In this post, we will see how we deploy the Phoenix application using AWS CodeBuild, CodeDeploy, and CodePipeline
Steps
Create a Phoenix app to deploy
$ mix phx.new memories
$ cd memories

$ mix ecto.create
Compiling 13 files (.ex)
Generated memories app
The database for Notes.Repo has already been created
$ mix phx.gen.html Notes Note notes note:string

* creating lib/memories_web/controllers/note_controller.ex
* creating lib/memories_web/templates/note/edit.html.eex
* creating lib/memories_web/templates/note/form.html.eex
* creating lib/memories_web/templates/note/index.html.eex
* creating lib/memories_web/templates/note/new.html.eex
* creating lib/memories_web/templates/note/show.html.eex
* creating lib/memories_web/views/note_view.ex
* creating test/memories_web/controllers/note_controller_test.exs
* creating lib/memories/notes/note.ex
* creating priv/repo/migrations/20200415160343_create_notes.exs
* creating lib/memories/notes.ex
* injecting lib/memories/notes.ex
* creating test/memories/notes_test.exs
* injecting test/memories/notes_test.exs

Add the resource to your browser scope in lib/memories_web/router.ex:

    resources "/notes", NoteController


Remember to update your repository by running migrations:

    $ mix ecto.migrate
Add /notes resources to router.ex
  scope "/", MemoriesWeb do
    pipe_through :browser

    get "/", PageController, :index

    resources "/notes", NoteController
  end
Run mix ecto.migrate and then your newly generated migration will run.
$ mix ecto.migrate

21:42:41.961 [info]  == Running 20200415160343 Memories.Repo.Migrations.CreateNotes.change/0 forward

21:42:41.964 [info]  create table notes

21:42:41.972 [info]  == Migrated 20200415160343 in 0.0s
Now when you start mix phx.server, you should see the app running at http://localhost:4000/notes
Make it ready for mix release
Uncomment the following line in the prod.secret.exs.
config :memories, MemoriesWeb.Endpoint, server: trueNow initialize git repo with git init command and push it to GitHub.
In the next steps, we will use AWS services for setting up CodeBuild, CodeDeploy, and CodePipeline.
Create IAM User
We will create IAM User
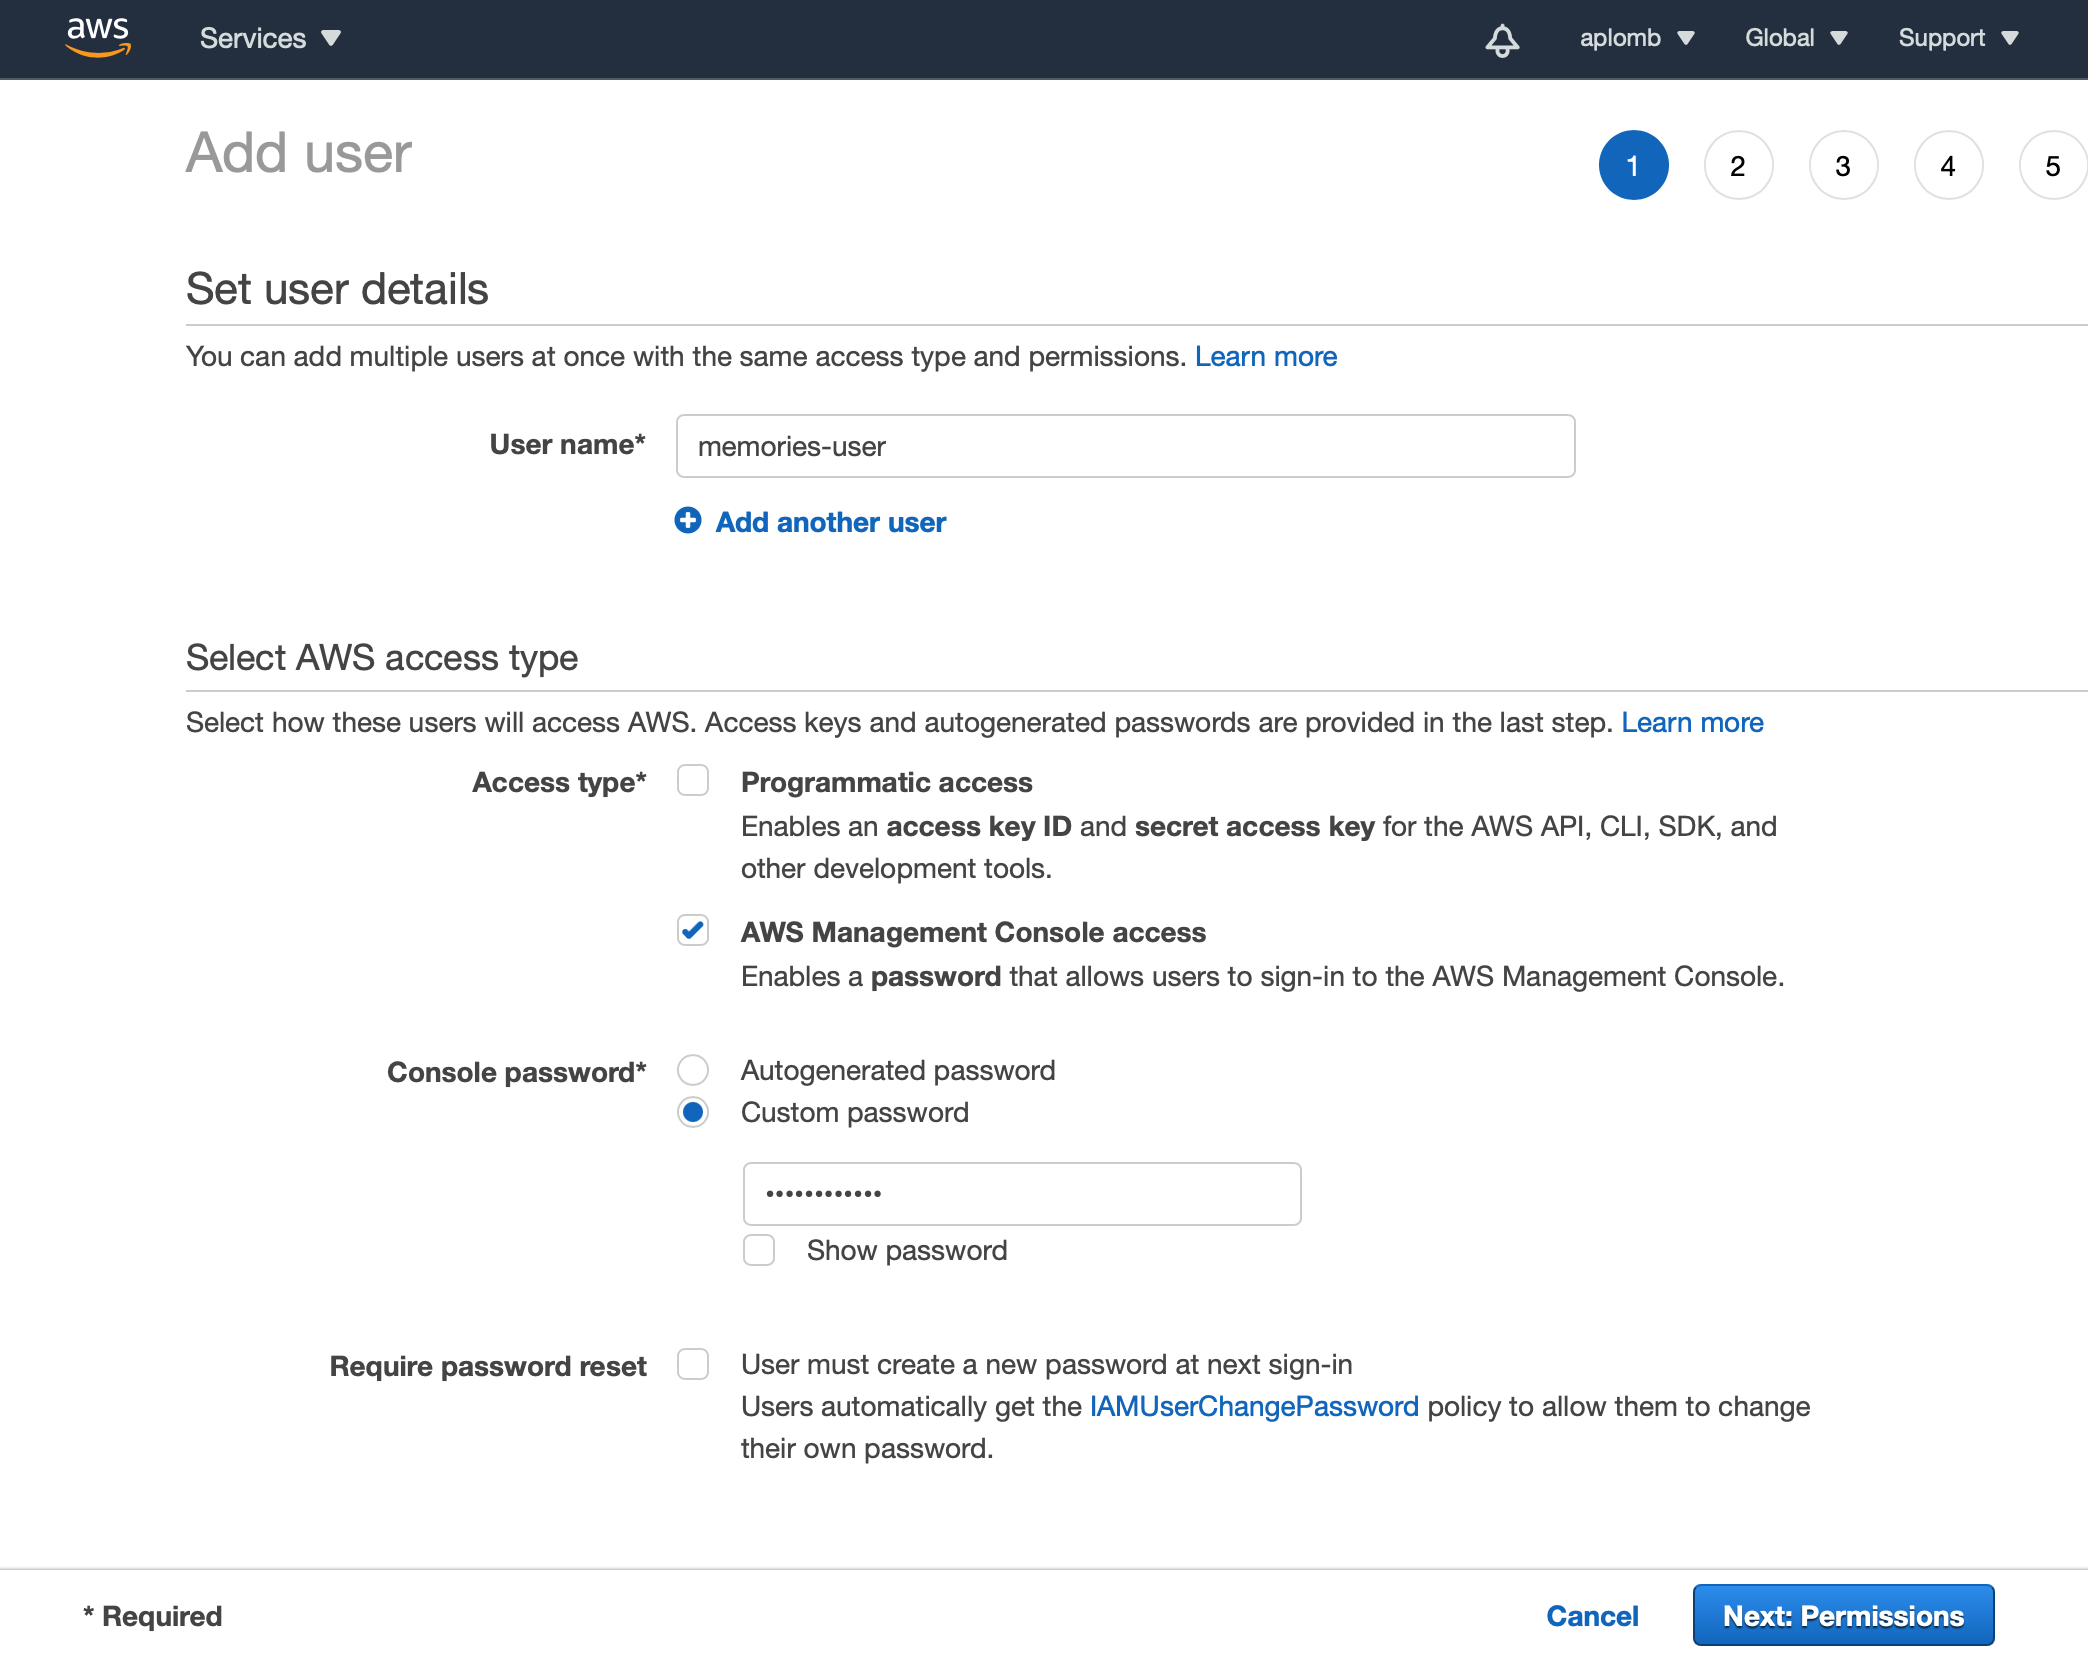
We have created a username memories-user and set a custom password to access AWS Management Console access.
Next, under permissions, Choose "Attach existing policies directly".

AmazonEC2FullAccess
AWSCodeDeployFullAccess
AWSCodePipelineFullAccess
AWSCodeBuildAdminAccess
IAMFullAccess
AmazonSNSReadOnlyAccess
AmazonSSMFullAccess
ComputeOptimizerReadOnlyAccess
After done, you will get an AWS console login for the new user. Go ahead and log in with that new user. We will be only using that new account. You will be prompted to change your password on your first login. You should see your AWS Console dashboard.
Setup CodeBuild
AWS CodeBuild is a fully managed continuous integration service that compiles source code, runs tests, and produces software packages that are ready to deploy.
Let's create a new CodeBuild project. In your AWS console, you can find CodeBuild under the services tab in the header section or you can directly go to CodeBuild using this link. Go create a new project and you should see a form like this.
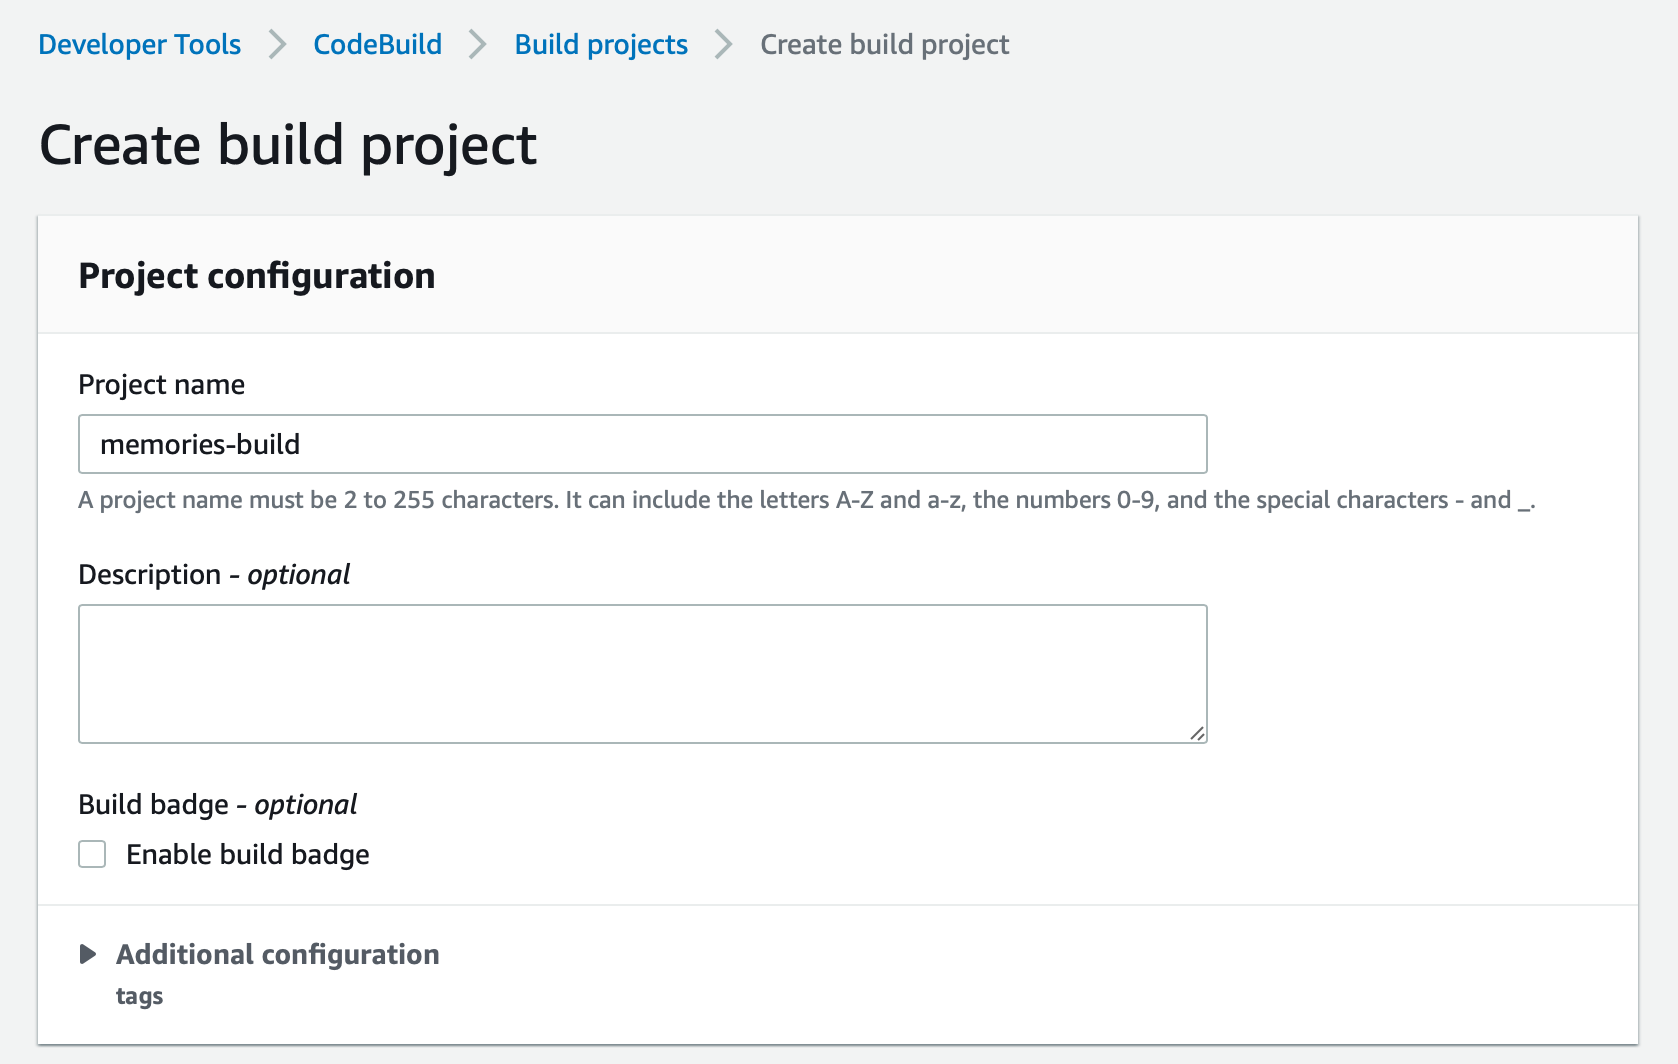
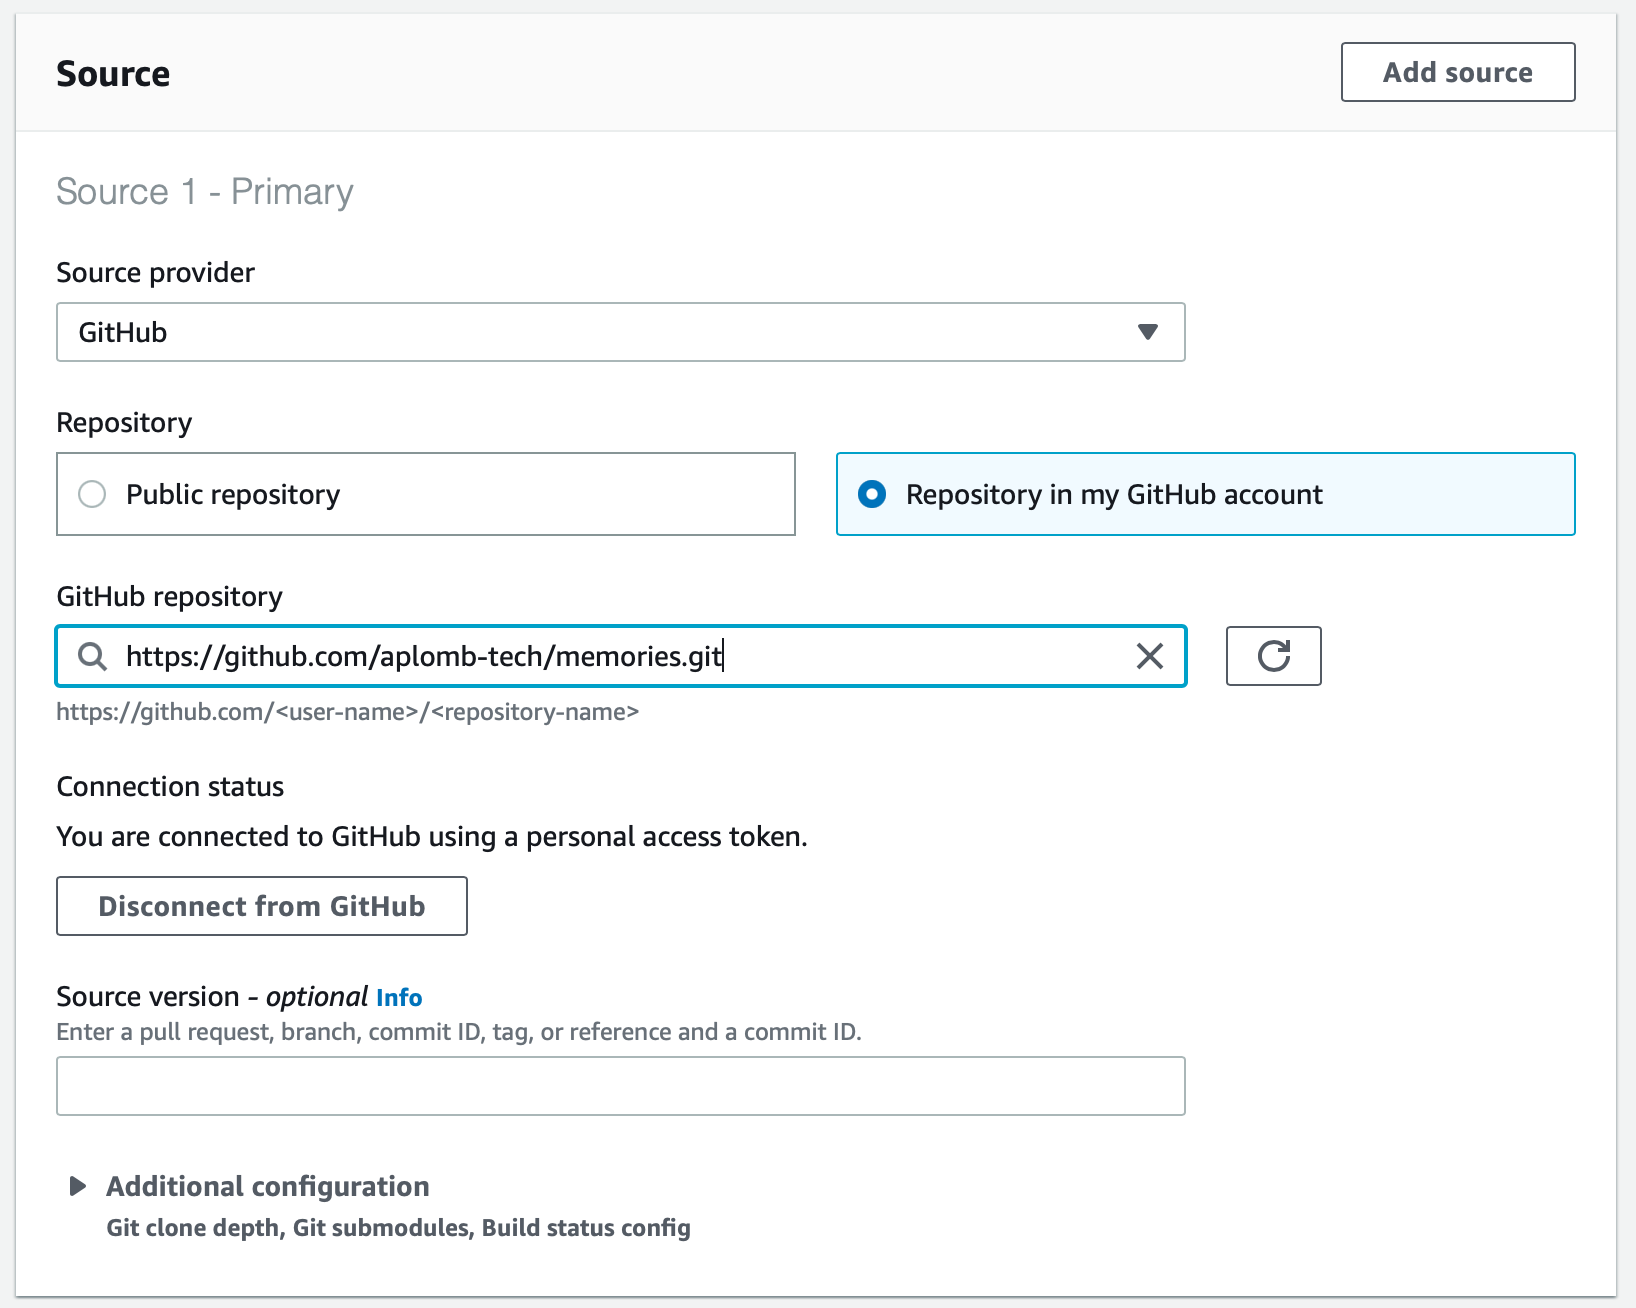
For the Project name, I am using memories-build. Under source, you need to select GitHub as Source Provider. You'll need to connect your GitHub account to AWS CodeBuild using OAuth. After connecting it, select 'Repository in my GitHub account. Select the repository we created earlier.
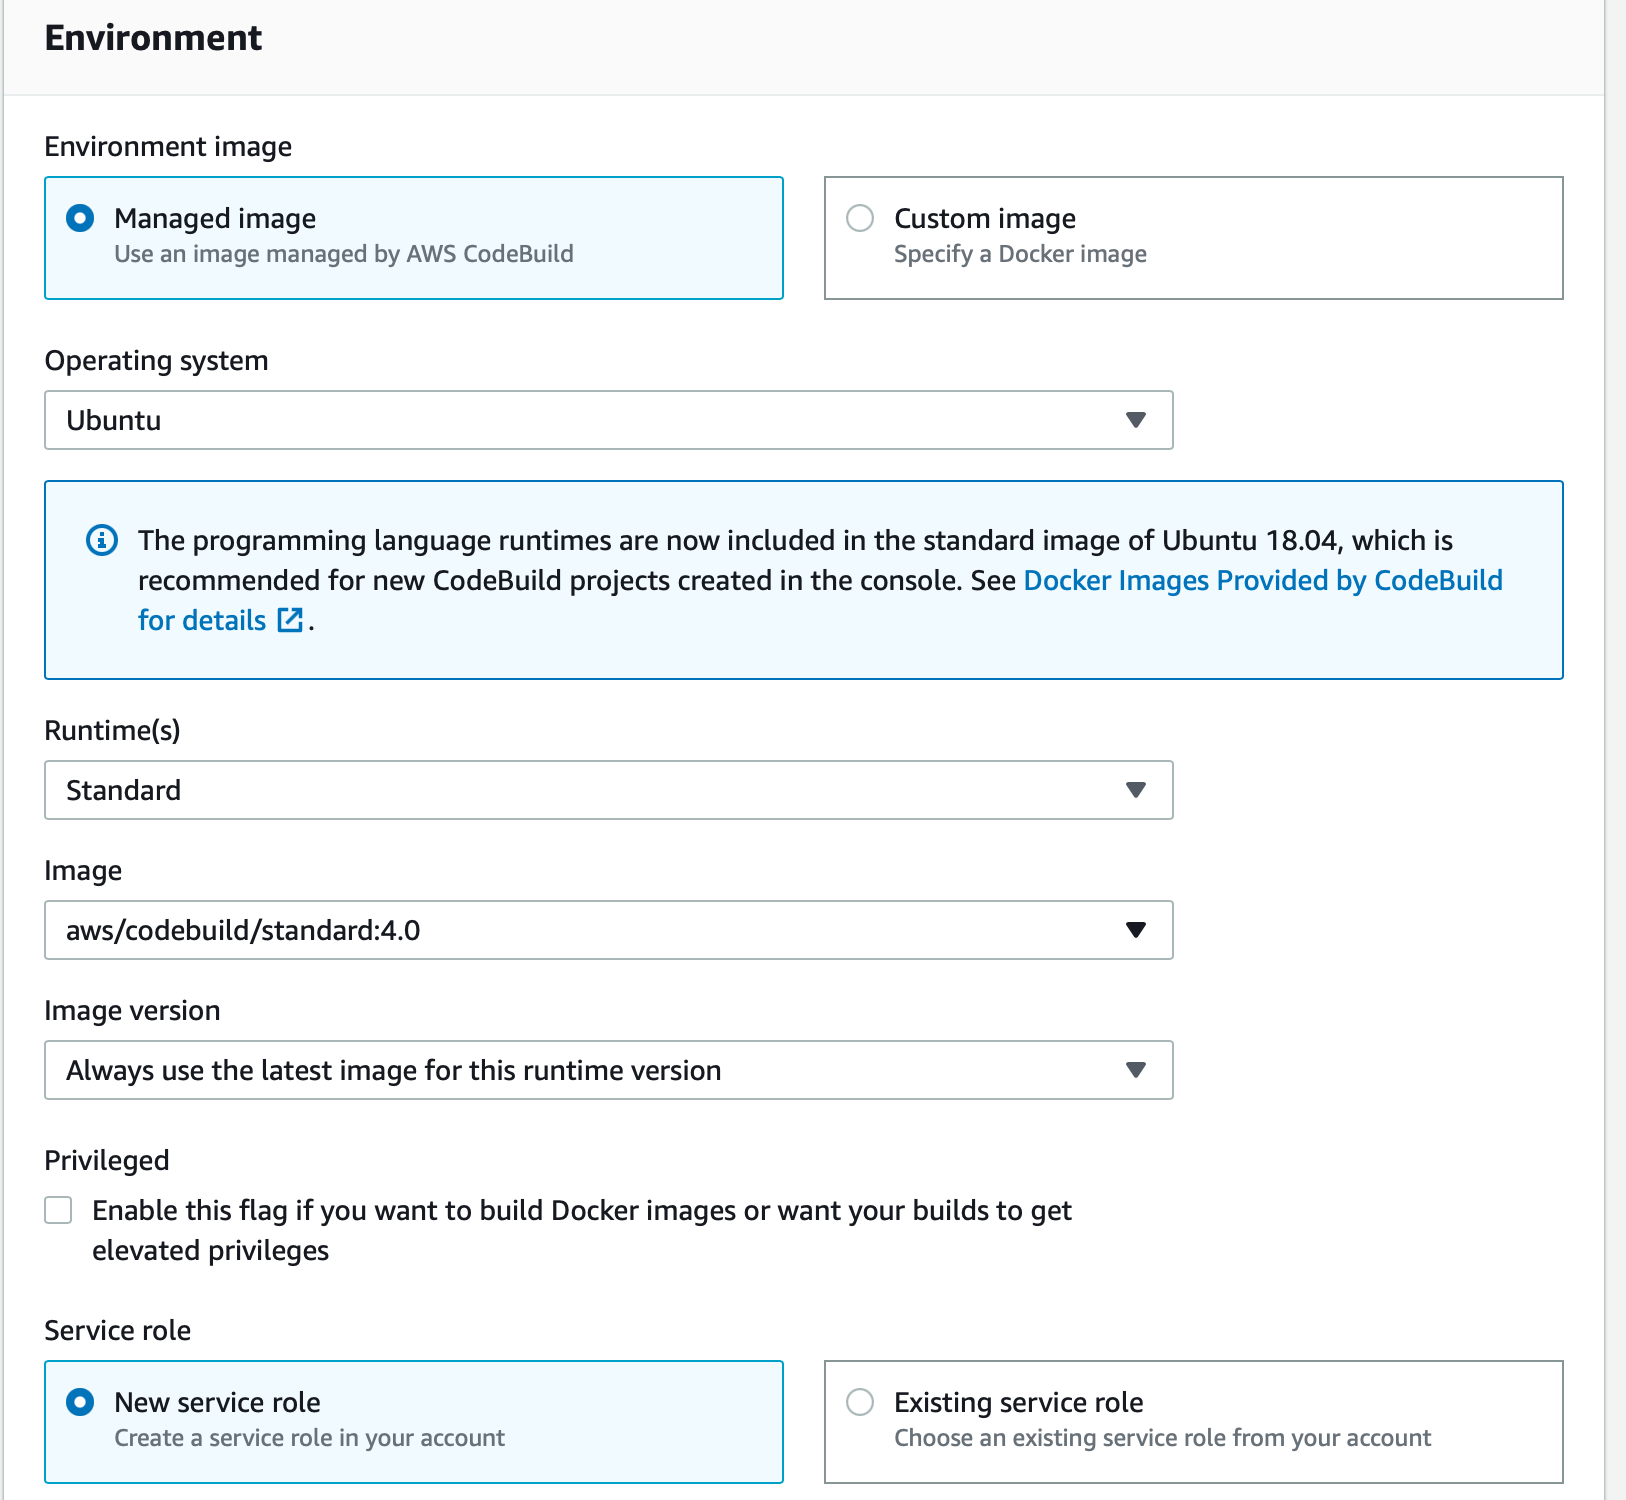
Now, under 'Environment', we can go with 'Managed' image and select 'Ubuntu' as our operating system and 'Standard' as our runtime. We will leave rest of the section of Environment and Buildspec as it is.
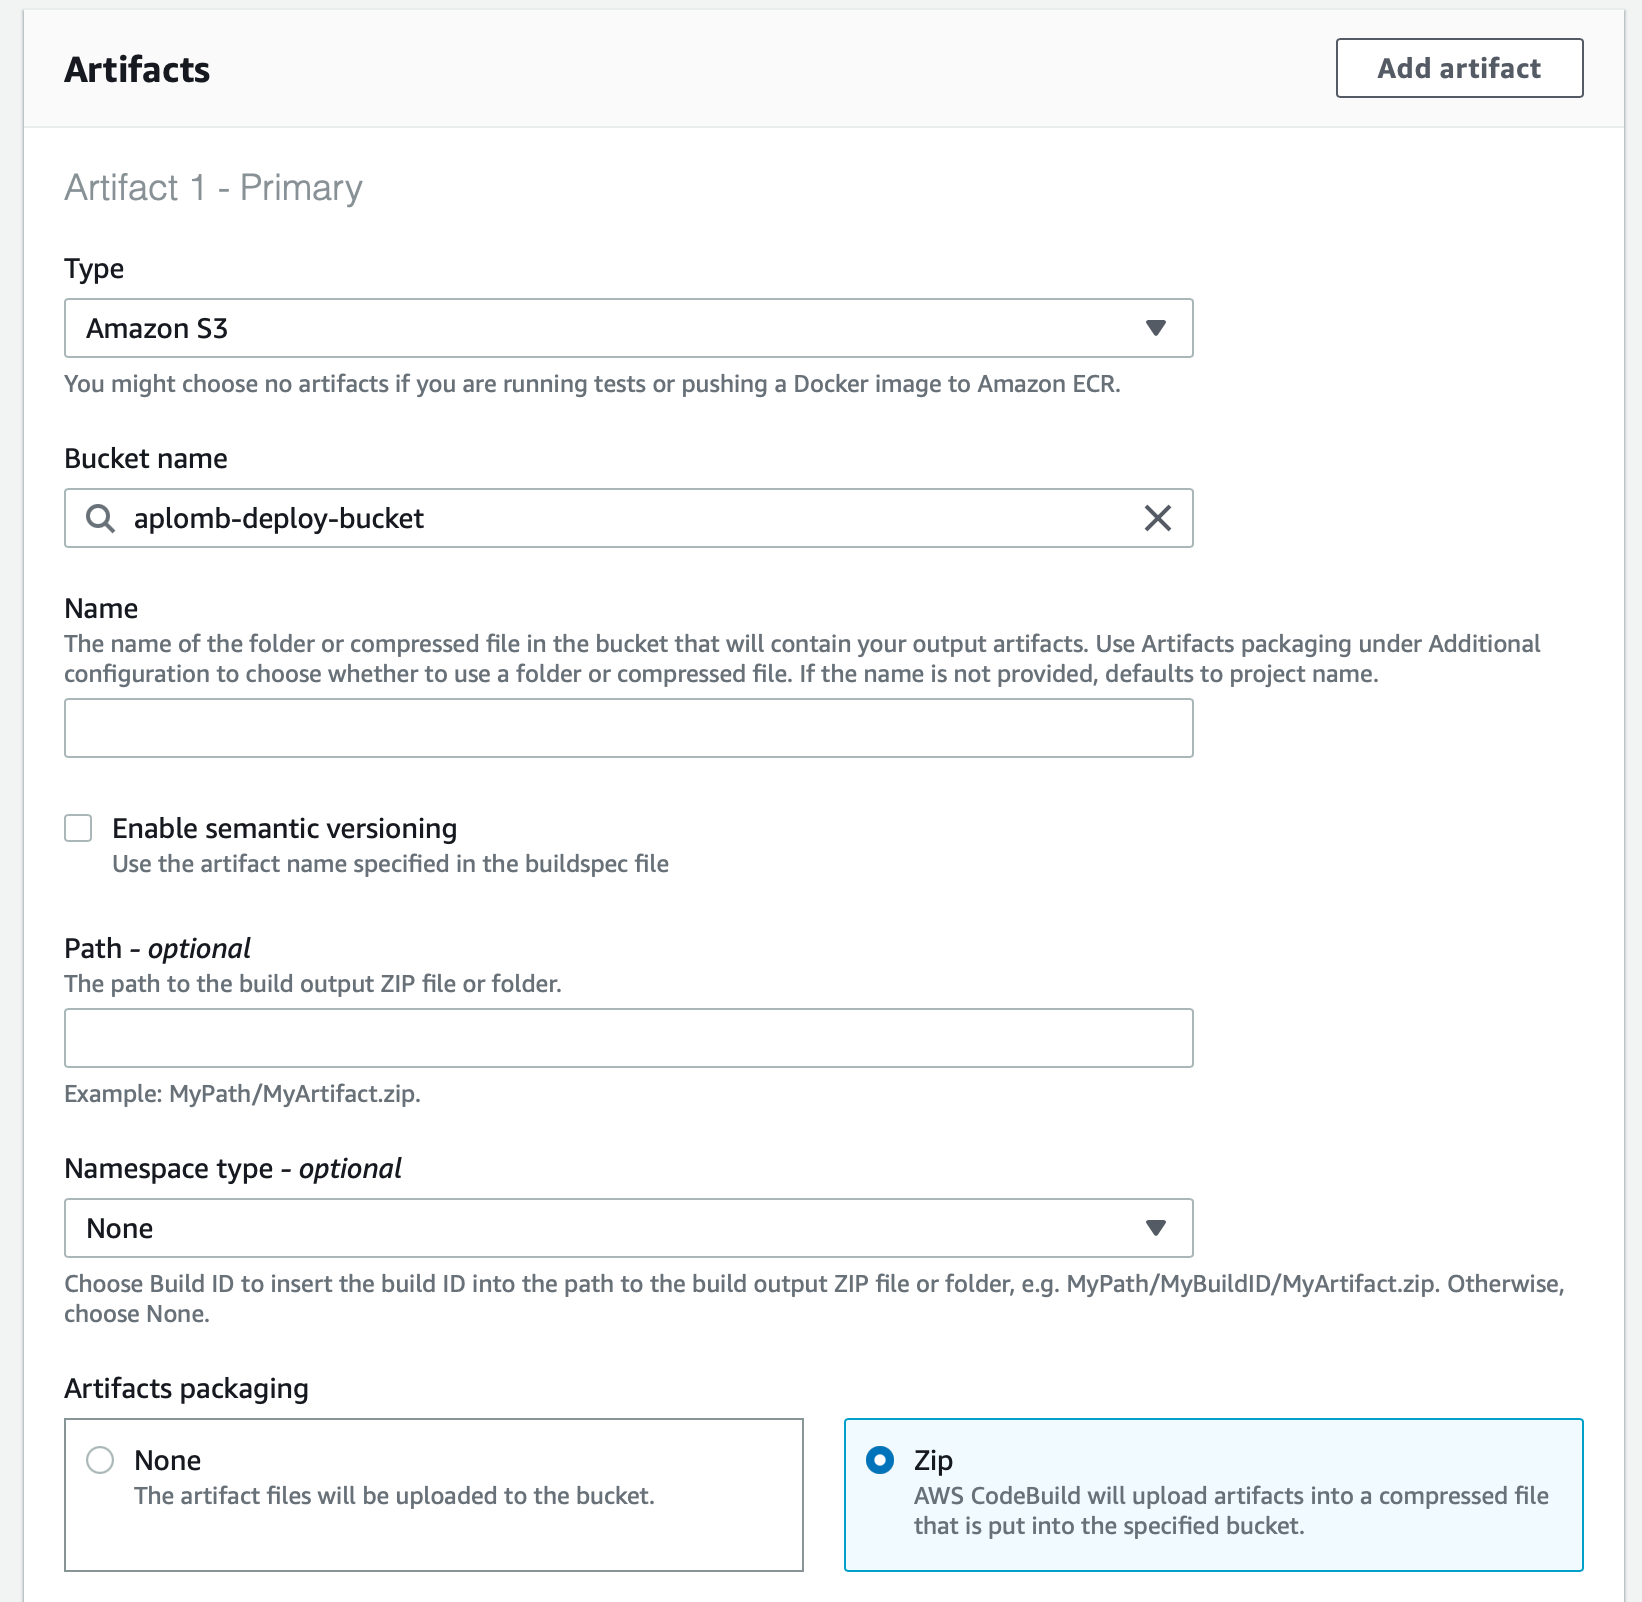
Select 'Amazon S3' for Artifacts type. You can either create a new bucket that will store our project builds here first or select an existing bucket. For Artifacts packaging, select Zip and then click on 'Create build project'.
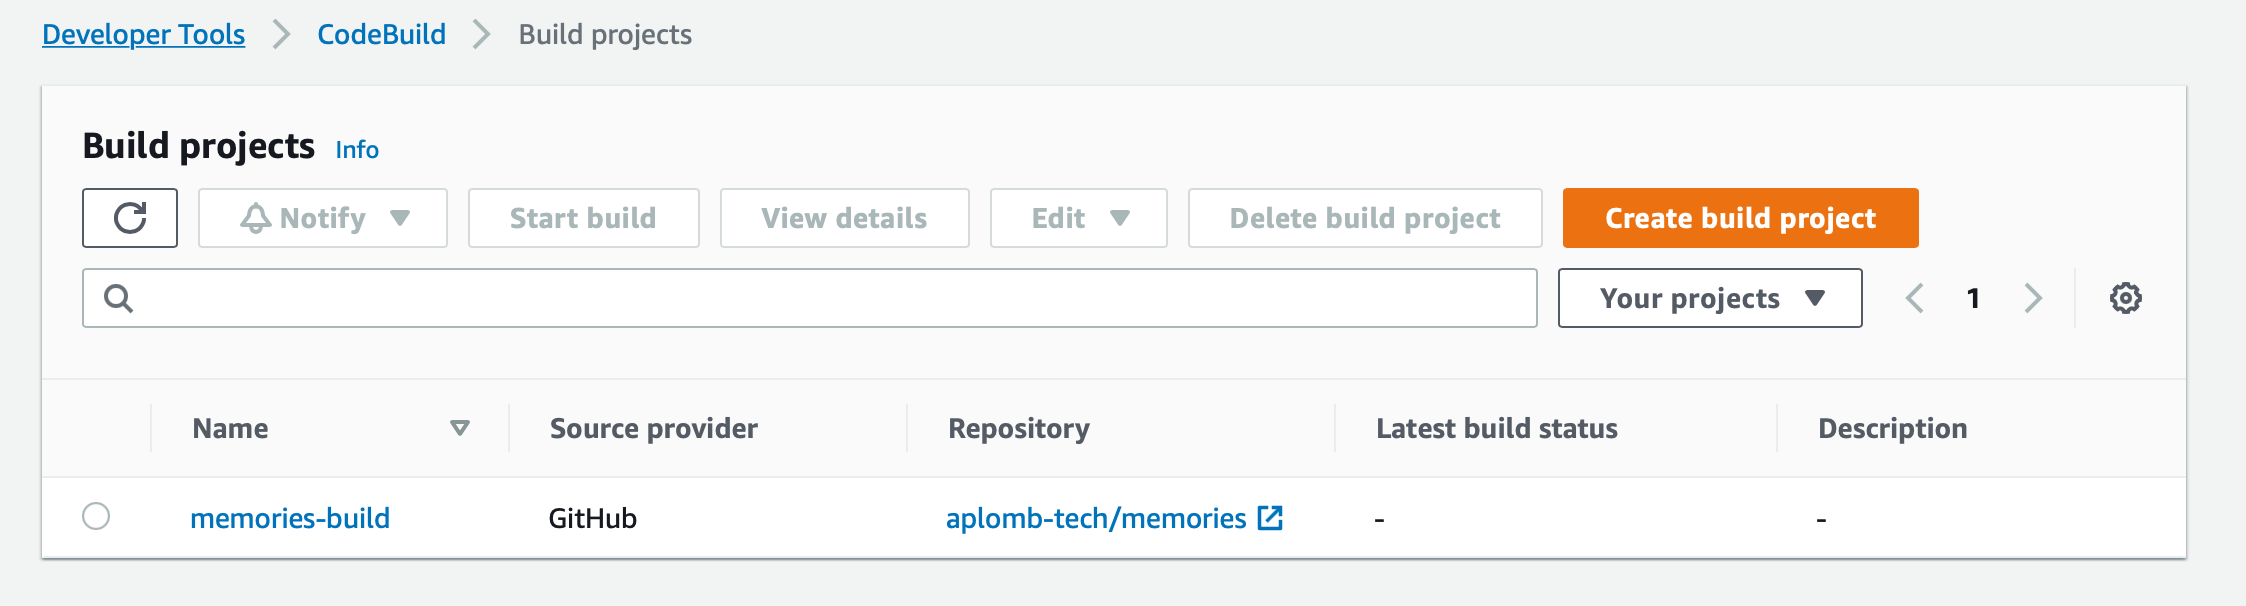
You should now see your build project under 'Build projects'
AWS CodePipeline
We have set up the build process and now we want AWS to build our project on every push to GitHub. We can do that with AWS CodePipeline
AWS CodePipeline is a fully managed continuous delivery service that helps you automate your release pipelines for fast and reliable application and infrastructure updates. CodePipeline automates the build, test, and deploy phases of your release process every time there is a code change, based on the release model you define
Just like we created a CodeBuild project, we need to create a new CodePipeline project. You can find CodePipeline from the 'Services' header in the menu or use this link. Let's go ahead and create a new Pipeline using this form.
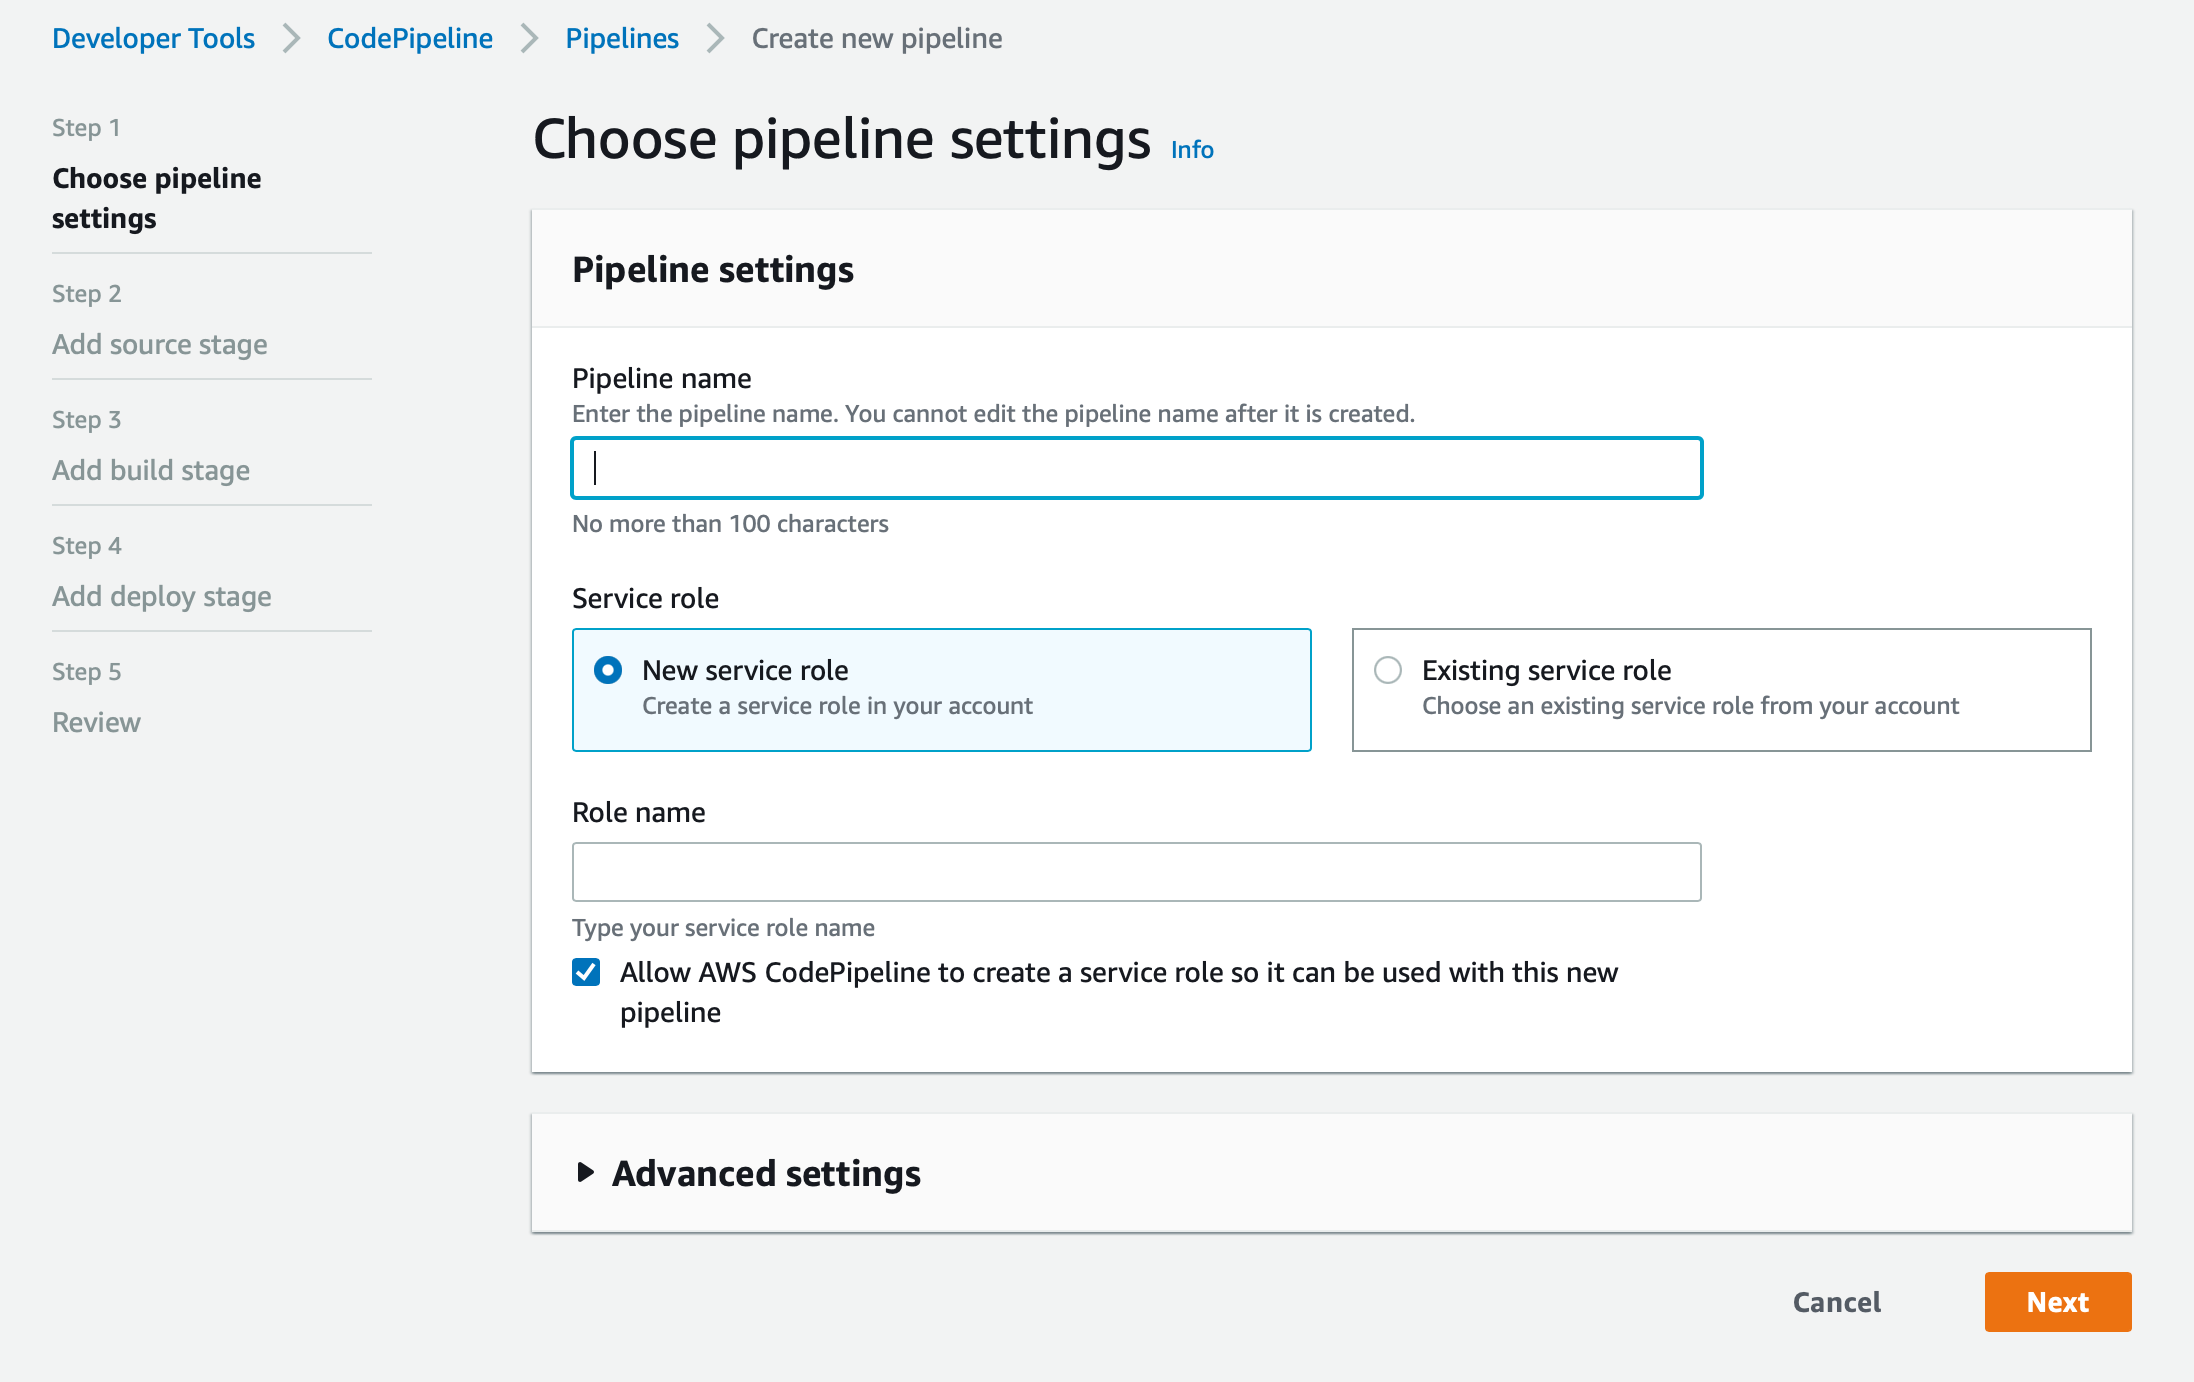
We'll use 'memories-pipeline' as the name and create a new service role. The name of it auto-generated so let's stick to it. For Artifact store, you can select Default location or select different bucket to store artifacts from CodePipeline
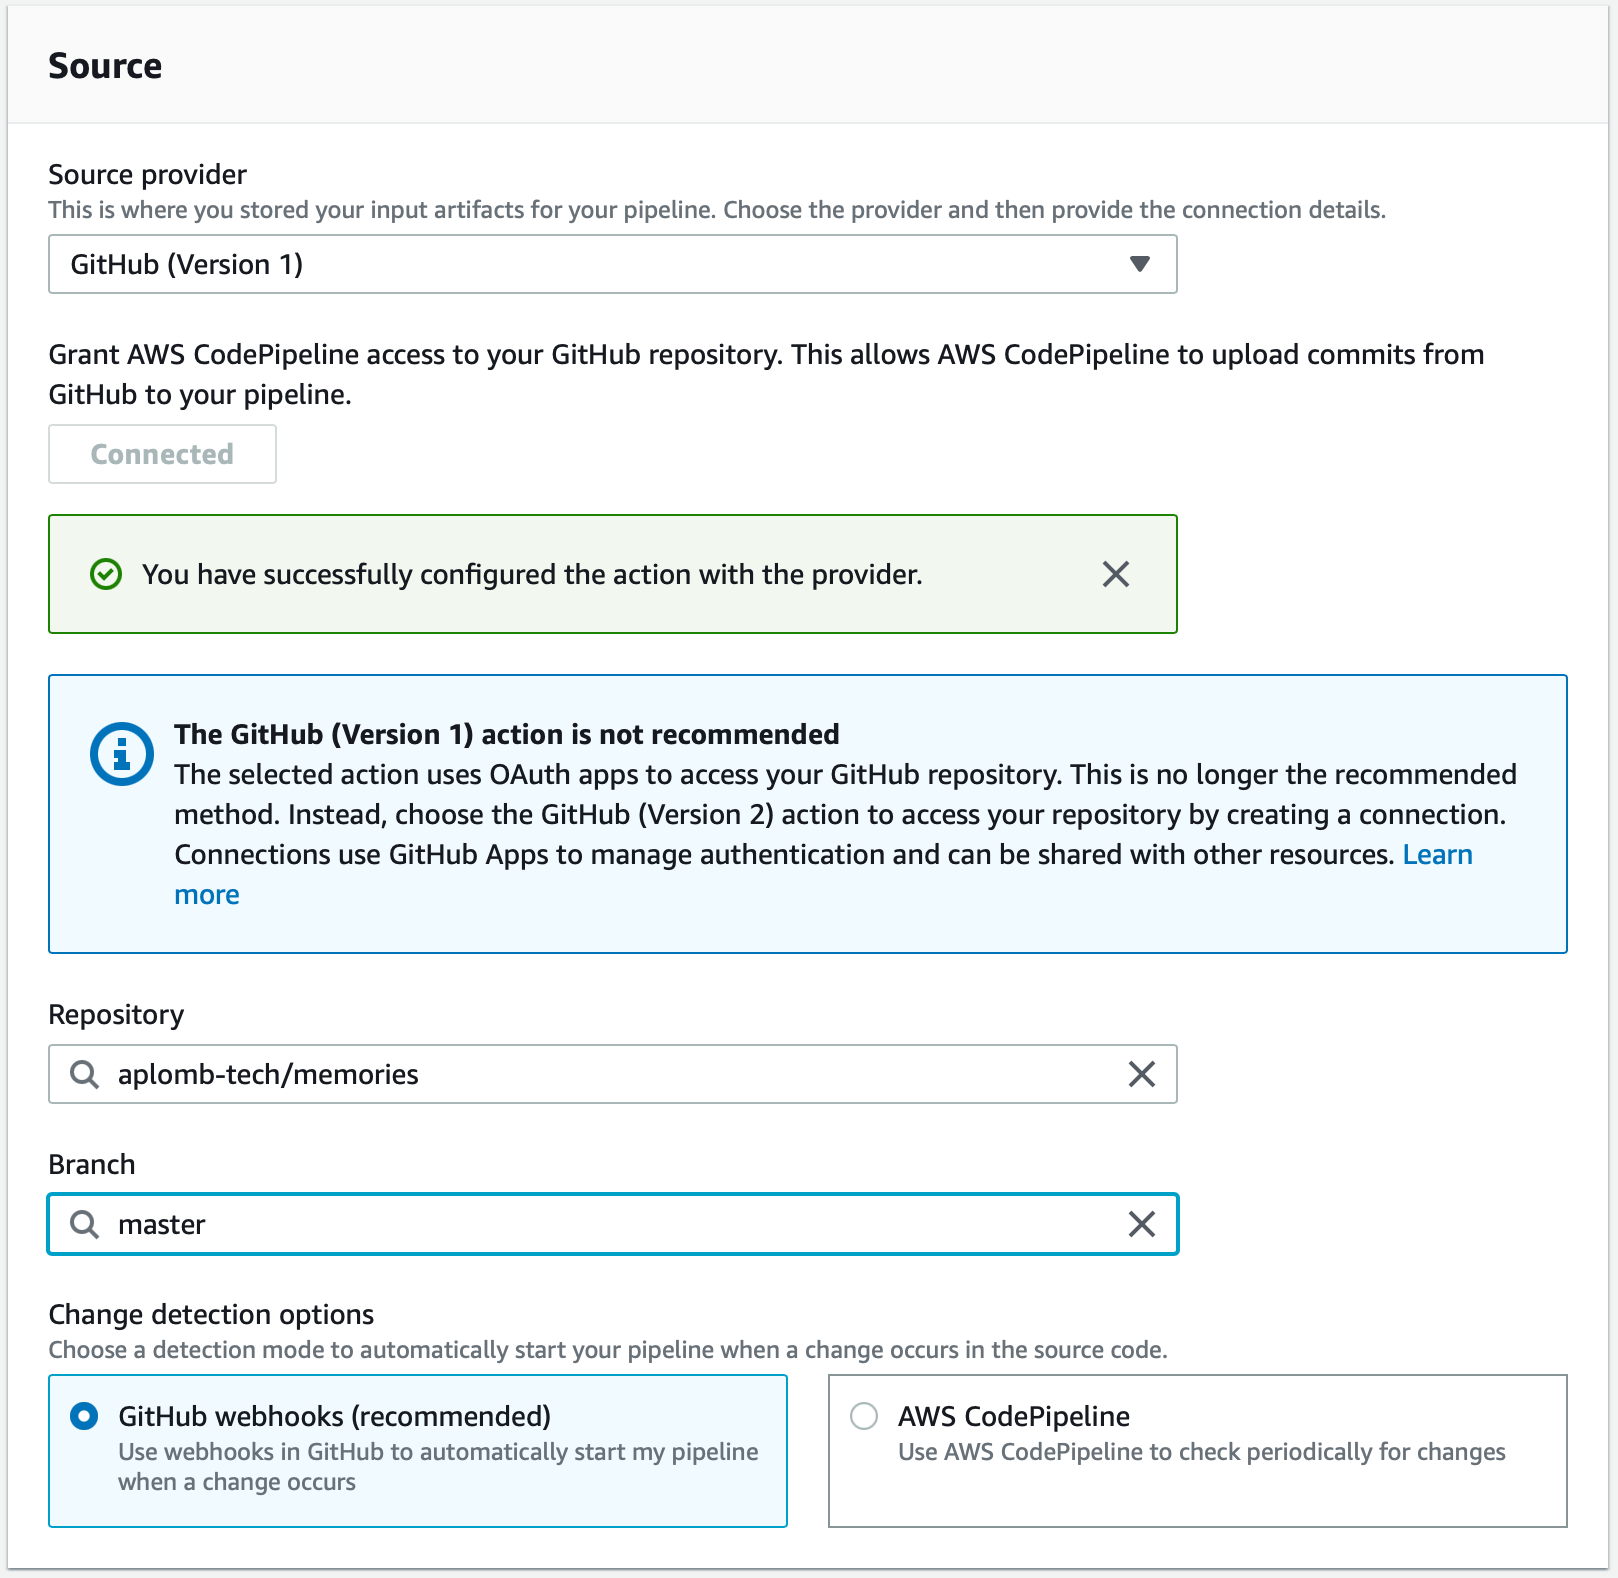
Next step, let's add the source stage. We are pushing our code to GitHub and want to build the source from it directly so we'll select GitHub as our provider. We need to connect CodePipeline to your GitHub account just like we did for CodeBuild. We then need to select the GitHub project and the branch we want CodePipeline to watch. For change detection, we'll use GitHub webhooks.
After the source stage, we will get to the build stage. We just want to select Build provider as 'AWS CodeBuild' and select the building project that we had built earlier and click 'Next'
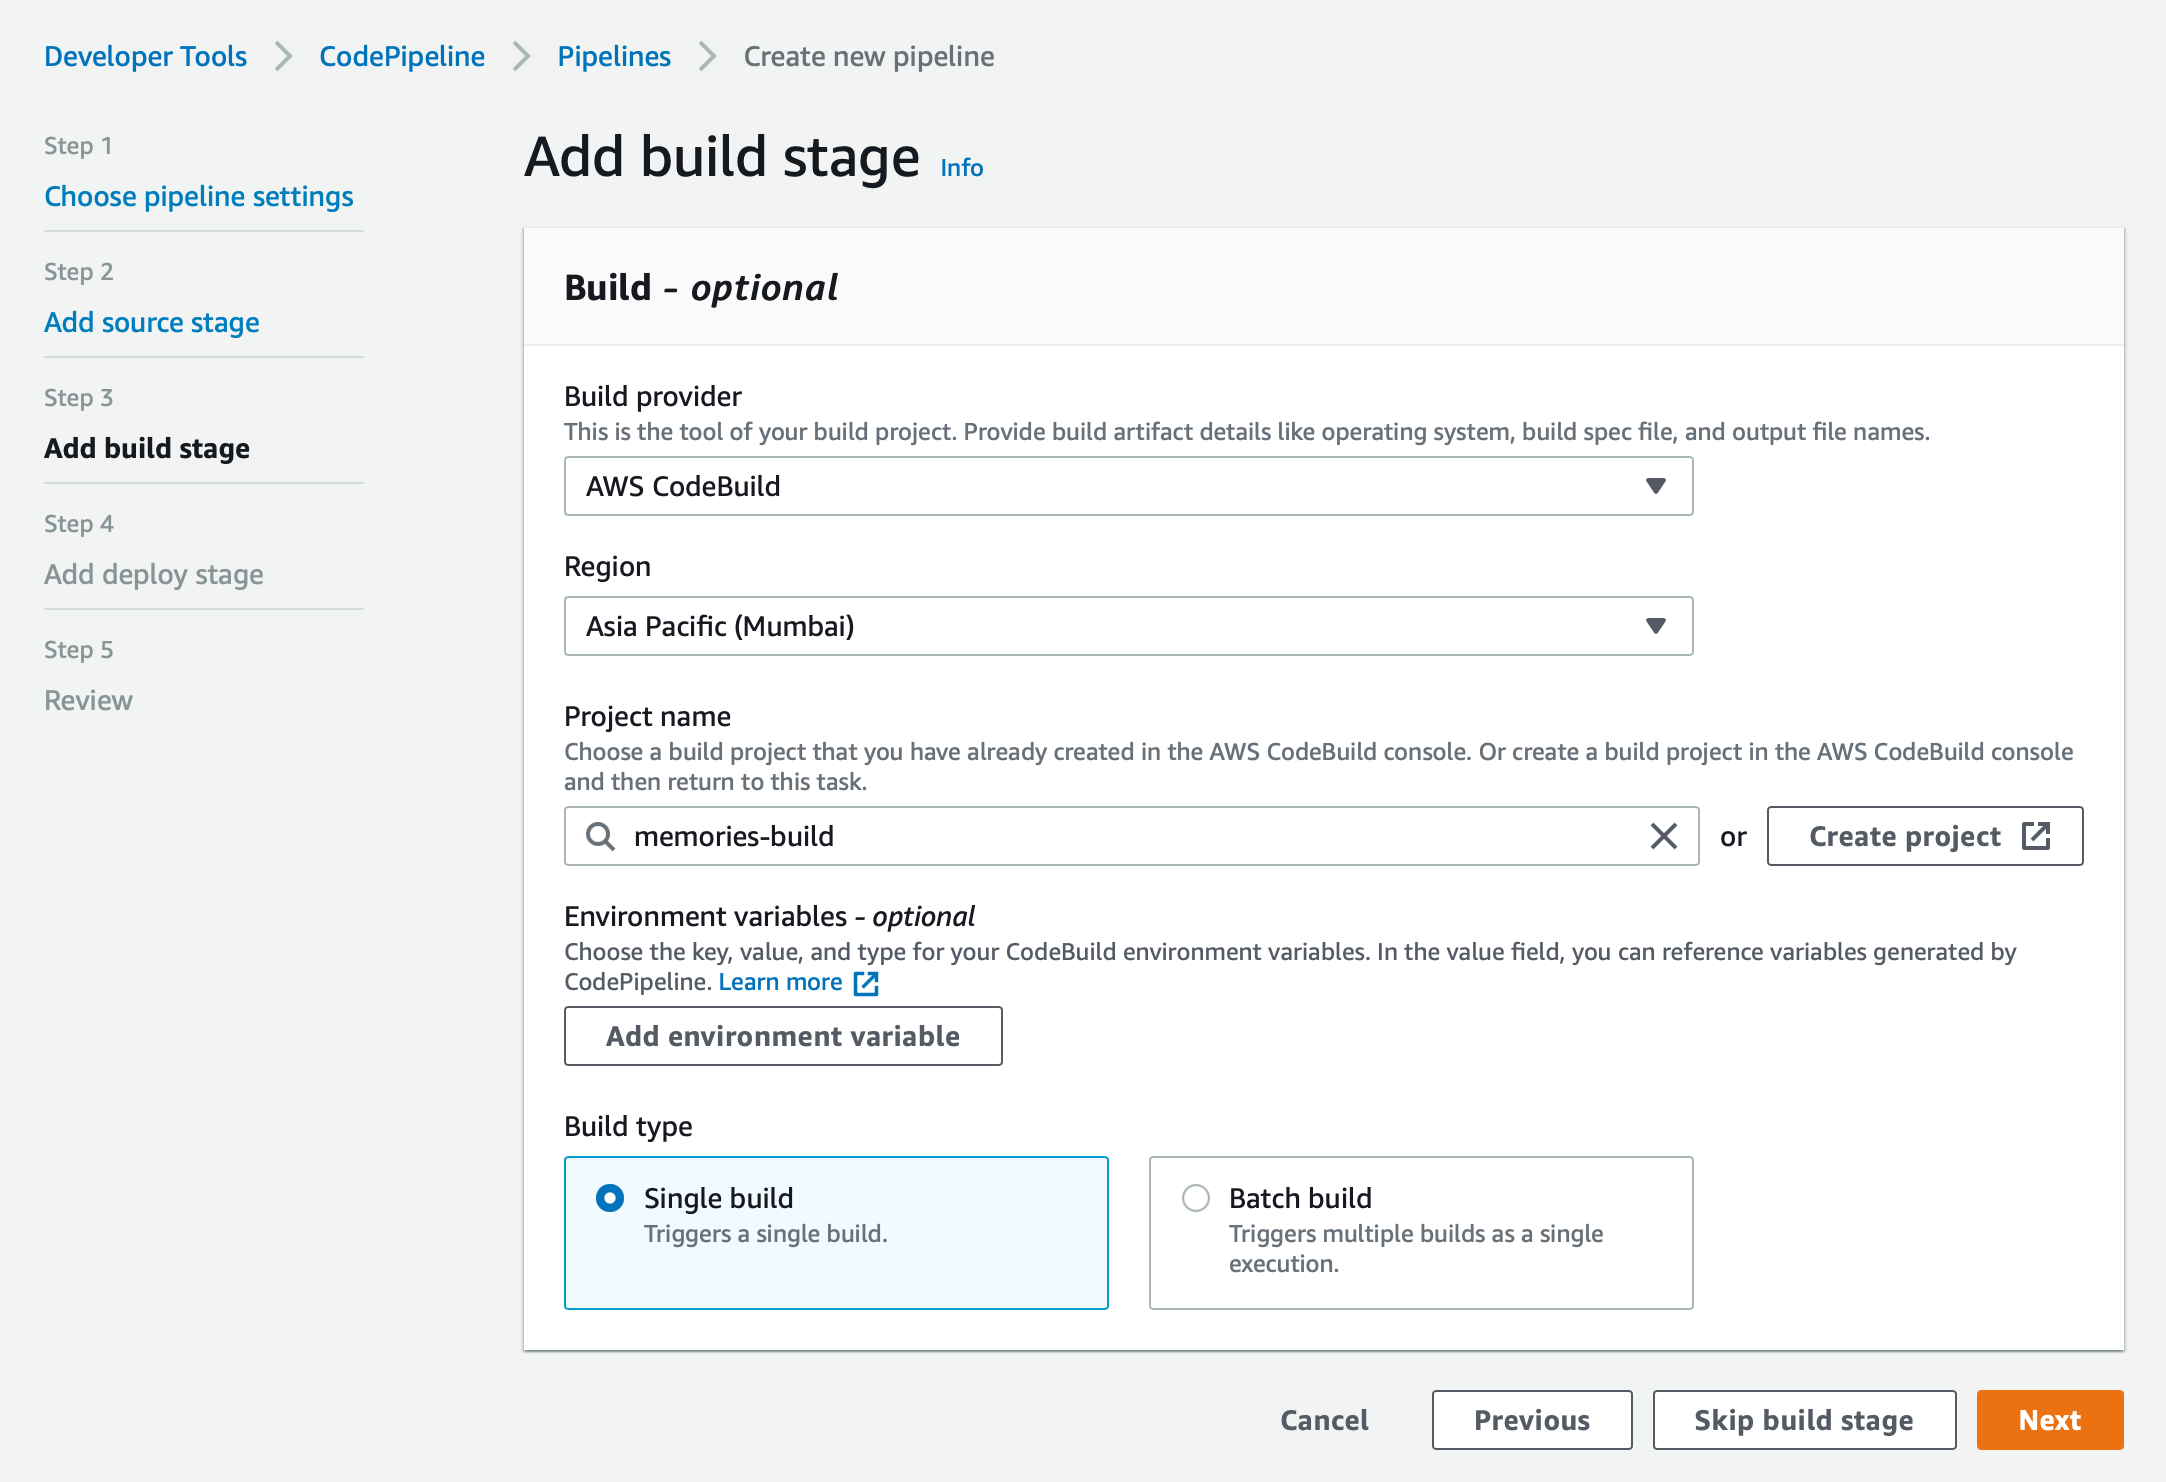
We now get to the Deploy stage which we will be setting up later, so you can go ahead and skip this stage and then confirm all the changes to finish creating the CodePipeline project. You should see the pipeline that you created under the 'Pipelines' section. If you go to the pipeline we just created, you should see that it starts fetching the code from the GitHub repository and tries to build it and it fails. It is because we have not added our buildspec.yml file to the repository yet.
version: 0.2

env:
  variables:
    LANG: "en_US.UTF-8"
    LANGUAGE: "en_US:en"
    LC_ALL: "en_US.UTF-8"
    HOME: "/root"
    ELIXIR_VERSION: "1.9.1"
    MIX_ENV: "prod"
    PORT: 4000

phases:
  install:
    runtime-versions:
      docker: 18

    commands:
      - echo Entered the install phase...
      - apt-get update
      - apt-get install -y git
      - apt-get install -y build-essential git wget libssl-dev libreadline-dev libncurses5-dev zlib1g-dev m4 curl wx-common libwxgtk3.0-dev autoconf
      - wget https://packages.erlang-solutions.com/erlang-solutions_1.0_all.deb && dpkg -i erlang-solutions_1.0_all.deb
      - apt-get update
      - apt-get install -y esl-erlang
      - apt-get install -y elixir
      - mkdir ~/node-latest-install && cd $_ && \
      - curl --silent --location https://deb.nodesource.com/setup_10.x | bash -
      - apt-get install -y nodejs
      - curl -sS https://dl.yarnpkg.com/debian/pubkey.gpg | apt-key add -;
      - echo "deb https://dl.yarnpkg.com/debian/ stable main" | tee /etc/apt/sources.list.d/yarn.list;
      - apt-get update && apt-get install -y yarn;

  pre_build:
    commands:
      - echo Entered the pre_build phase...
      - mix local.hex --force && mix local.rebar --force && mix hex.info
  build:
    commands:
      - echo Entered the build phase...
      - cd $CODEBUILD_SRC_DIR
      - mix deps.get
      - mix compile
      - echo Building assets
      - cd assets
      - yarn
      - yarn run deploy
      - cd ..
      - echo Build started on `date` in dir `pwd`
      - mix phx.digest
      - mix release
  post_build:
    commands:
      - echo Entered the post_build phase...
      - echo Build completed on `date`
artifacts:
  base-directory: _build/prod/rel/memories
  files:
    - '**/*'
Let's go ahead and add buildspec.yml the file to the root of the Phoenix project repo. Don't push to remote yet. We will need to do the following steps first.
For our BuildProject, we need two environment variables to set. First is SECRET_KEY_BASE and second is DATABASE_URL With the following steps we will get those.
To get SECRET_KEY_BASE, run following command on your machine
$ mix phx.gen.secret
/4pTqhKeD87SO1+/6NlblLrB6HngJq9AinspgNLNKQXHO3nv5xlVbmZwDYWoaGuX
We will use the generated result as our SECRET_KEY_BASE. Keep that with you.
Now for DATABASE_URL,
Note = For our current memories-user IAM user doesn't have permision to create it, so make sure you log out and login with your main AWS root credentials or main credentials
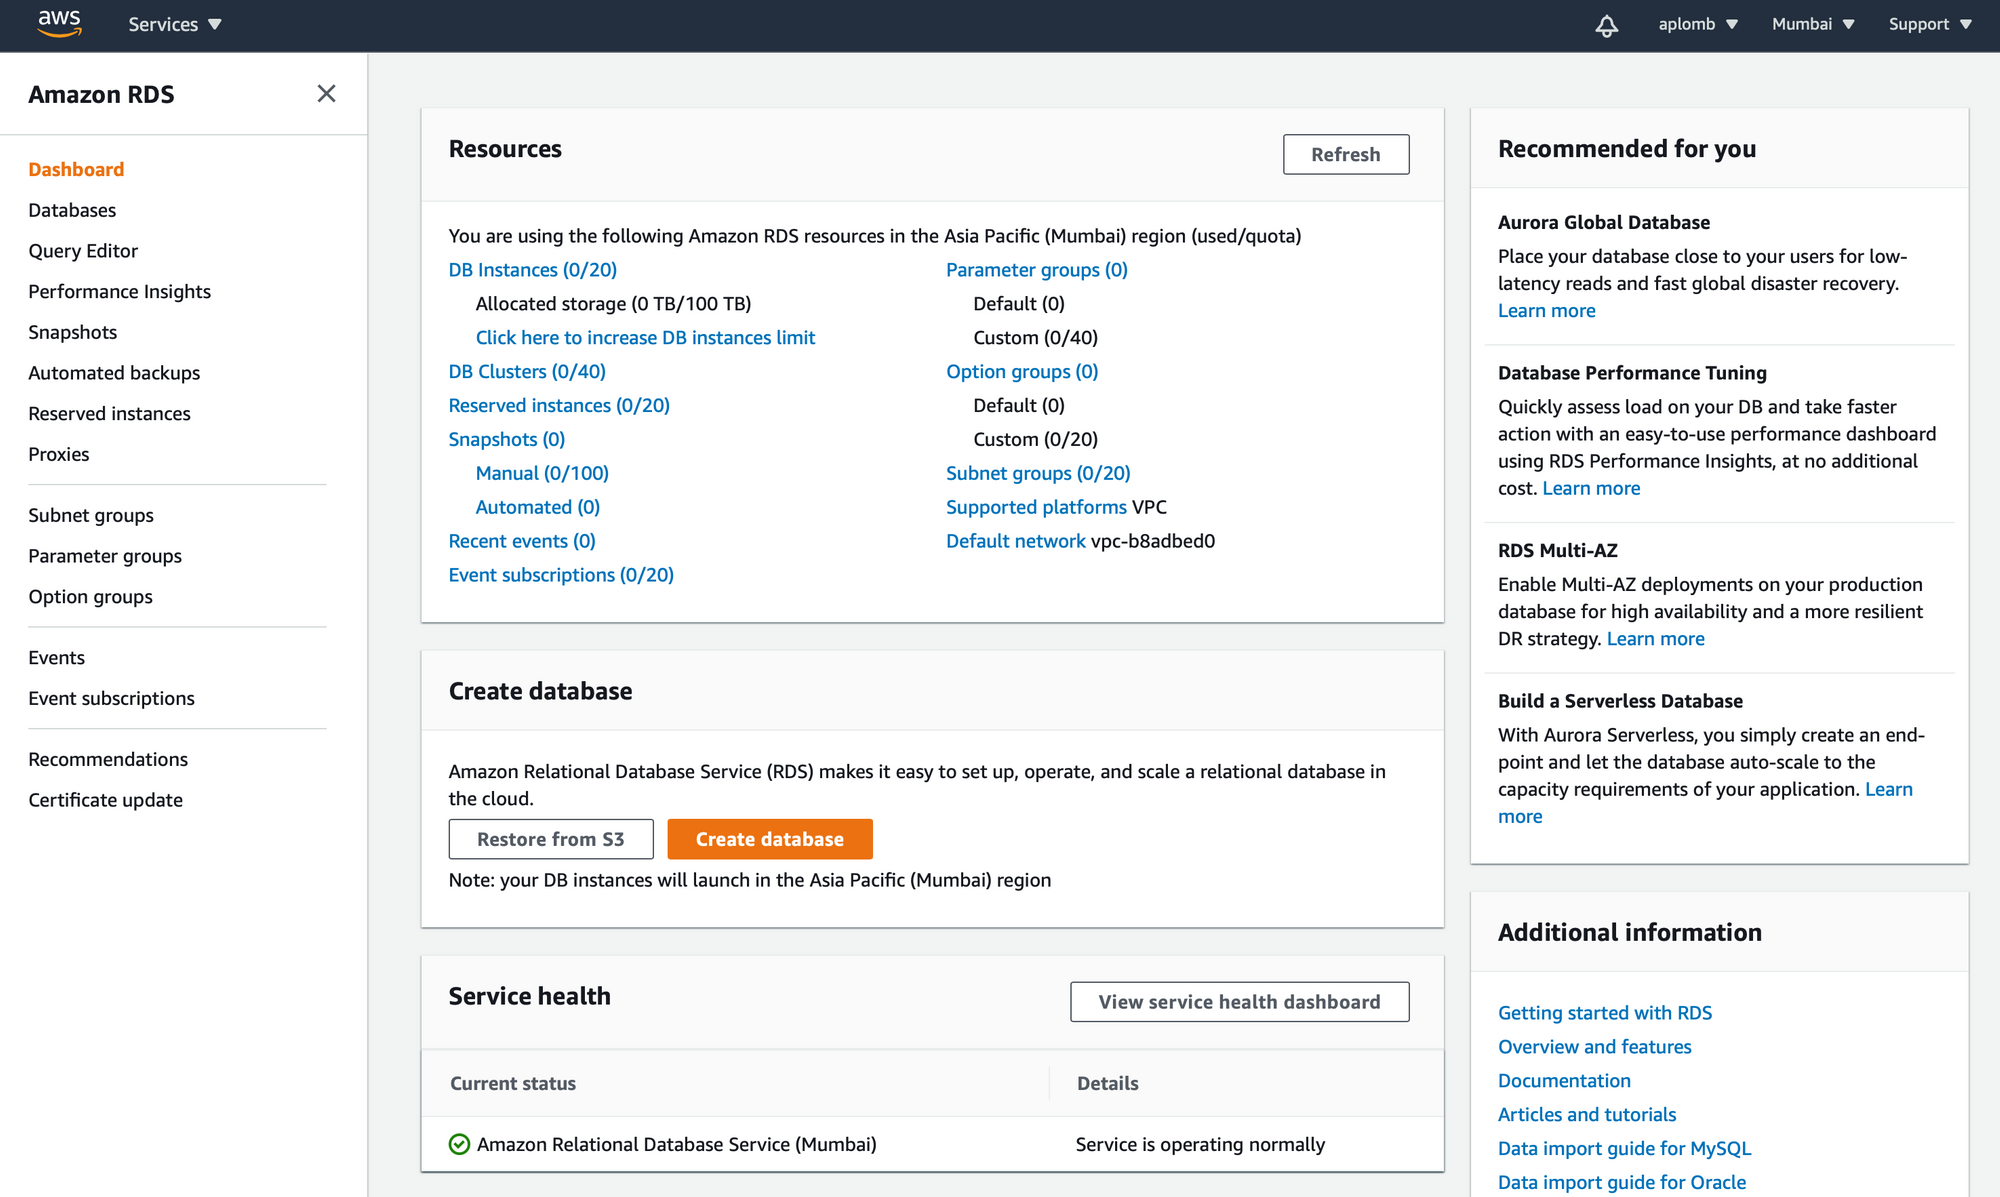
Go to RDS and create a Postgres database instance.
Search for 'RDS' in the Services section and then choose to create new PostgreSQL database.
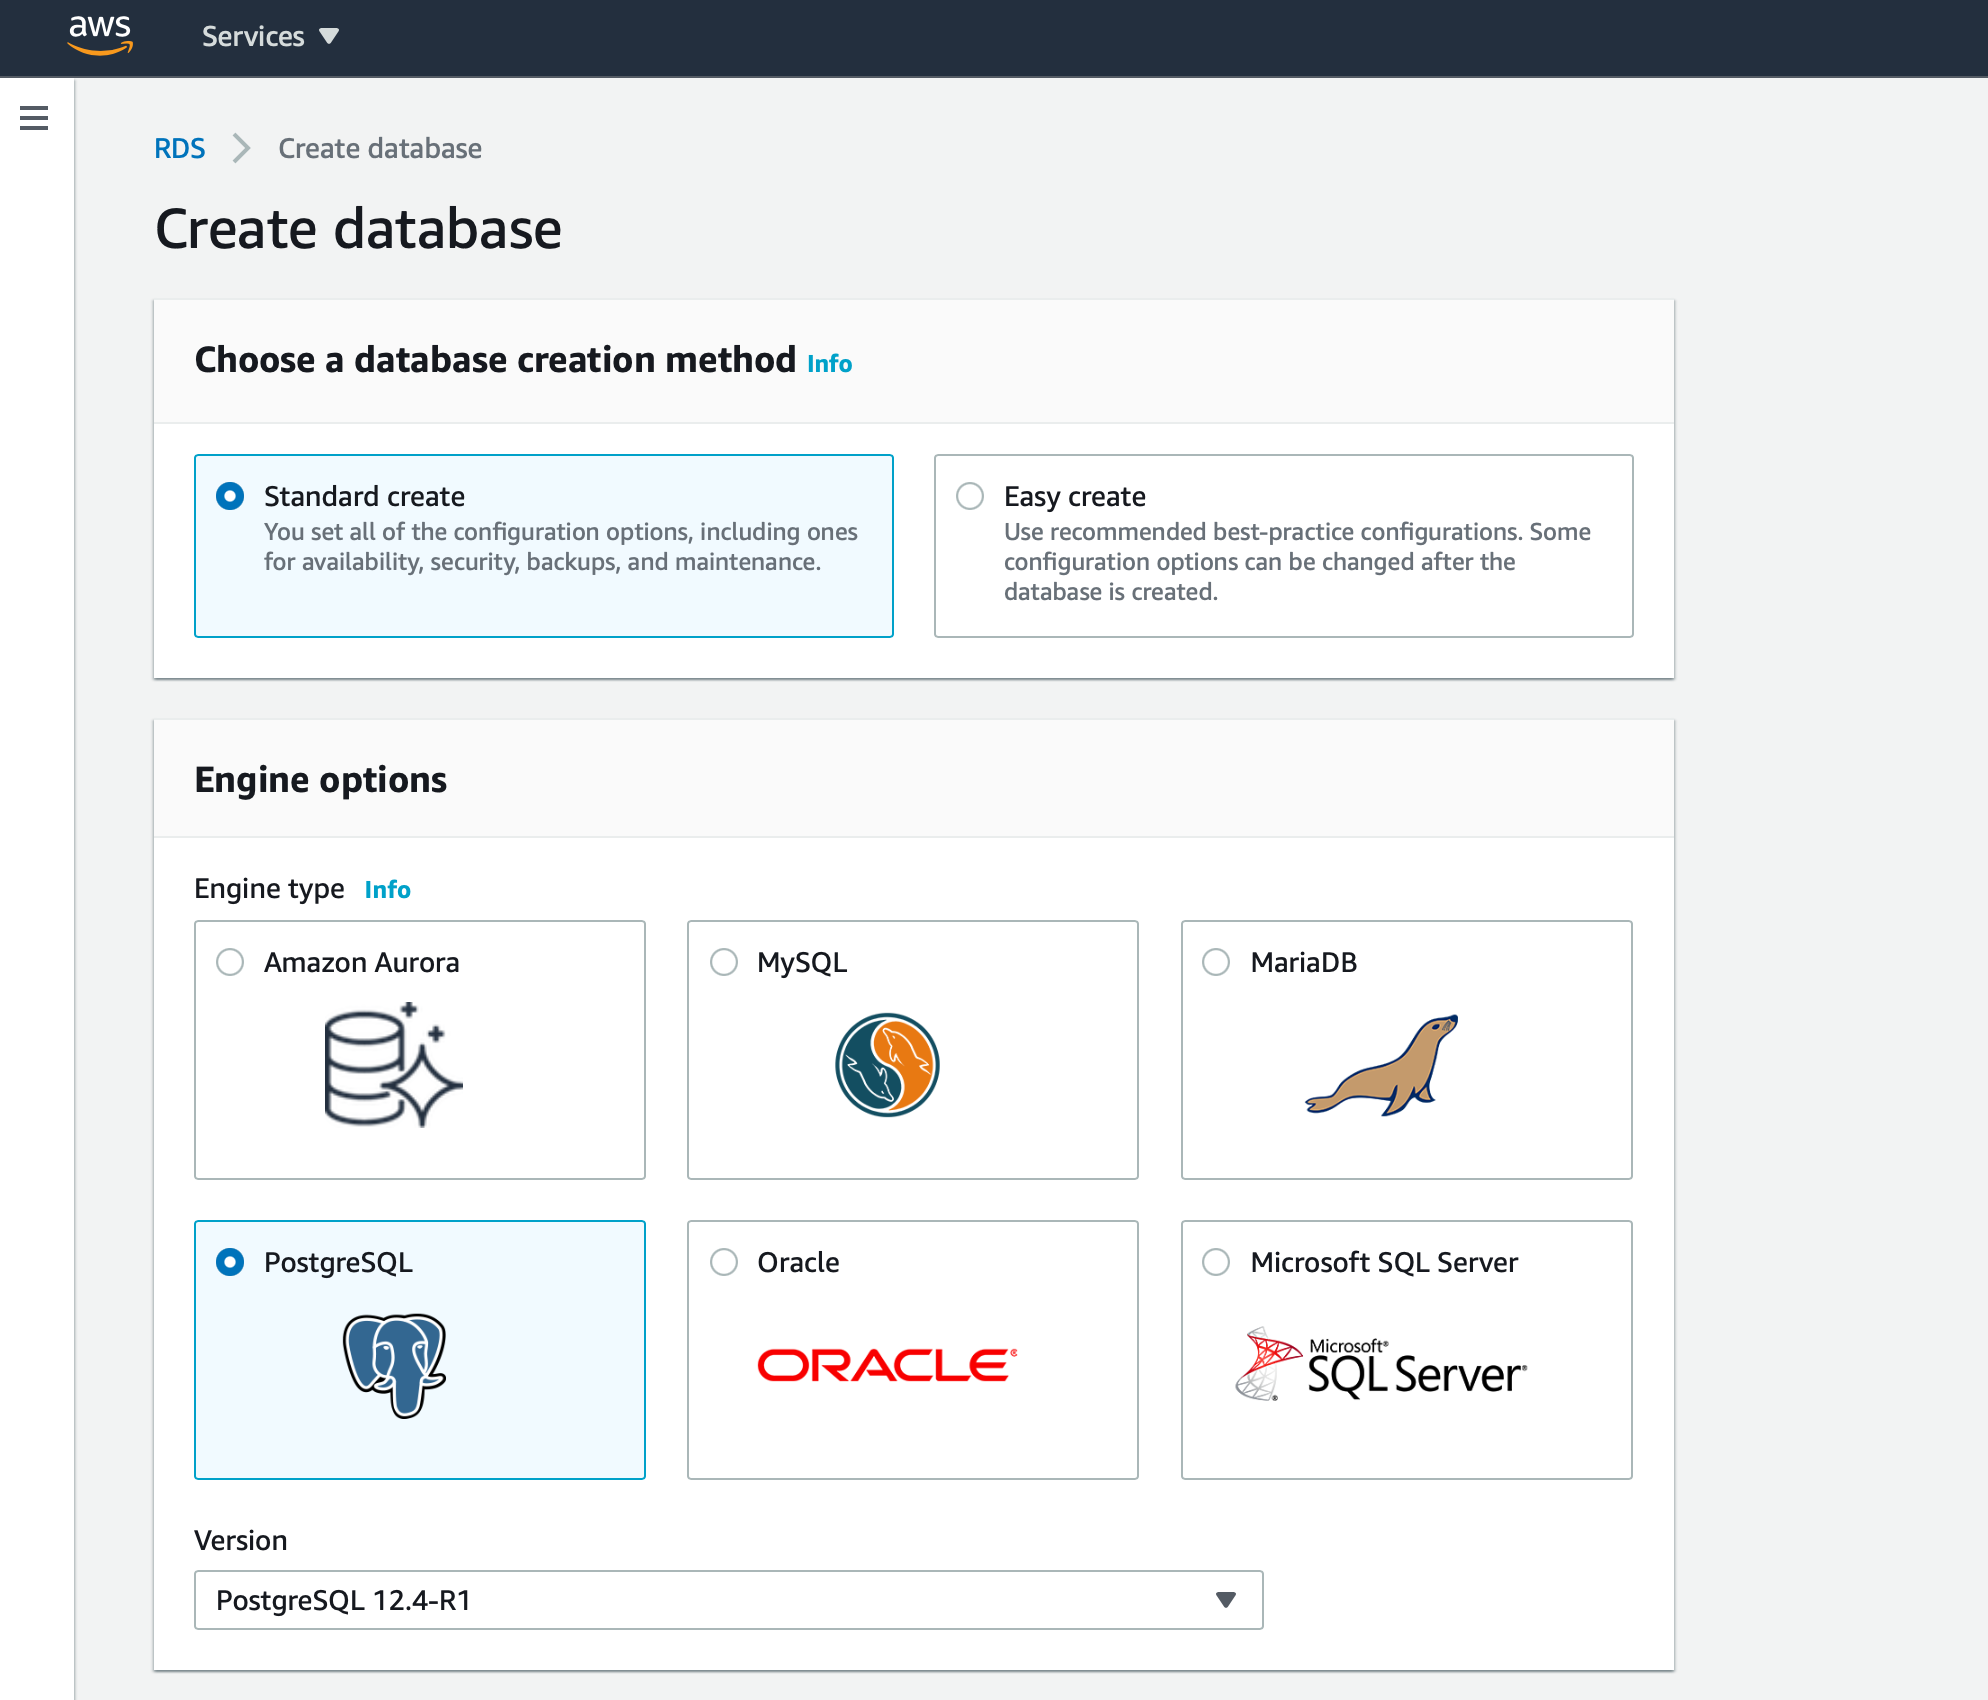
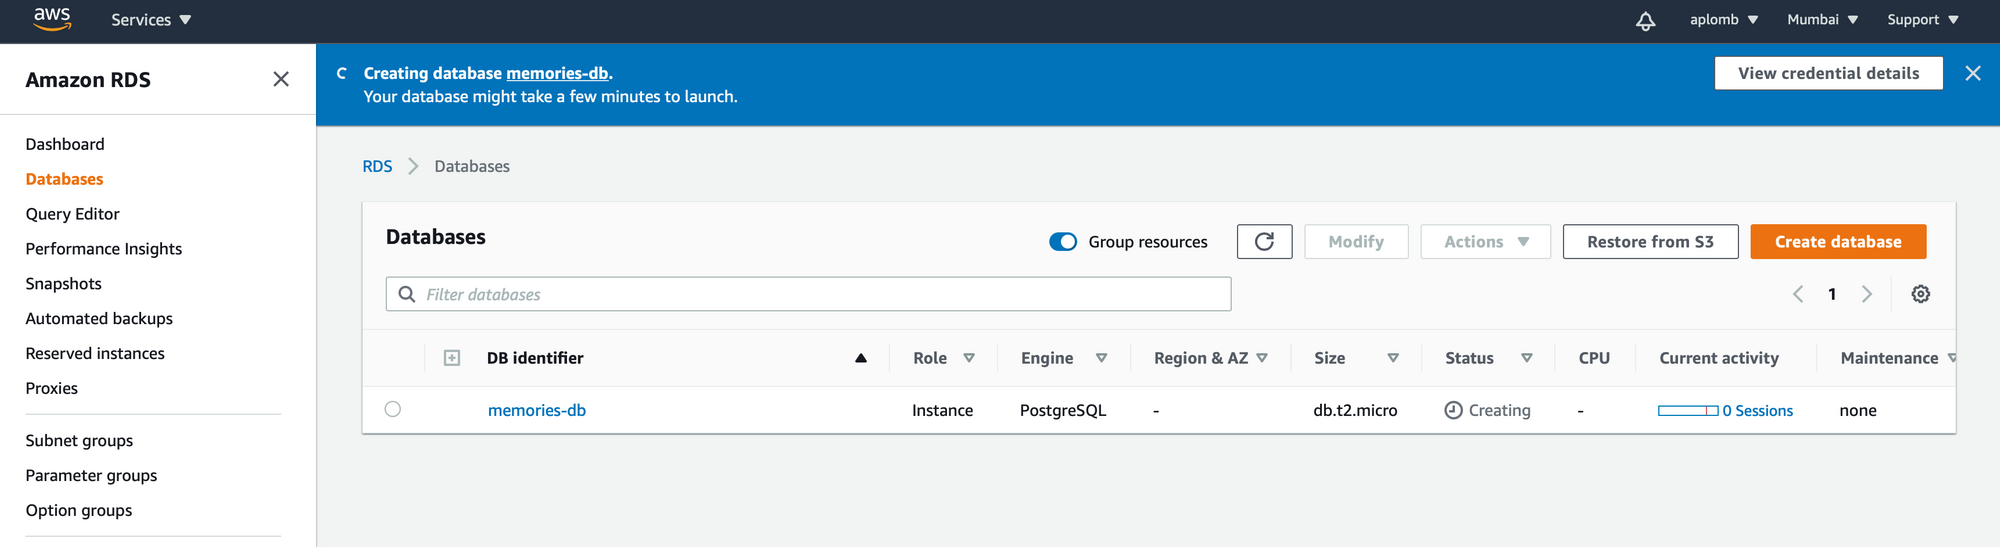
Once you create database, make sure you create database named memories
$ psql -h memories-db.xyzxyz.us-east-1.rds.amazonaws.com -U postgres -W
Password: <enter your postgres password>

psql (12.1, server 11.5)
SSL connection (protocol: TLSv1.2, cipher: ECDHE-RSA-AES256-GCM-SHA384, bits: 256, compression: off)
Type "help" for help.

postgres=> CREATE DATABASE memories;
CREATE DATABASE
Now our DATABASE_URL should be looking something like belowpostgres://postgres:postgres@memories-db.xyzxyz.us-east-1.rds.amazonaws.com:5432/memories
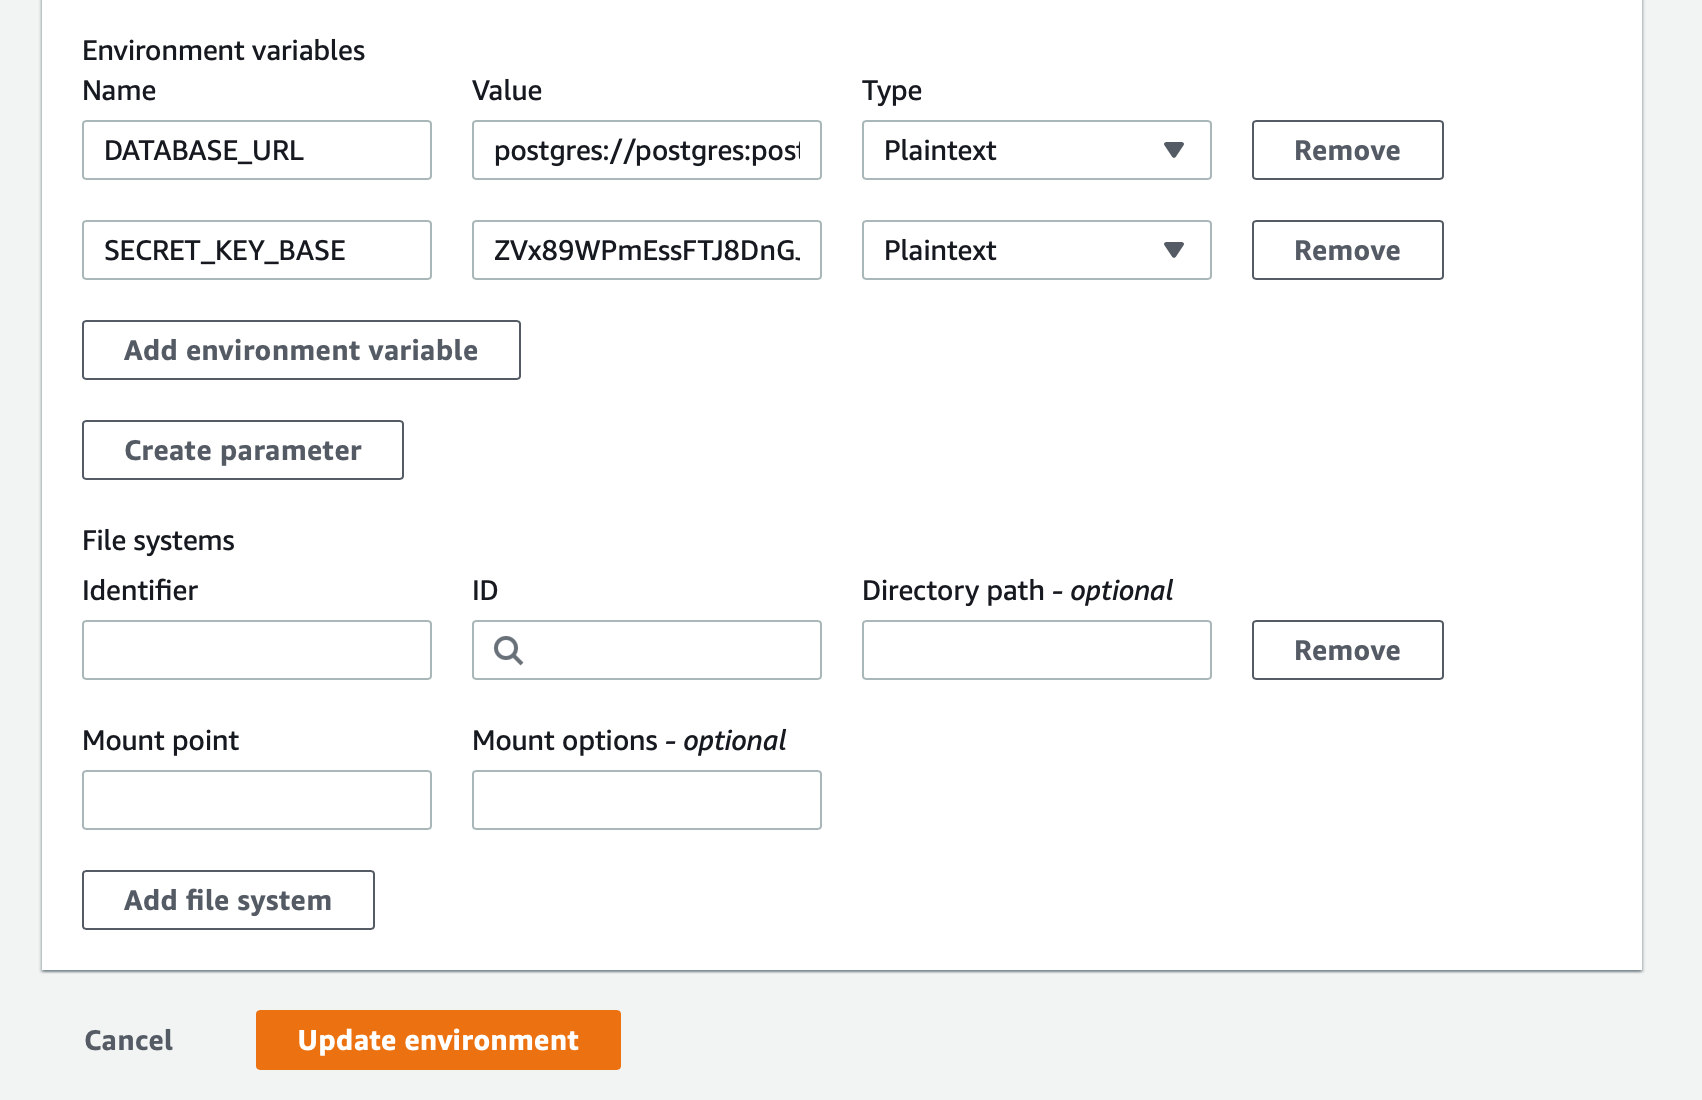
We need to set two environment variables in the Environment for the CodeBuid project. Go and edit the the CodeBuild project. Choose 'Environment'
Set the DATABASE_URL in the CodeBuild for our build project's environment variable. Also set SECRET_KEY_BASE
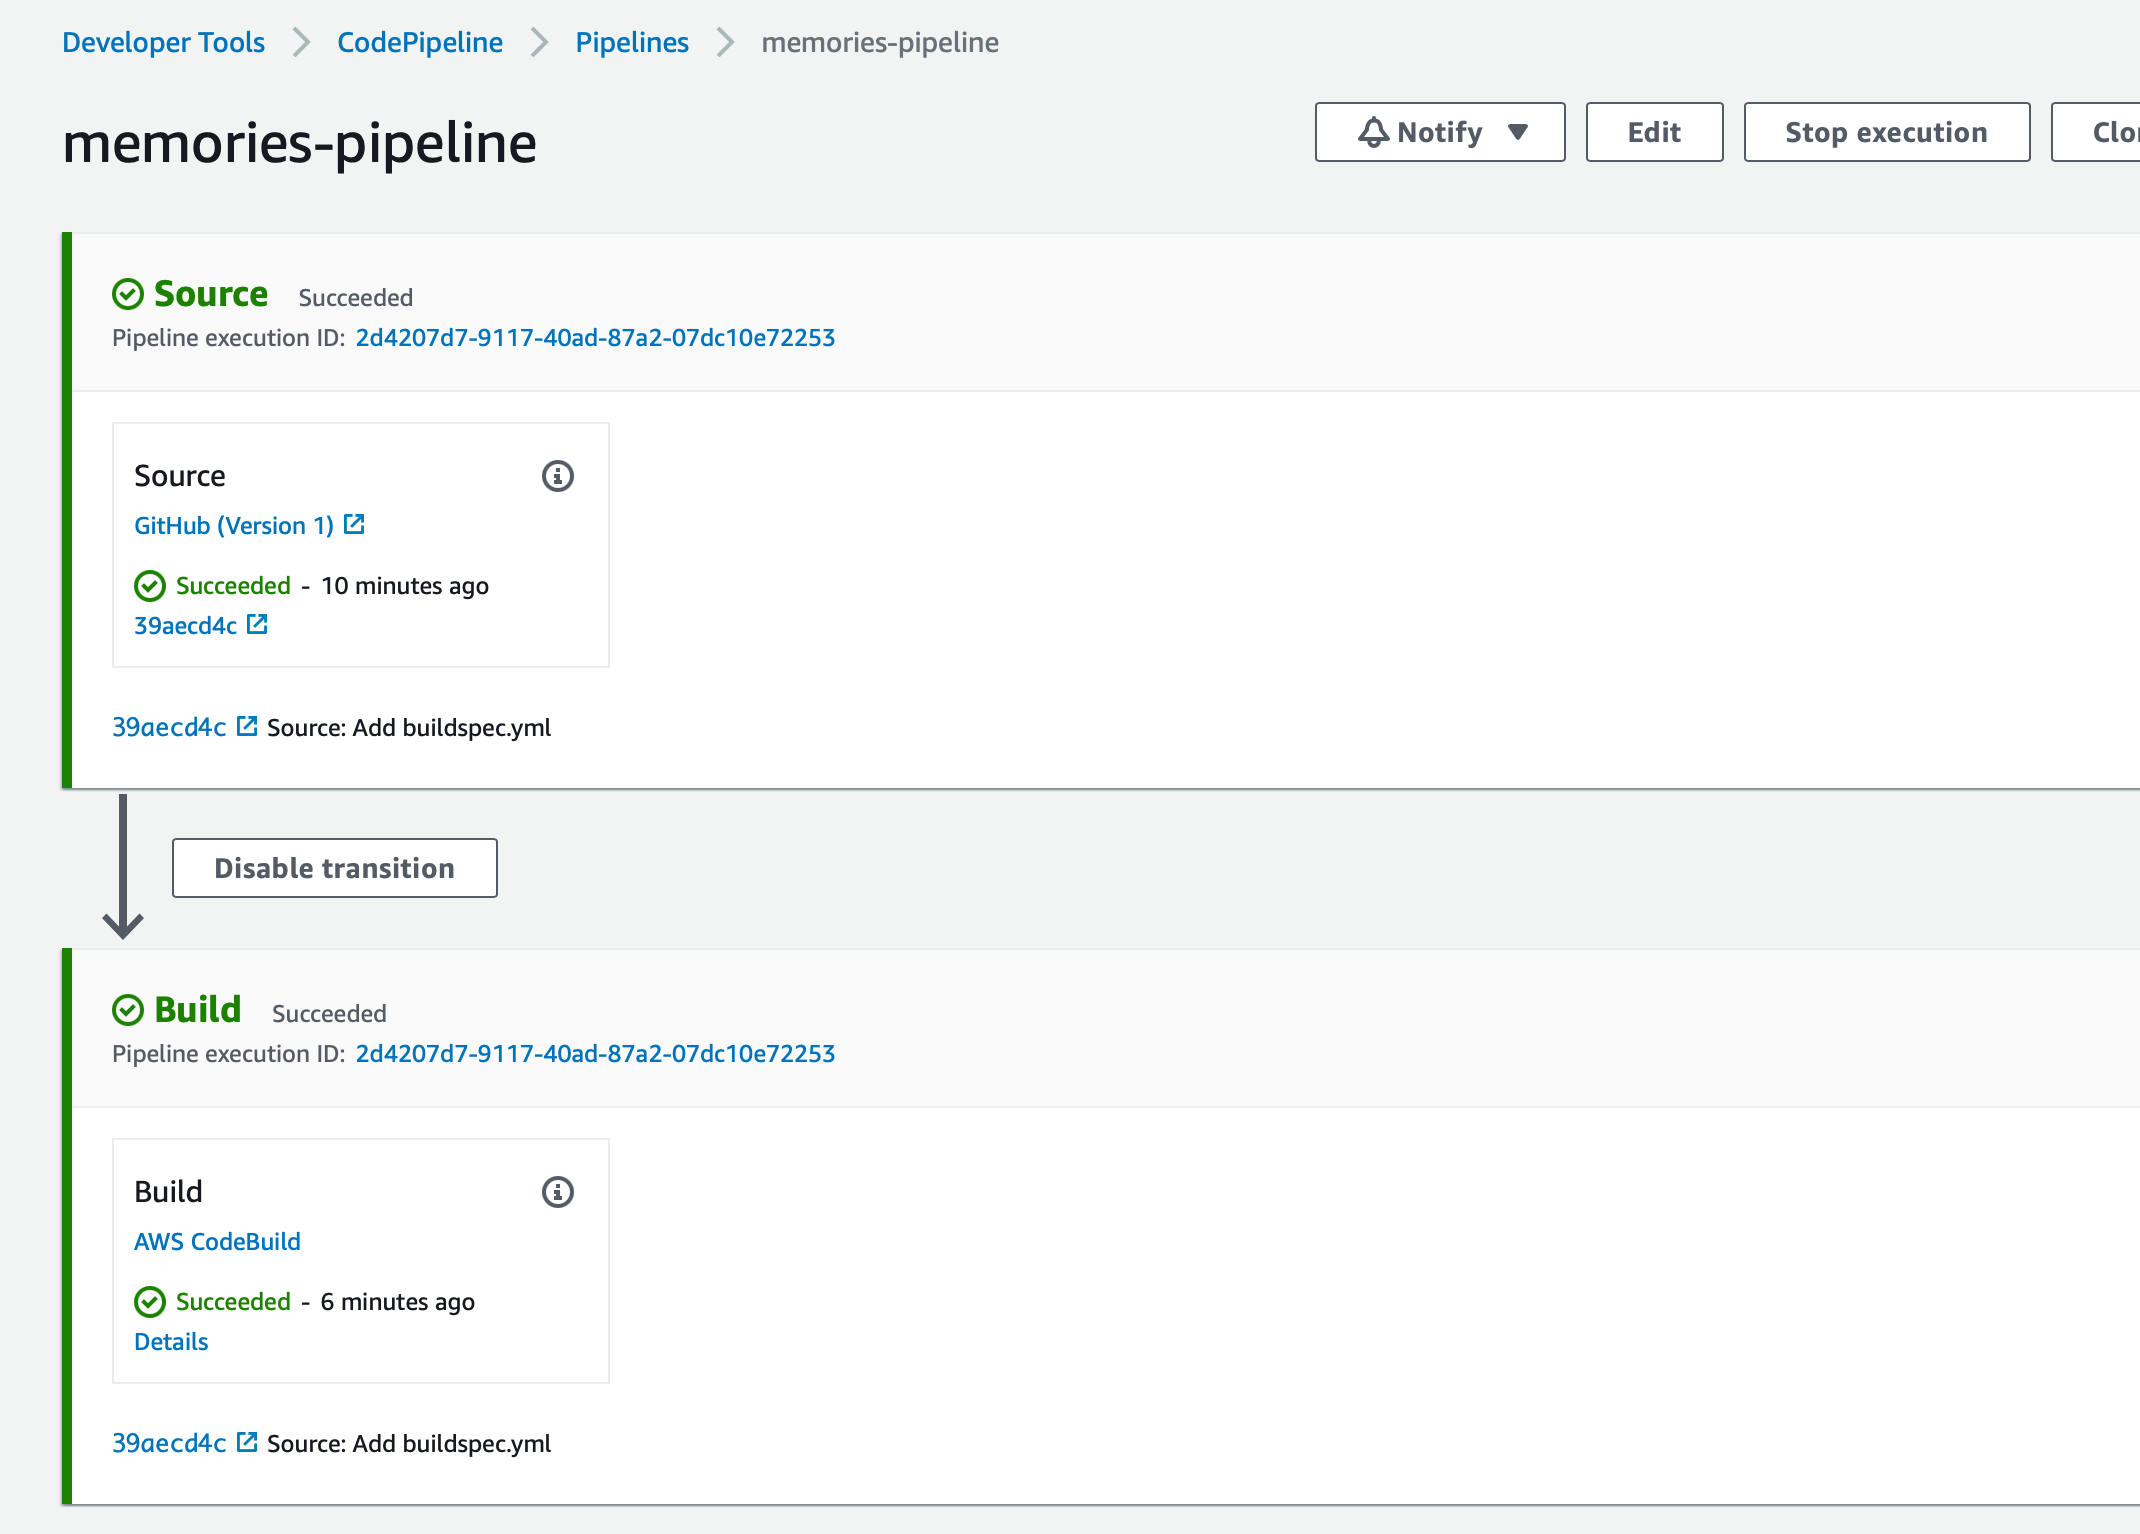
Also now push our buildspec.yml from local Git repo to GitHub remote master branch.
Once you do that, you should see status being changed to 'In progress' and then to 'Succeeded' along with the name of the commit and commit id for both 'Source' and 'Build' stages.
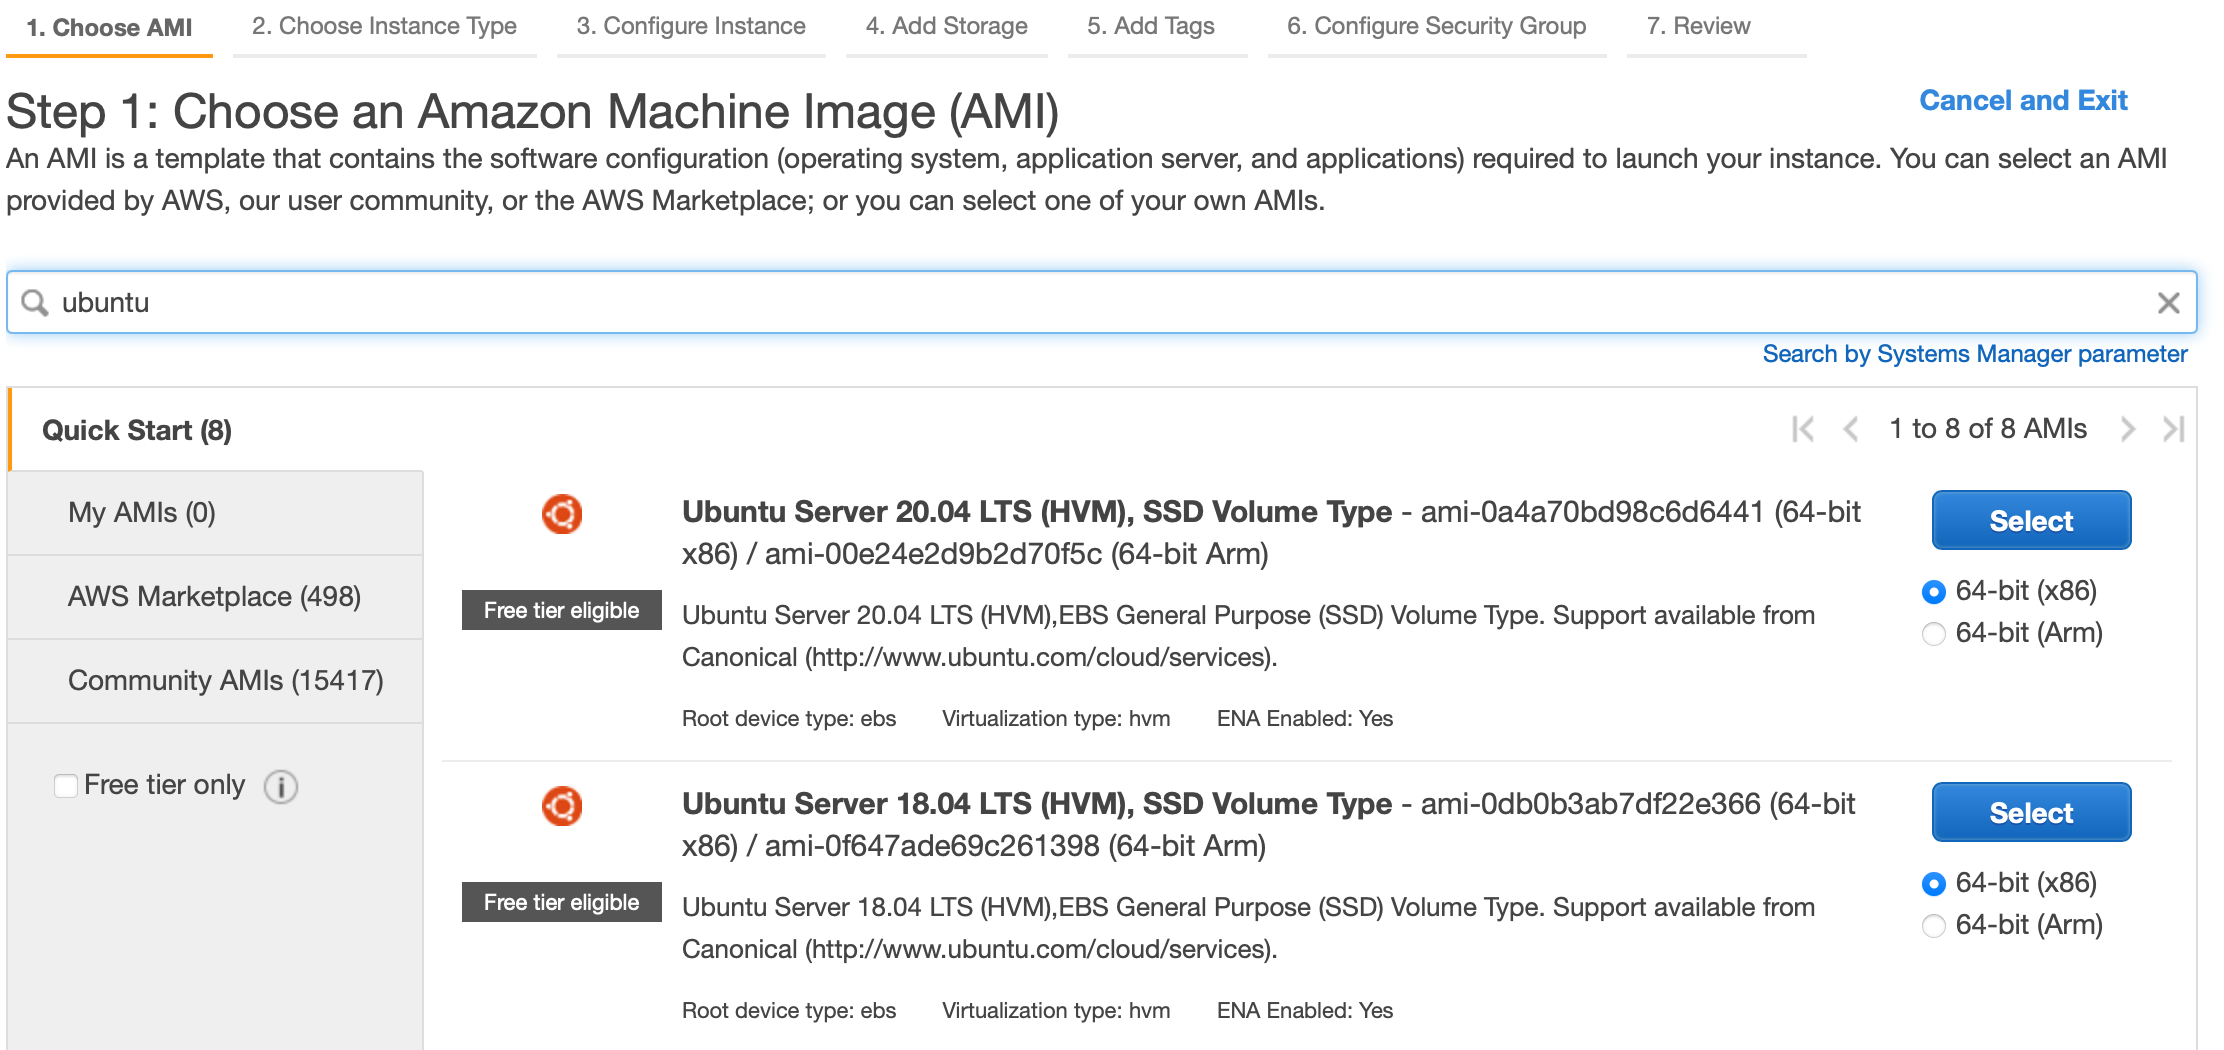
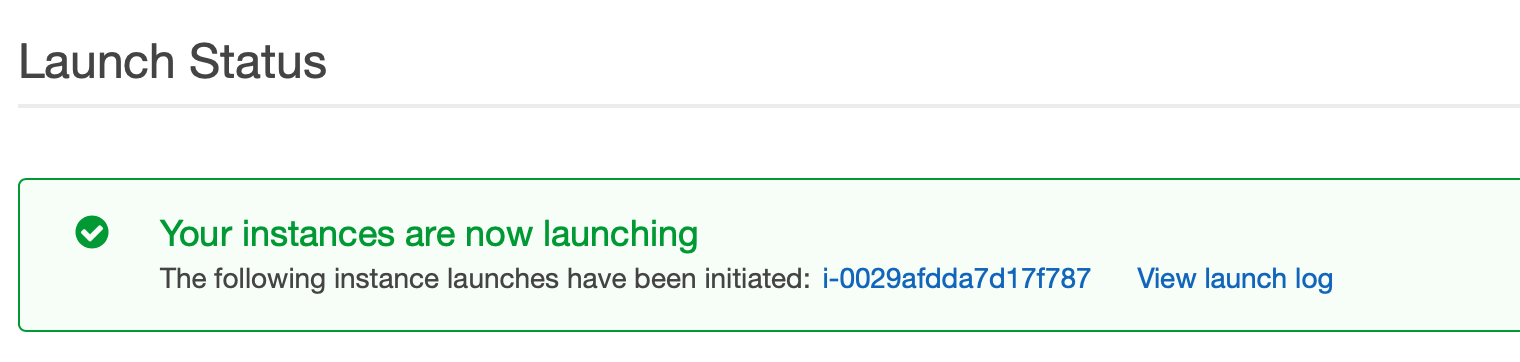
Creating EC2 instance
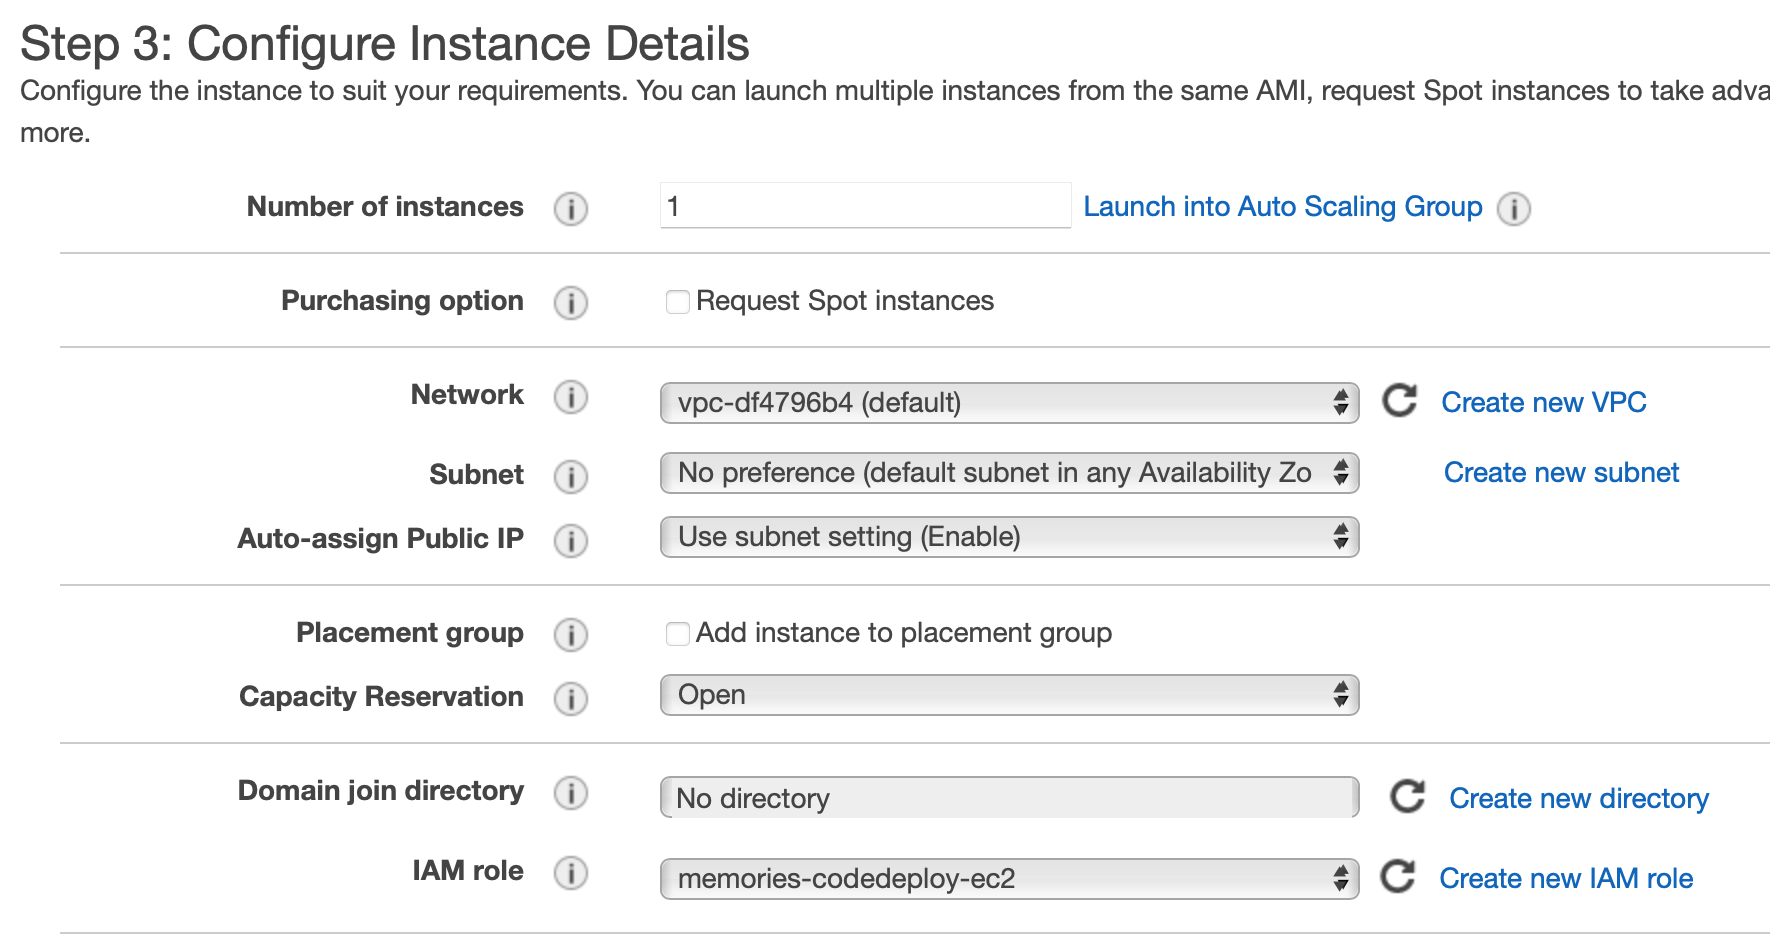
Now for running our Phoenix application, we need an EC2 instance. Search "EC2" in the Services and launch a new EC2 instance. Select "Ubuntu Server 18.04 LTS (HVM)", next, you can choose any instance type. We will use the t2.micro instance for this article.
Under the Configure instance, we need to give IAM role for the instance.
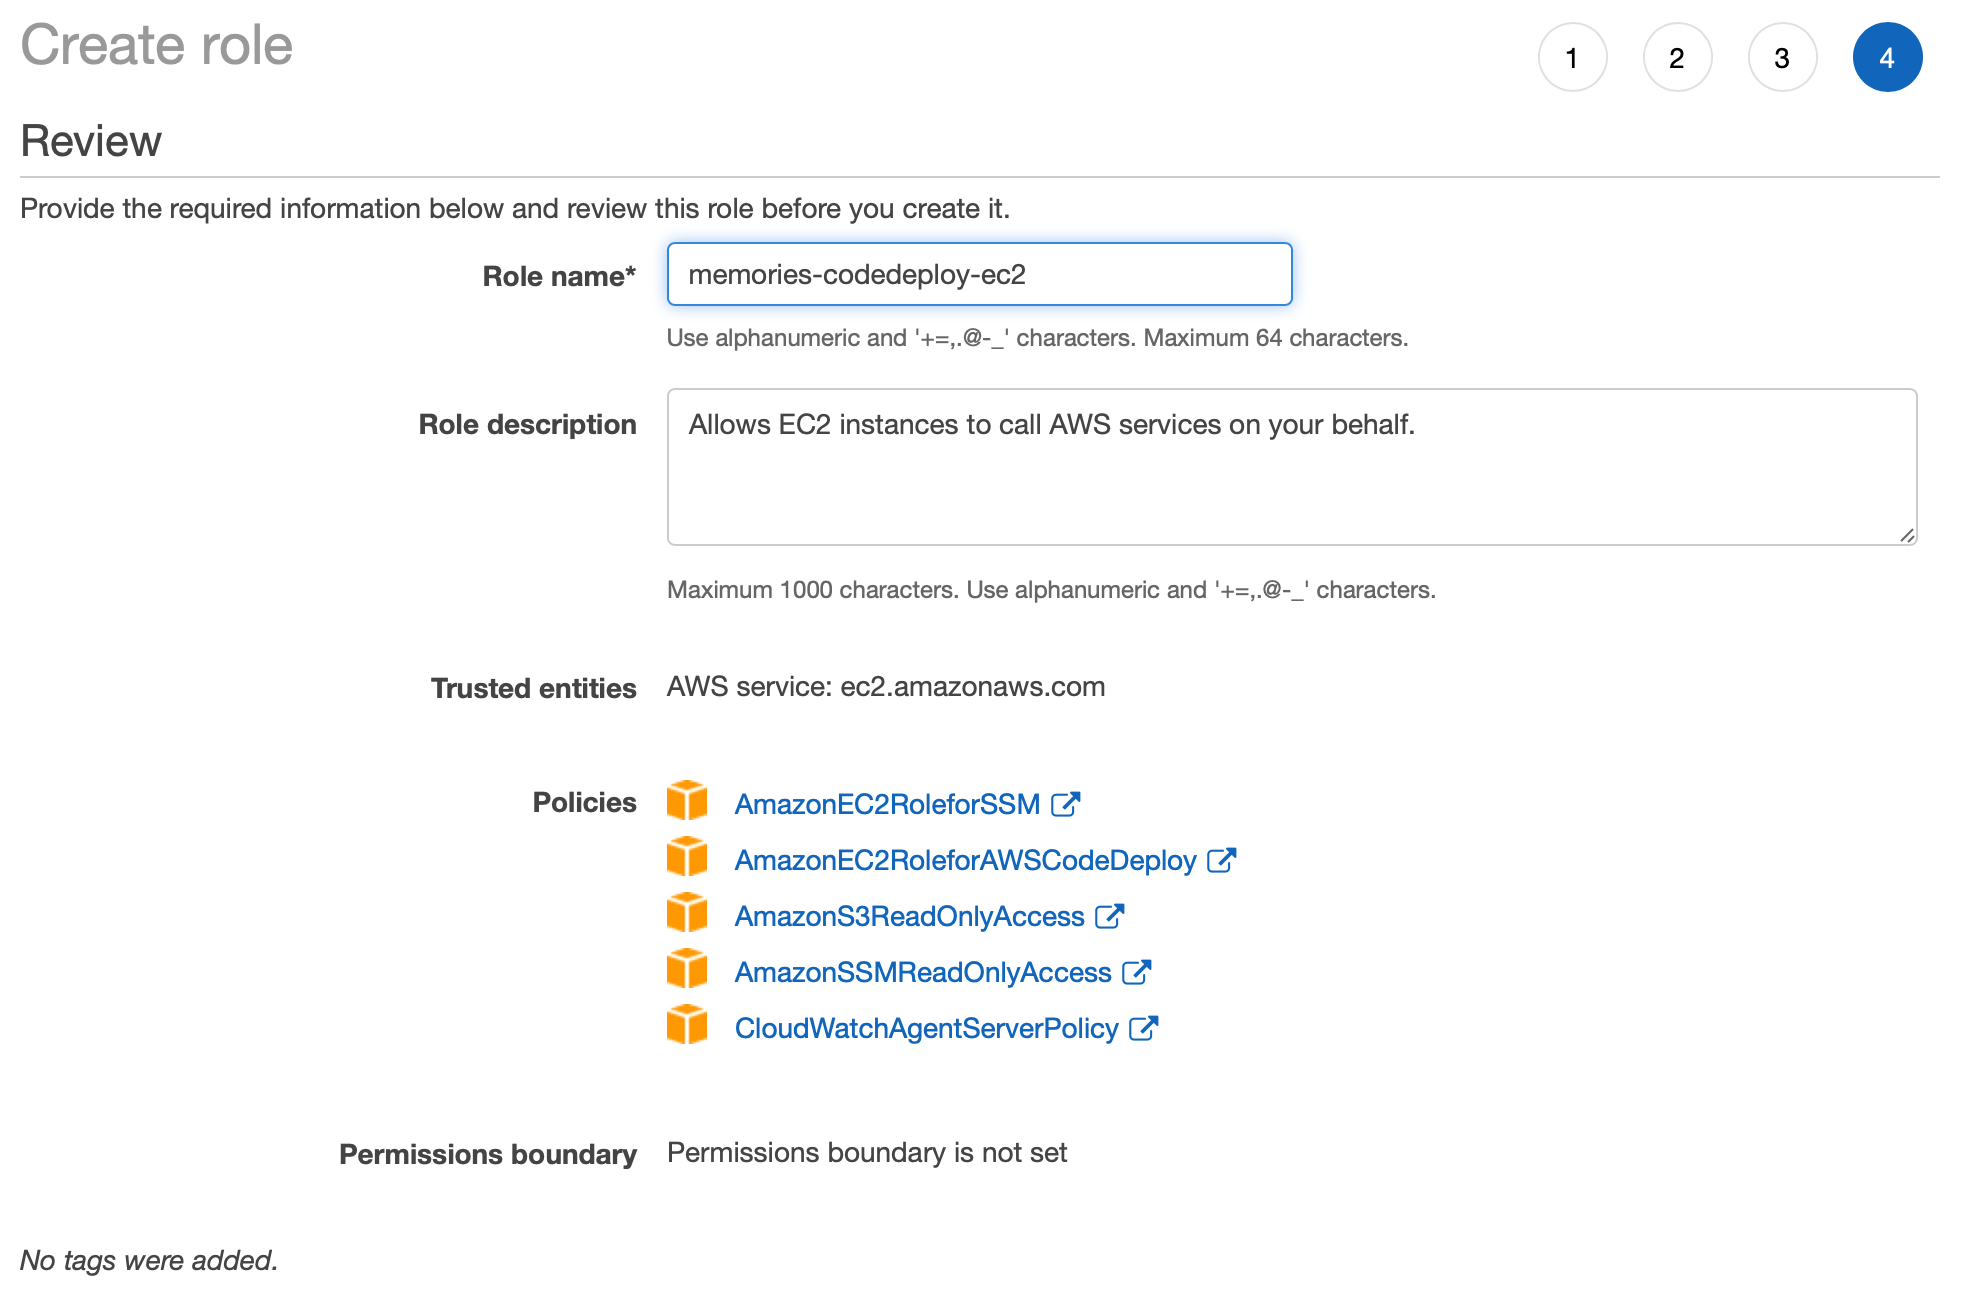
Right now, we don't have the role needed for using CodeDeploy to deploy the project to our instance. So let's go ahead and create a new role
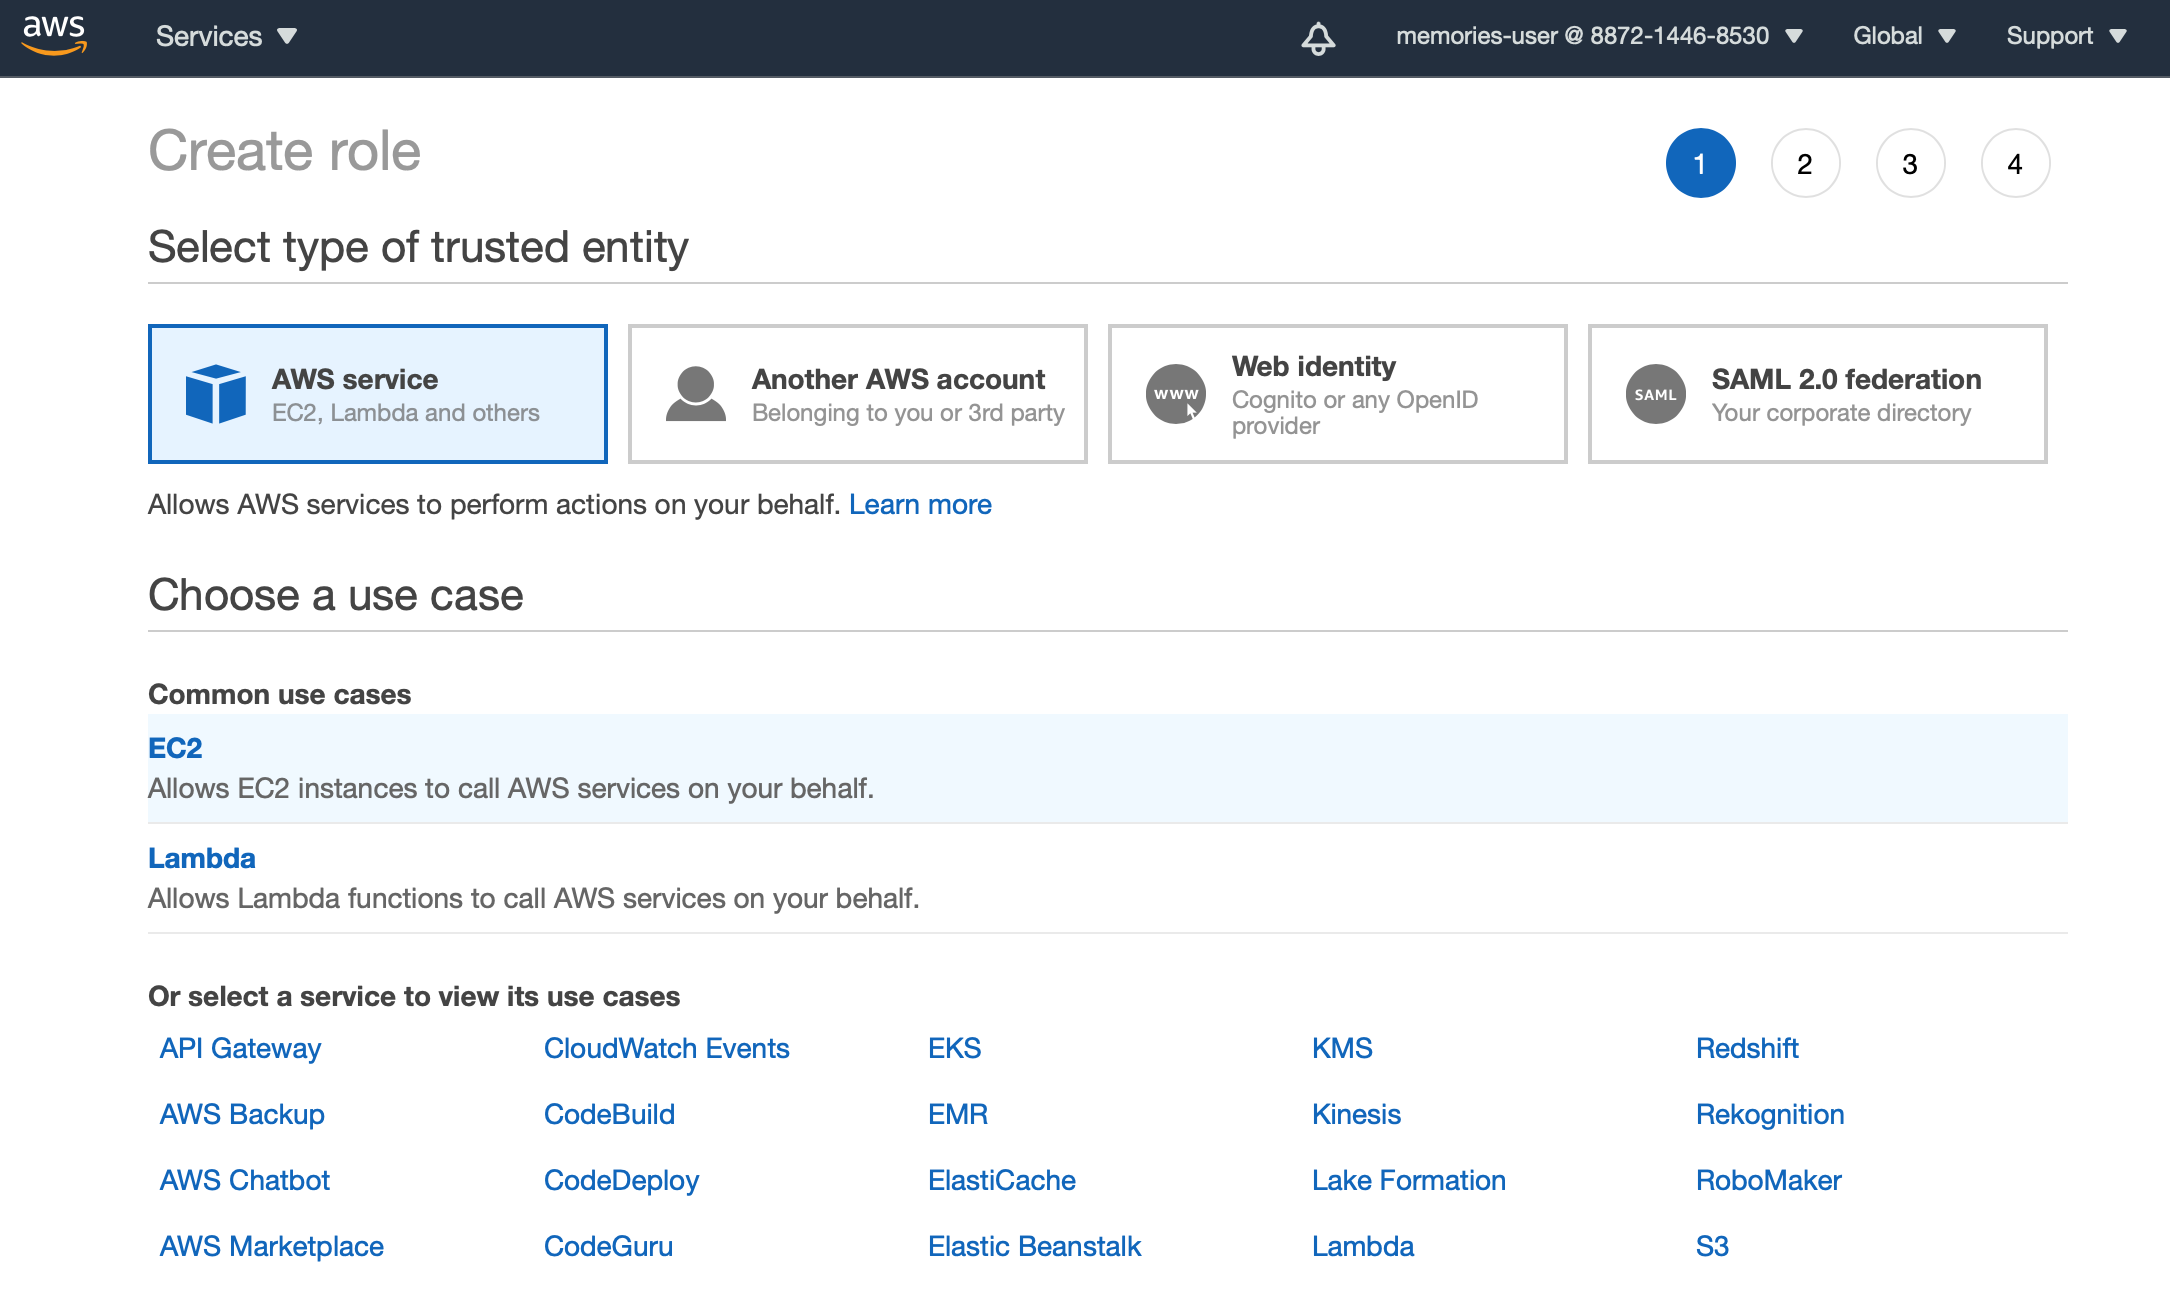
Select EC2 and click next
Attach following policies
AmazonEC2RoleforSSM
AmazonEC2RoleforAWSCodeDeploy
AmazonS3ReadOnlyAccess
AmazonSSMReadOnlyAccess
CloudWatchAgentServerPolicy
I give it a name as 'memories-codedeploy-ec2'
Now come back and refresh the IAM Role, you will see our new role in the list, choose it.
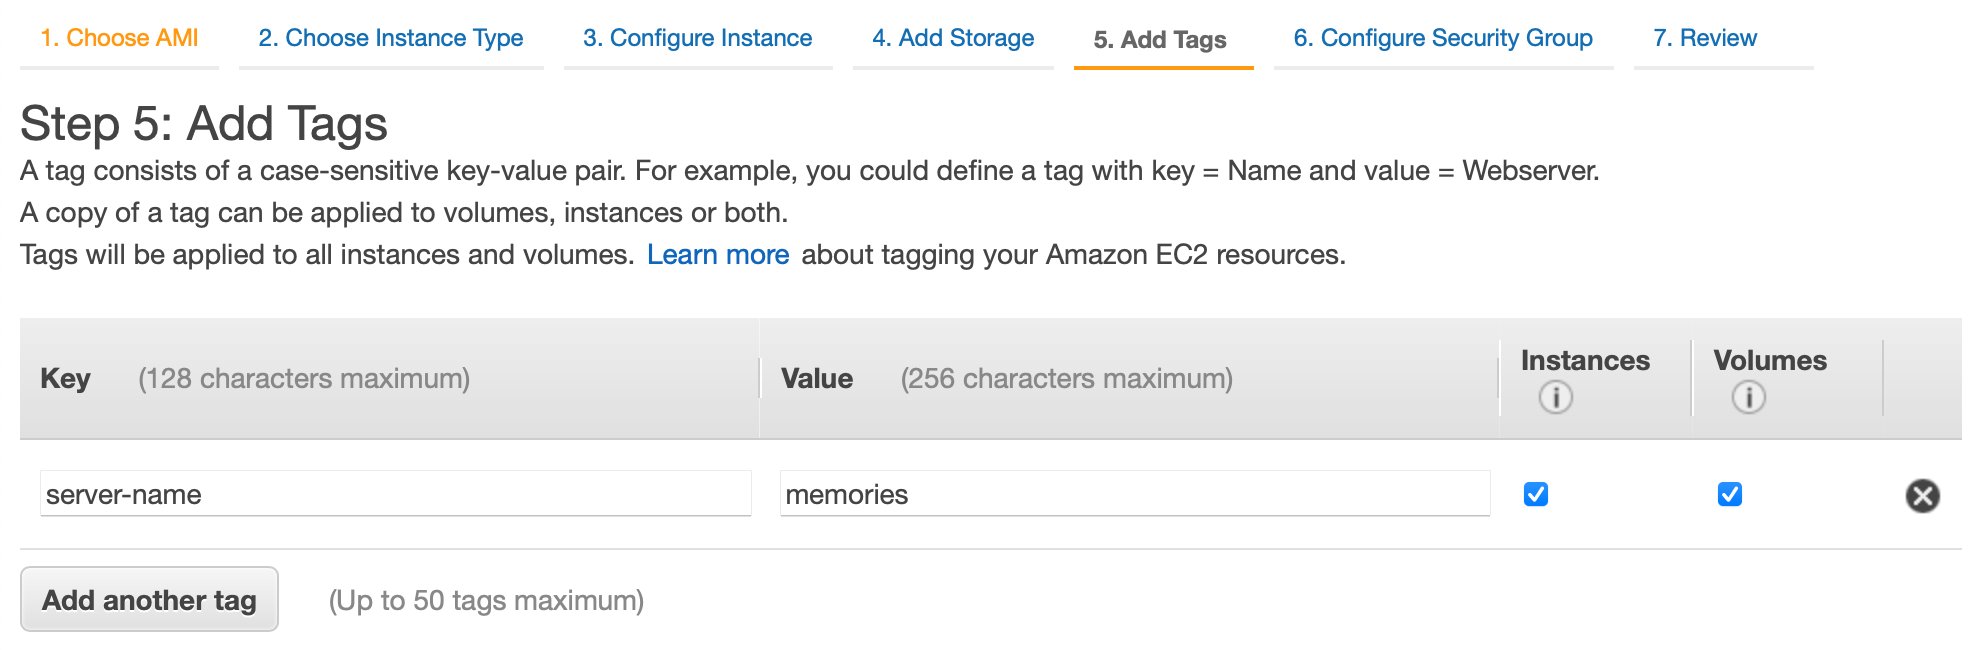
Now we will set tag for the instance. We will add key named server-name and value as memories. Tag is required in order for CodeDeploy to find our EC2 instance.
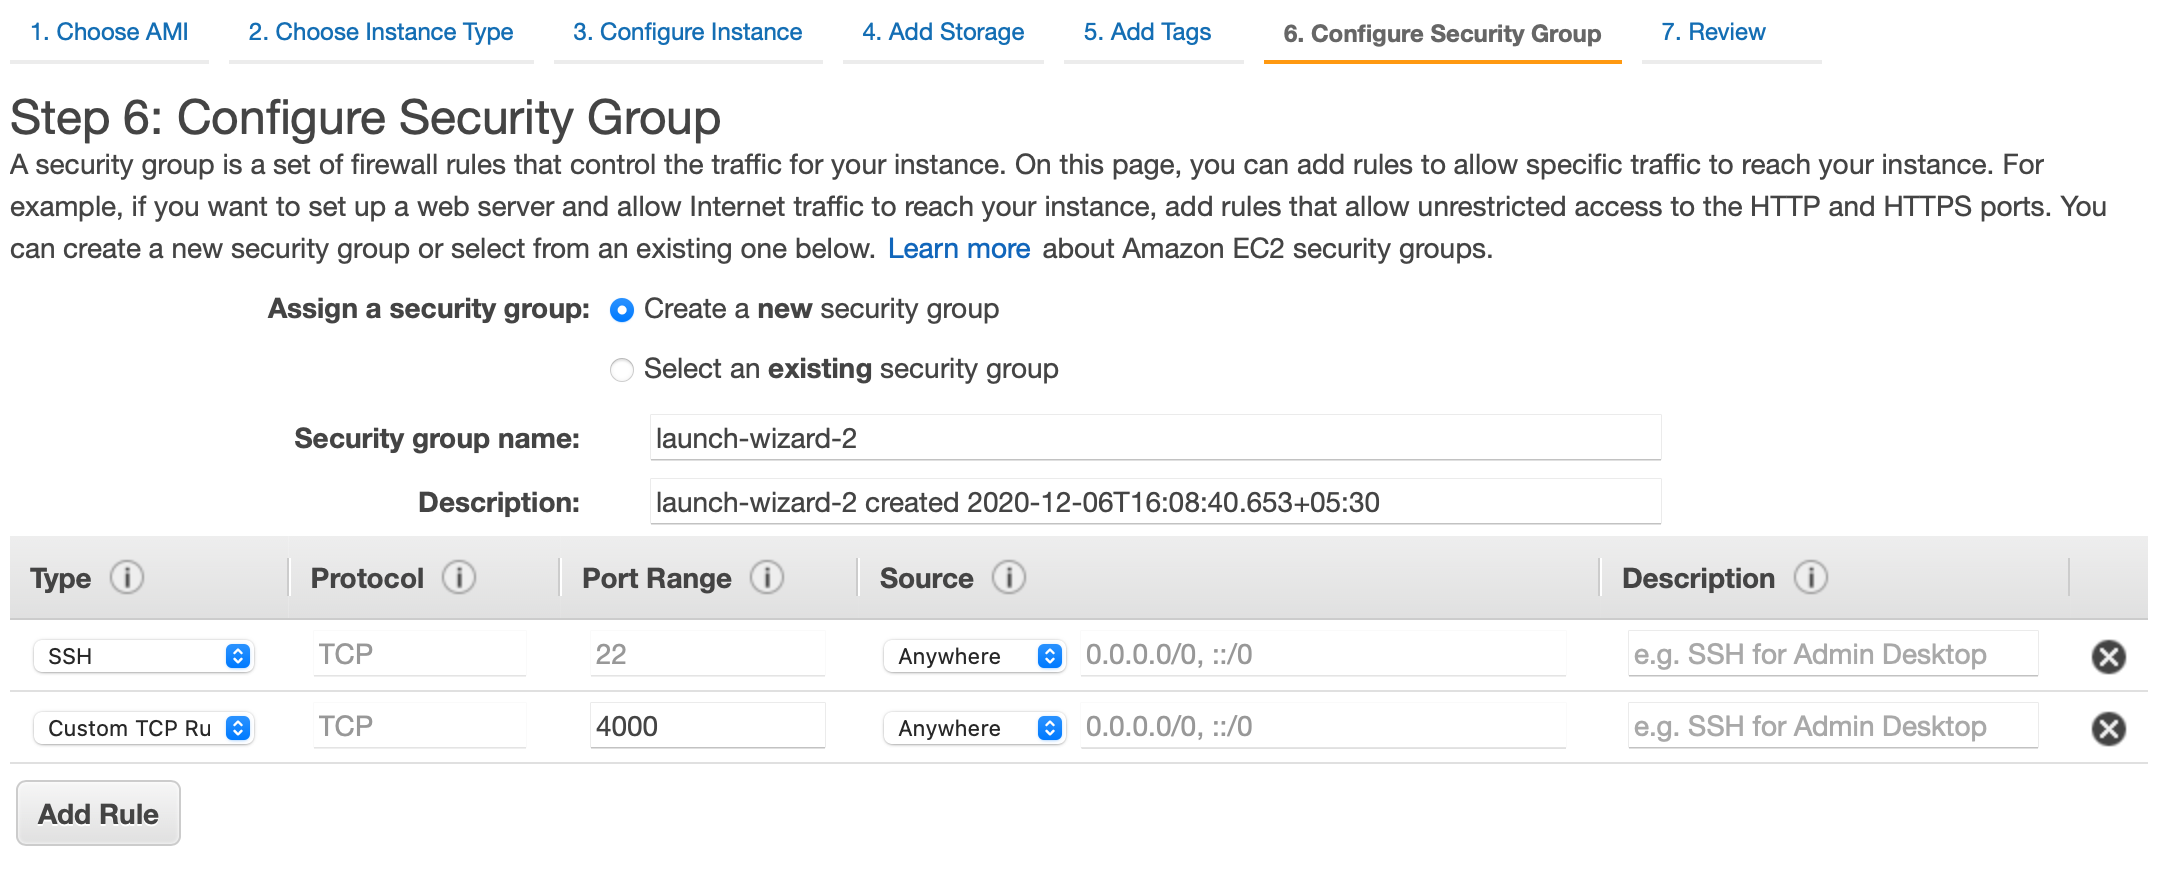
In this article, we will be running our Phoenix app on port 4000, so create a new security group with the type Custom TCP and port 4000. In the source, allow it from Anywhere
Next download KeyPair and we will need to SSH to instance.
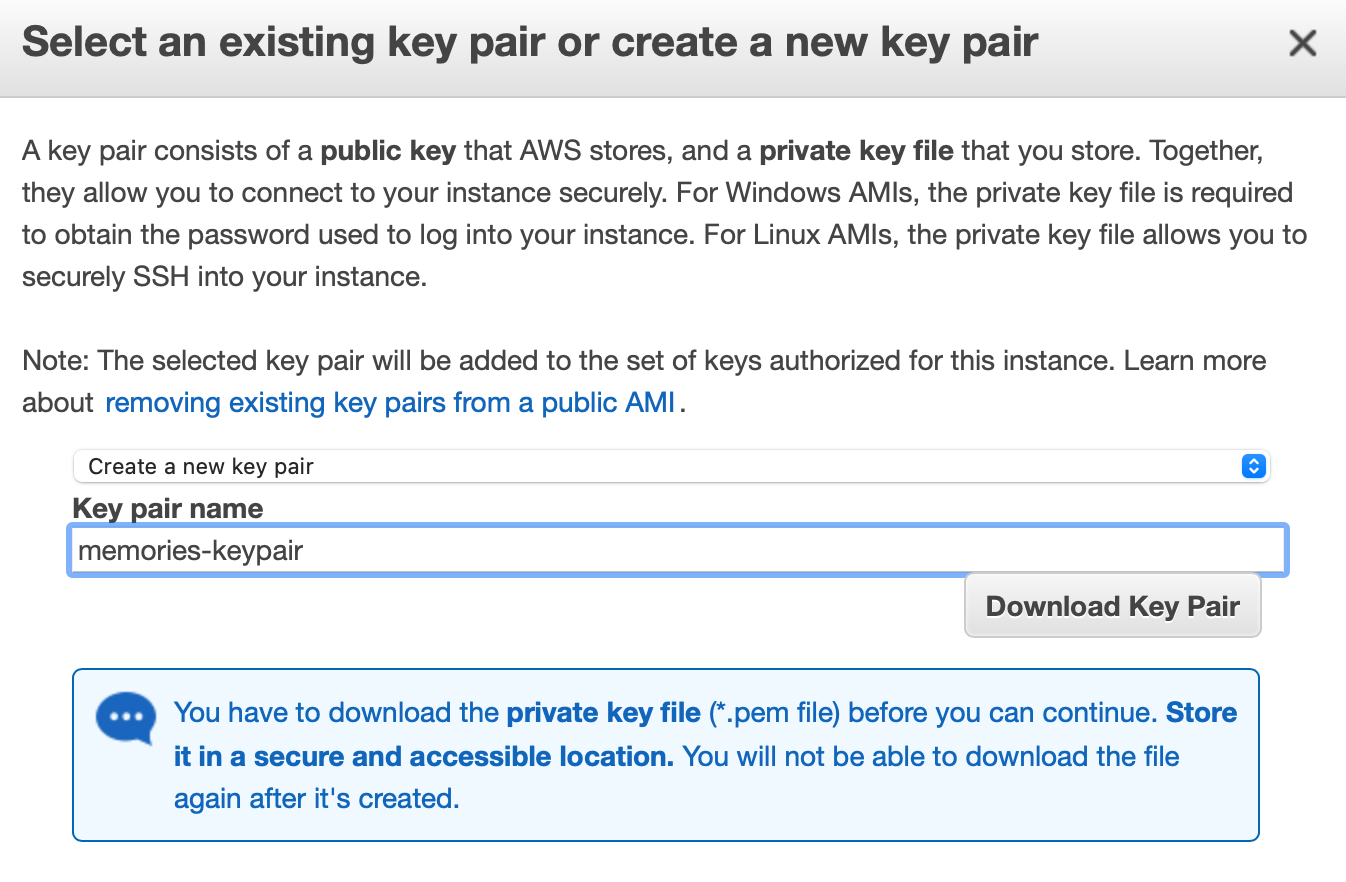
To ssh, we can use .pem file. You can check if you can SSH to the instance with the following command.
ssh -i ~/.ssh/memories-keypair.pem ubuntu@ec2-65-0-205-105.ap-south-1.compute.amazonaws.comSetup CodeDeploy Agent on EC2 instance
As you have SSHed to the EC2 instance, we will prepare it for our deployment.
We need to set CodeDeploy Agent on our EC2 instance. SSH to the instance and run the following command
sudo apt-get update
sudo apt-get install -y ruby
sudo apt-get install wget
cd /home/ubuntu
wget https://aws-codedeploy-us-east-1.s3.amazonaws.com/latest/install

chmod +x ./install
sudo ./install auto
In the above commands running wget command with the proper AWS region is important, that's why we use aws-codedeploy-us-east-1 in the URL.
Setup CodeDeploy
AWS CodeDeploy is a fully managed deployment service that automates software deployments to a variety of compute services such as Amazon EC2, AWS Fargate, AWS Lambda, and your on-premises servers.
Before we setup CodeDeploy, we need to add a new IAM role,
Go to IAM and create a new role, chose use case as CodeDeploy
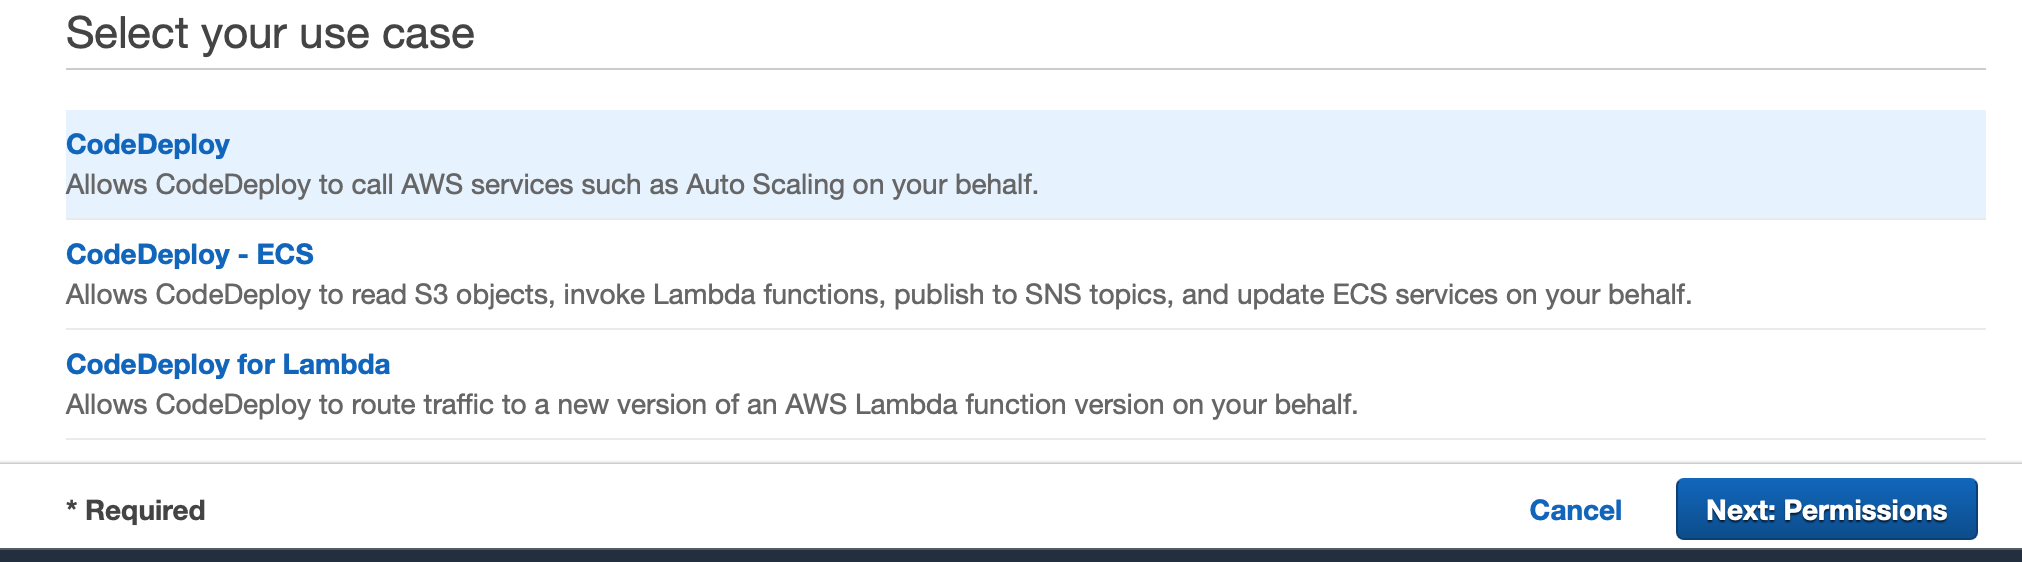
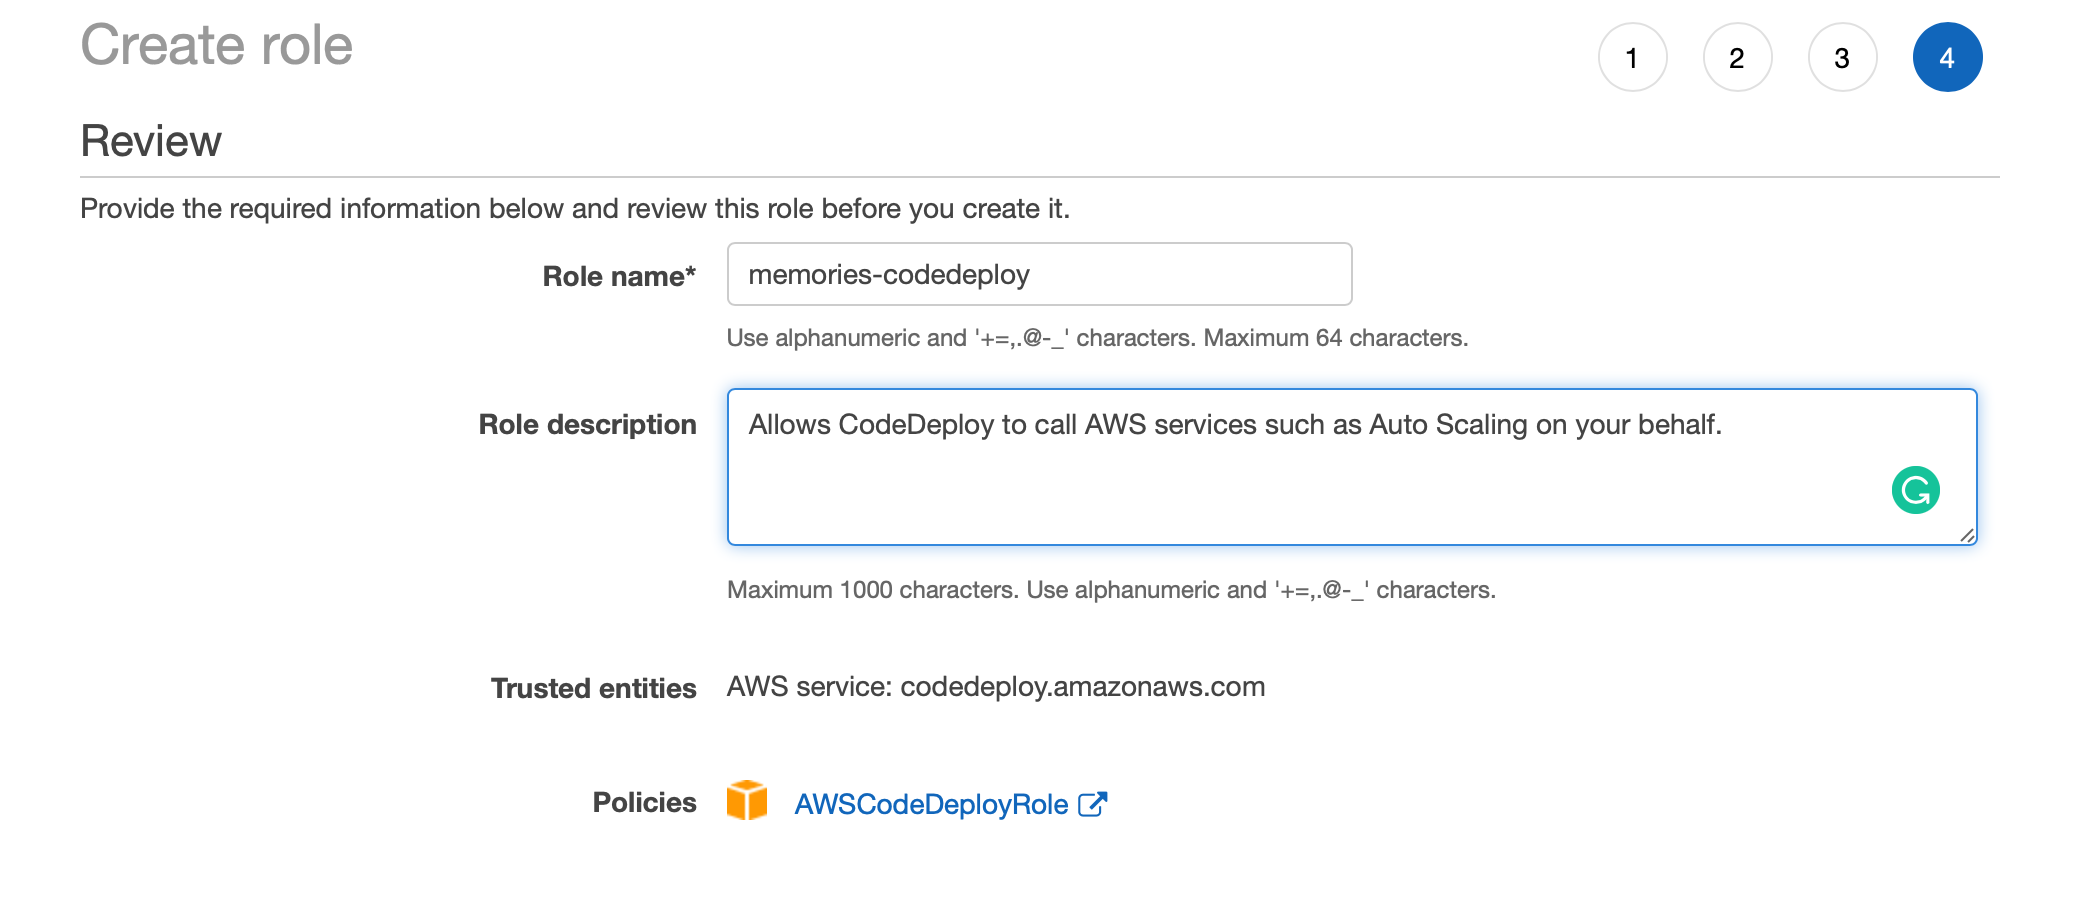
We don't need to change any permission policies this time and can simply proceed to the last step where we need to add a name for the role. We can call it 'memories-codedeploy
Name role as 'memories-codedeploy'
Now we have our role ready, we can move ahead with creating a new CodeDeploy application.
Find out the CodeDeploy link from the Services header. Let's follow the same procedure to create a new CodeDeploy as we did with CodeBuild and CodePipeline.
Click 'Create Application' in CodeDeploy, you should see a form like the one below
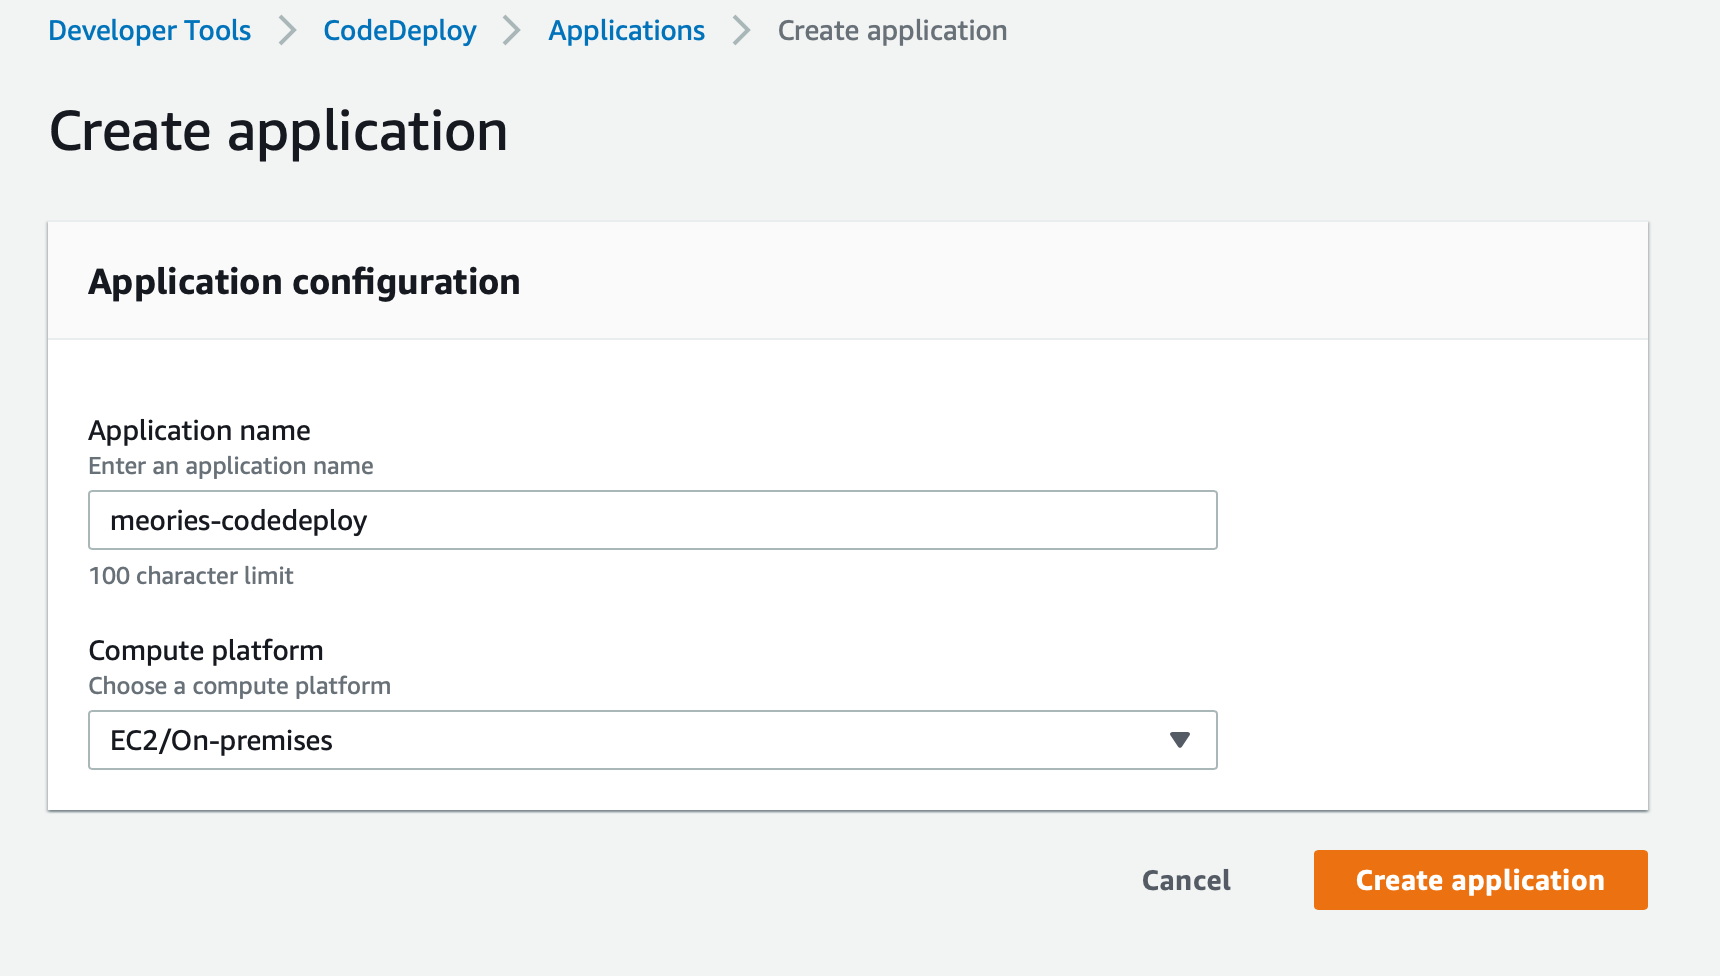
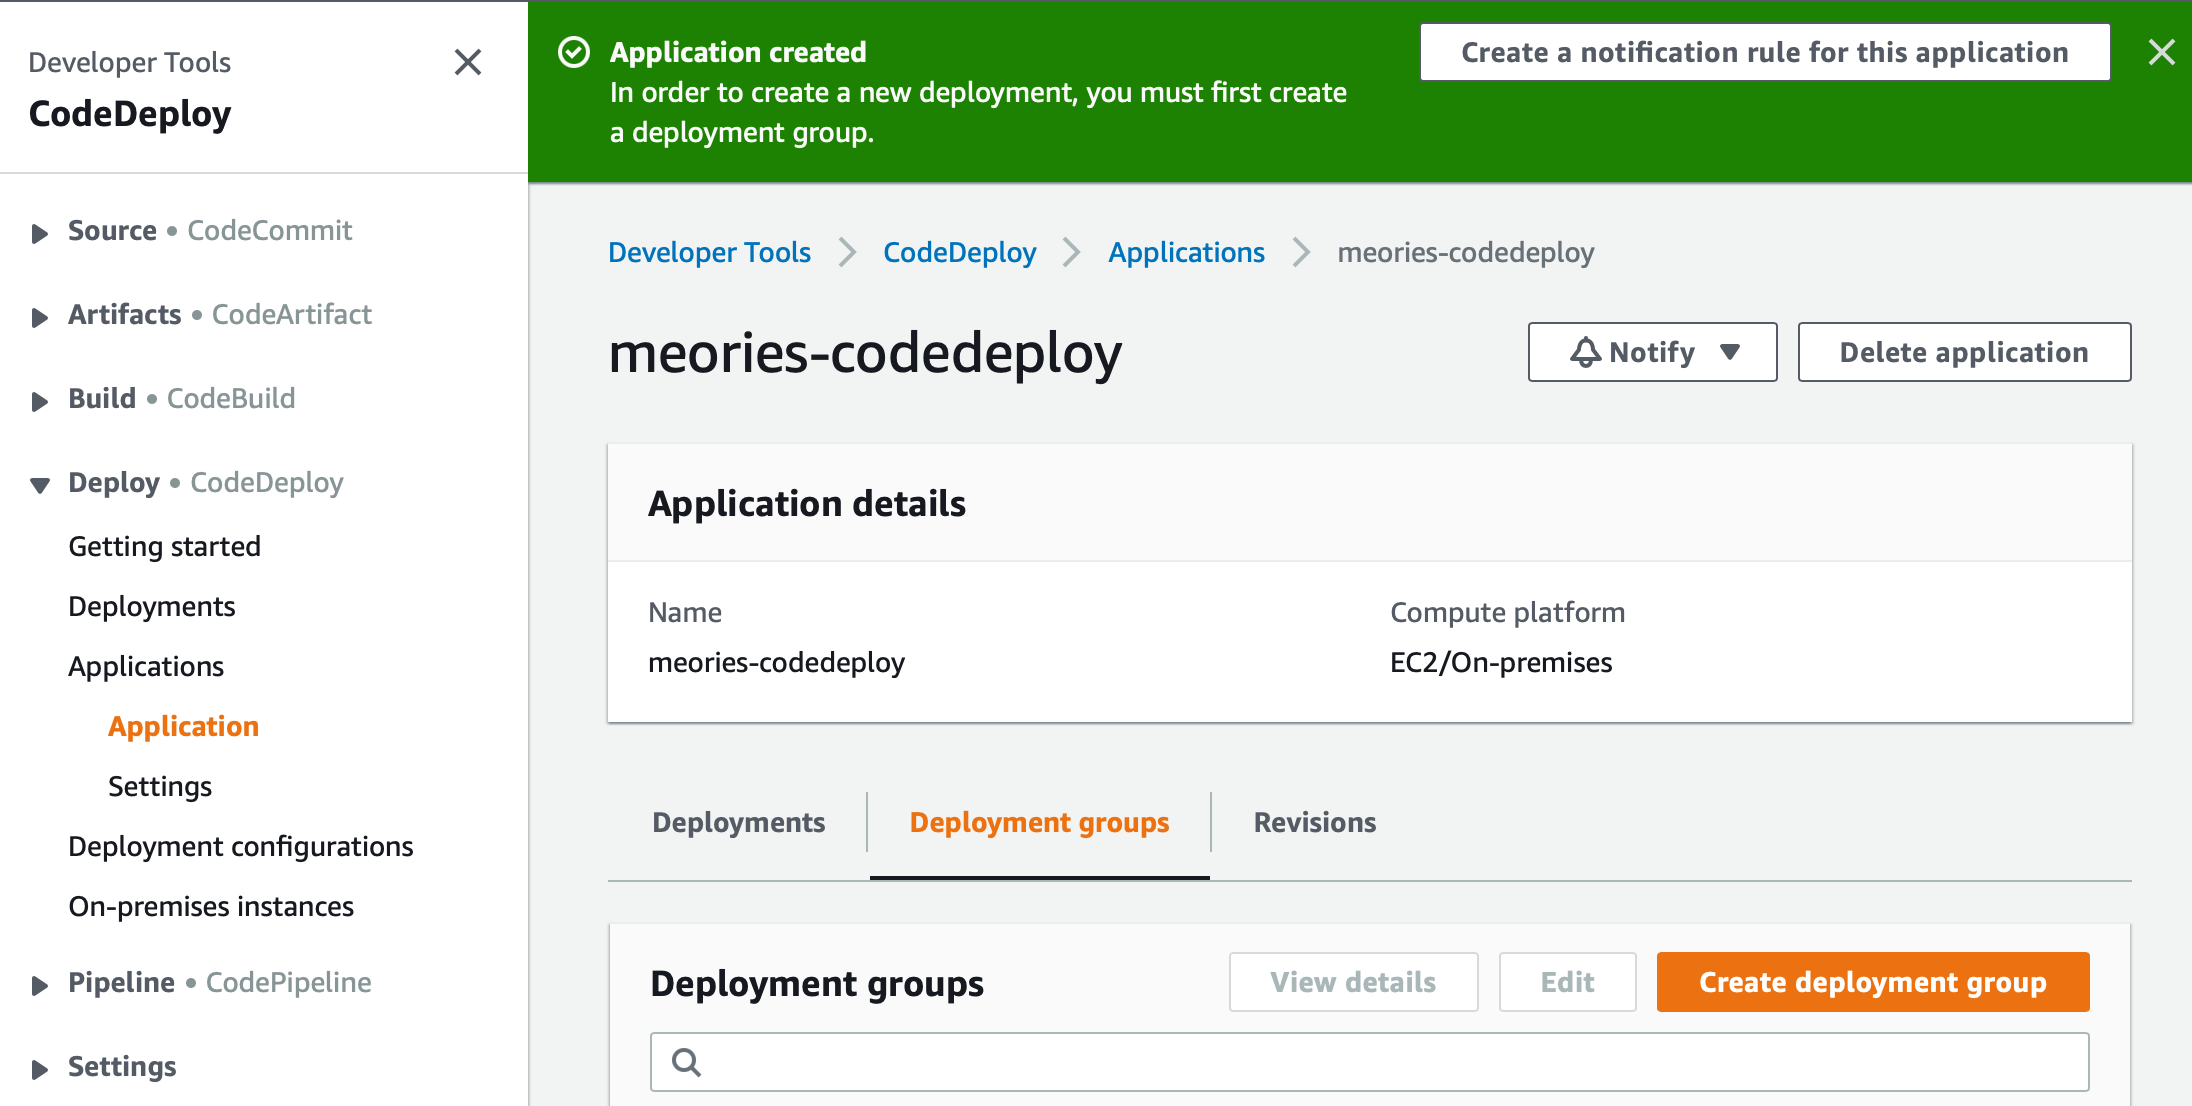
We'll go ahead and give it a name memories-codedeploy. We'll select EC2/On-premises for our Compute platform. After we create it, you'll notice we have a message saying 'In order to create a new deployment, you must create a deployment group'. So let's click on 'Create Deployment Group' at the bottom of the page.
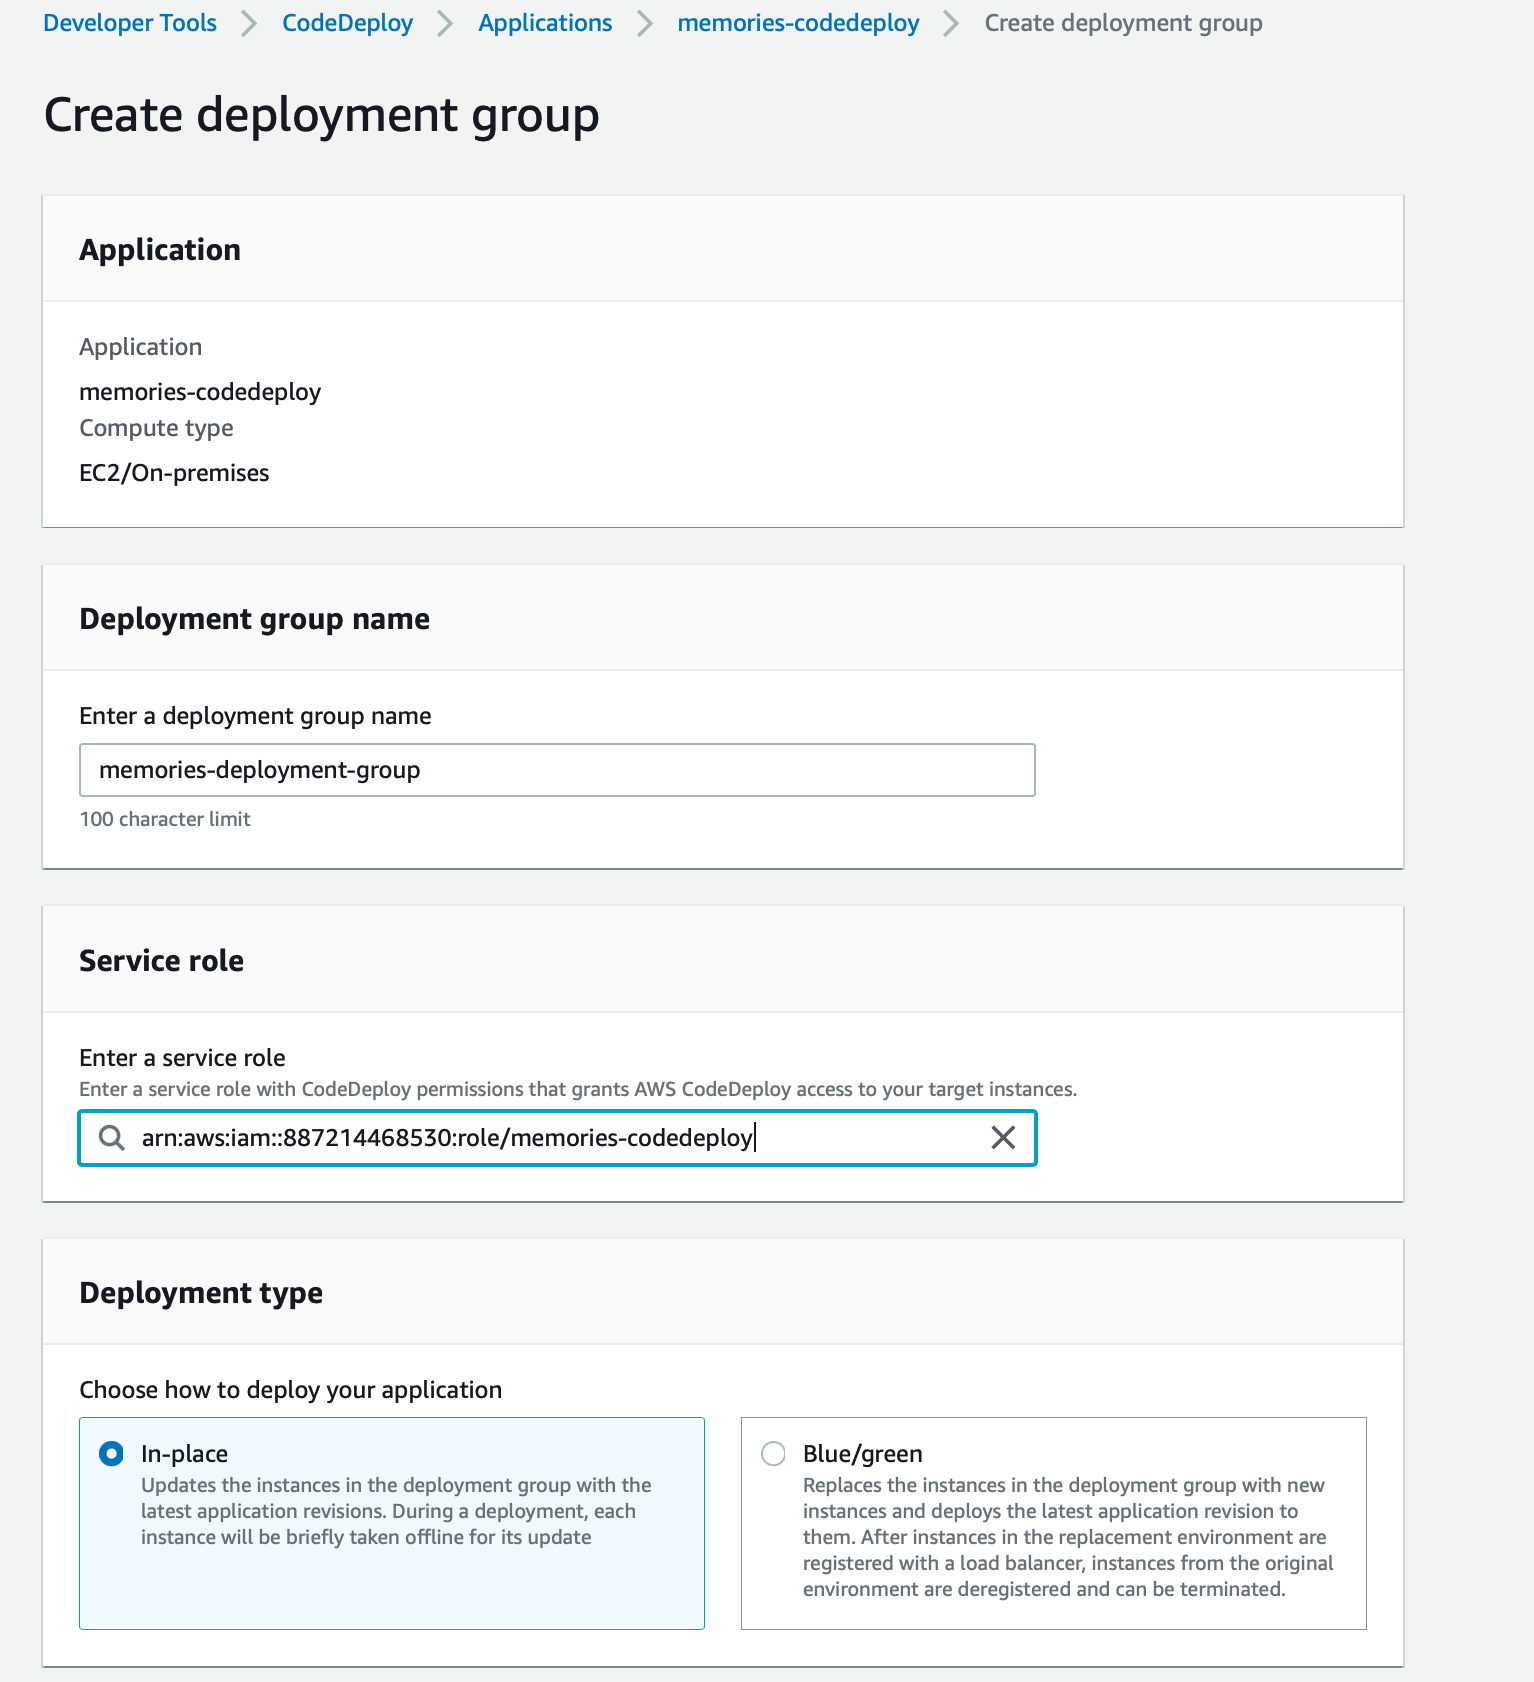
We can call our deployment group 'memories-deployment-group' and select the role that we just created. Our deployment type will be 'In place'
We will select 'Amazon EC2 instances' as our environment configuration. In order for CodeDeploy to find our EC2 instance, we had added a tag while creating the instance. We'll simply add the same key and value here.
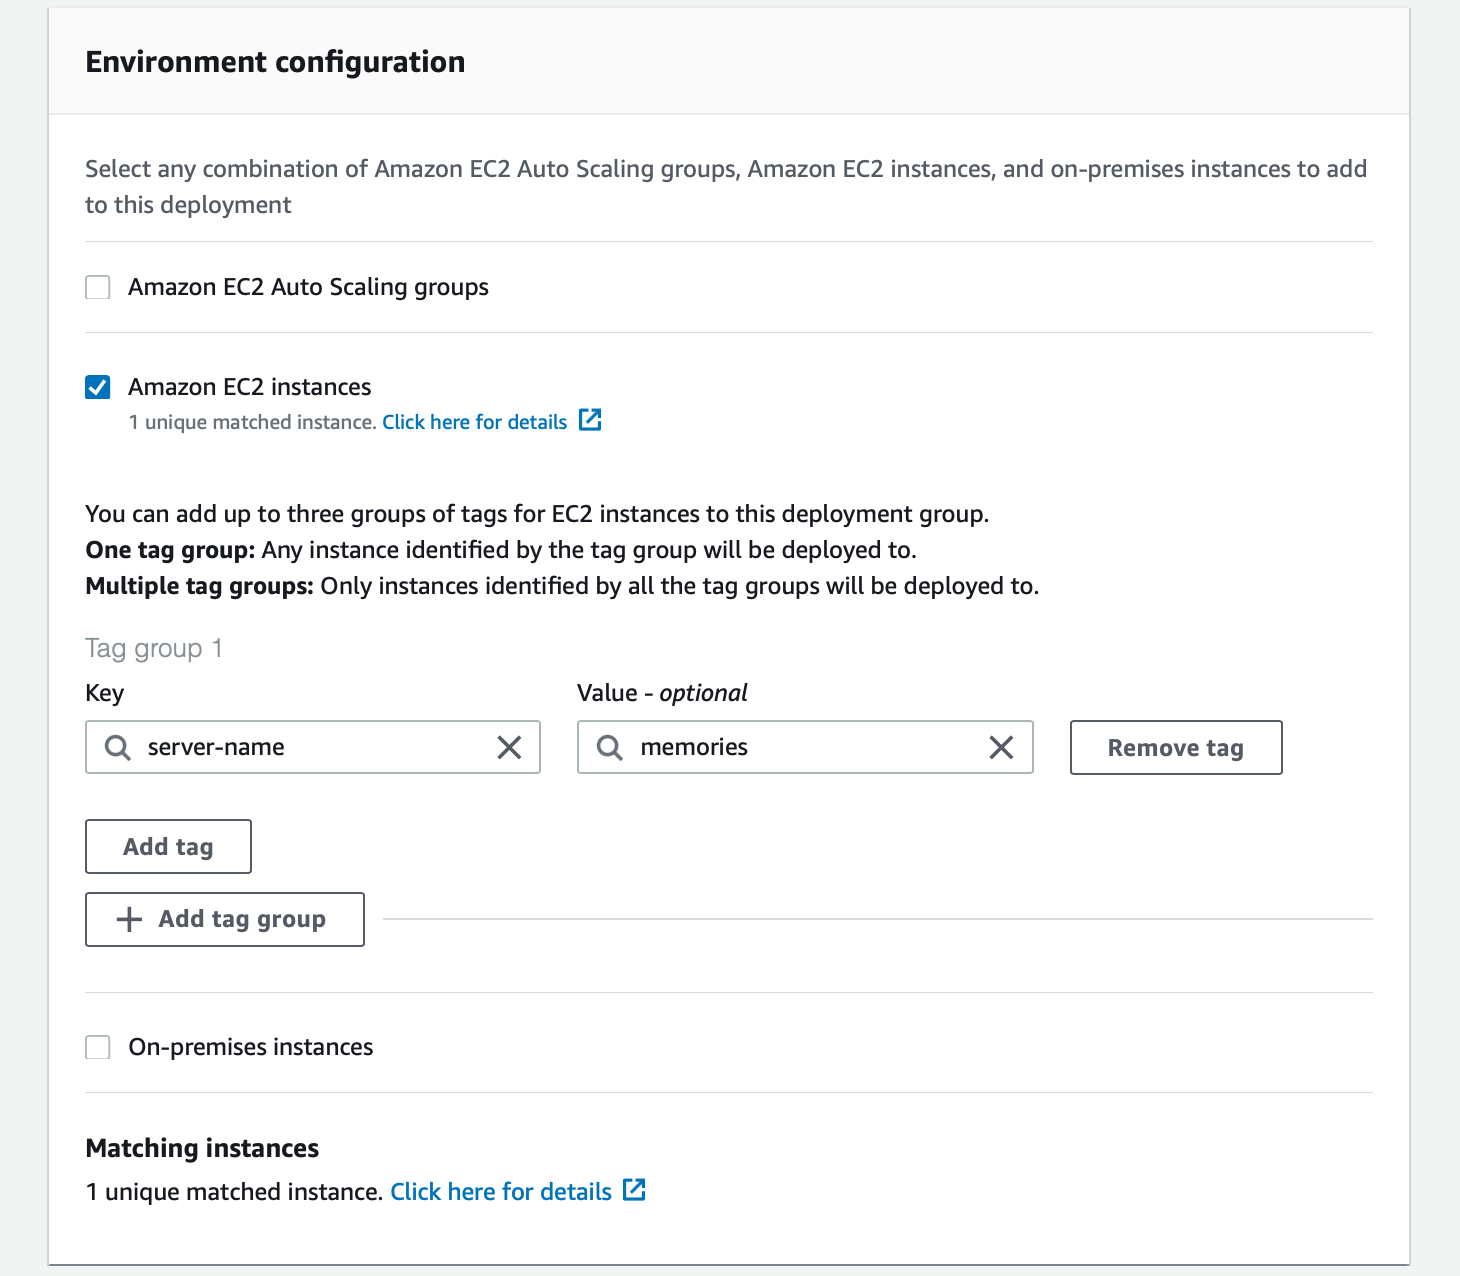
In this article, we are not using any Load balancer so uncheck the box.
Just like we added buildspec.yml, for CodeDeploy, we need appspec.yml file for the CodeDeploy. It will contain instructions to carry during our deploy process. Let's create the file appspec.yml in our project's root folder where we had added buildspec.yml
version: 0.0
os: linux
files:
  - source: /
    destination: /home/ubuntu/apps/memories
hooks:
  ApplicationStart:
    - location: scripts/start.sh
As in the above YAML file, we have a script to start the application. Create a folder named scripts in the root of your project and then add the following file named start.sh
#!/usr/bin/env bash

export HOME=/home/ubuntu
/home/ubuntu/apps/memories/bin/memories daemon
Make sure to change the permission of the file to be executable script.
$ chmod +x scripts/start.shWe need to change buildspec.yml as well, add the following lines at the end of the build: commands section in buildspec YAML
  - cp appspec.yml  _build/prod/rel/memories/
  - cp -R scripts  _build/prod/rel/memories/
This is to copy our appspec.yml and start the script to the final release so that we can use it while starting up the application.
Now commit newly added files to Git and push it to GitHub
Add Deploy Stage
Now let's go back to the CodePipeline application. Right now we only have the 'Source' and 'Build' stage setup. Let's add a 'Deploy` stage. Click 'Edit' at the top of the page.
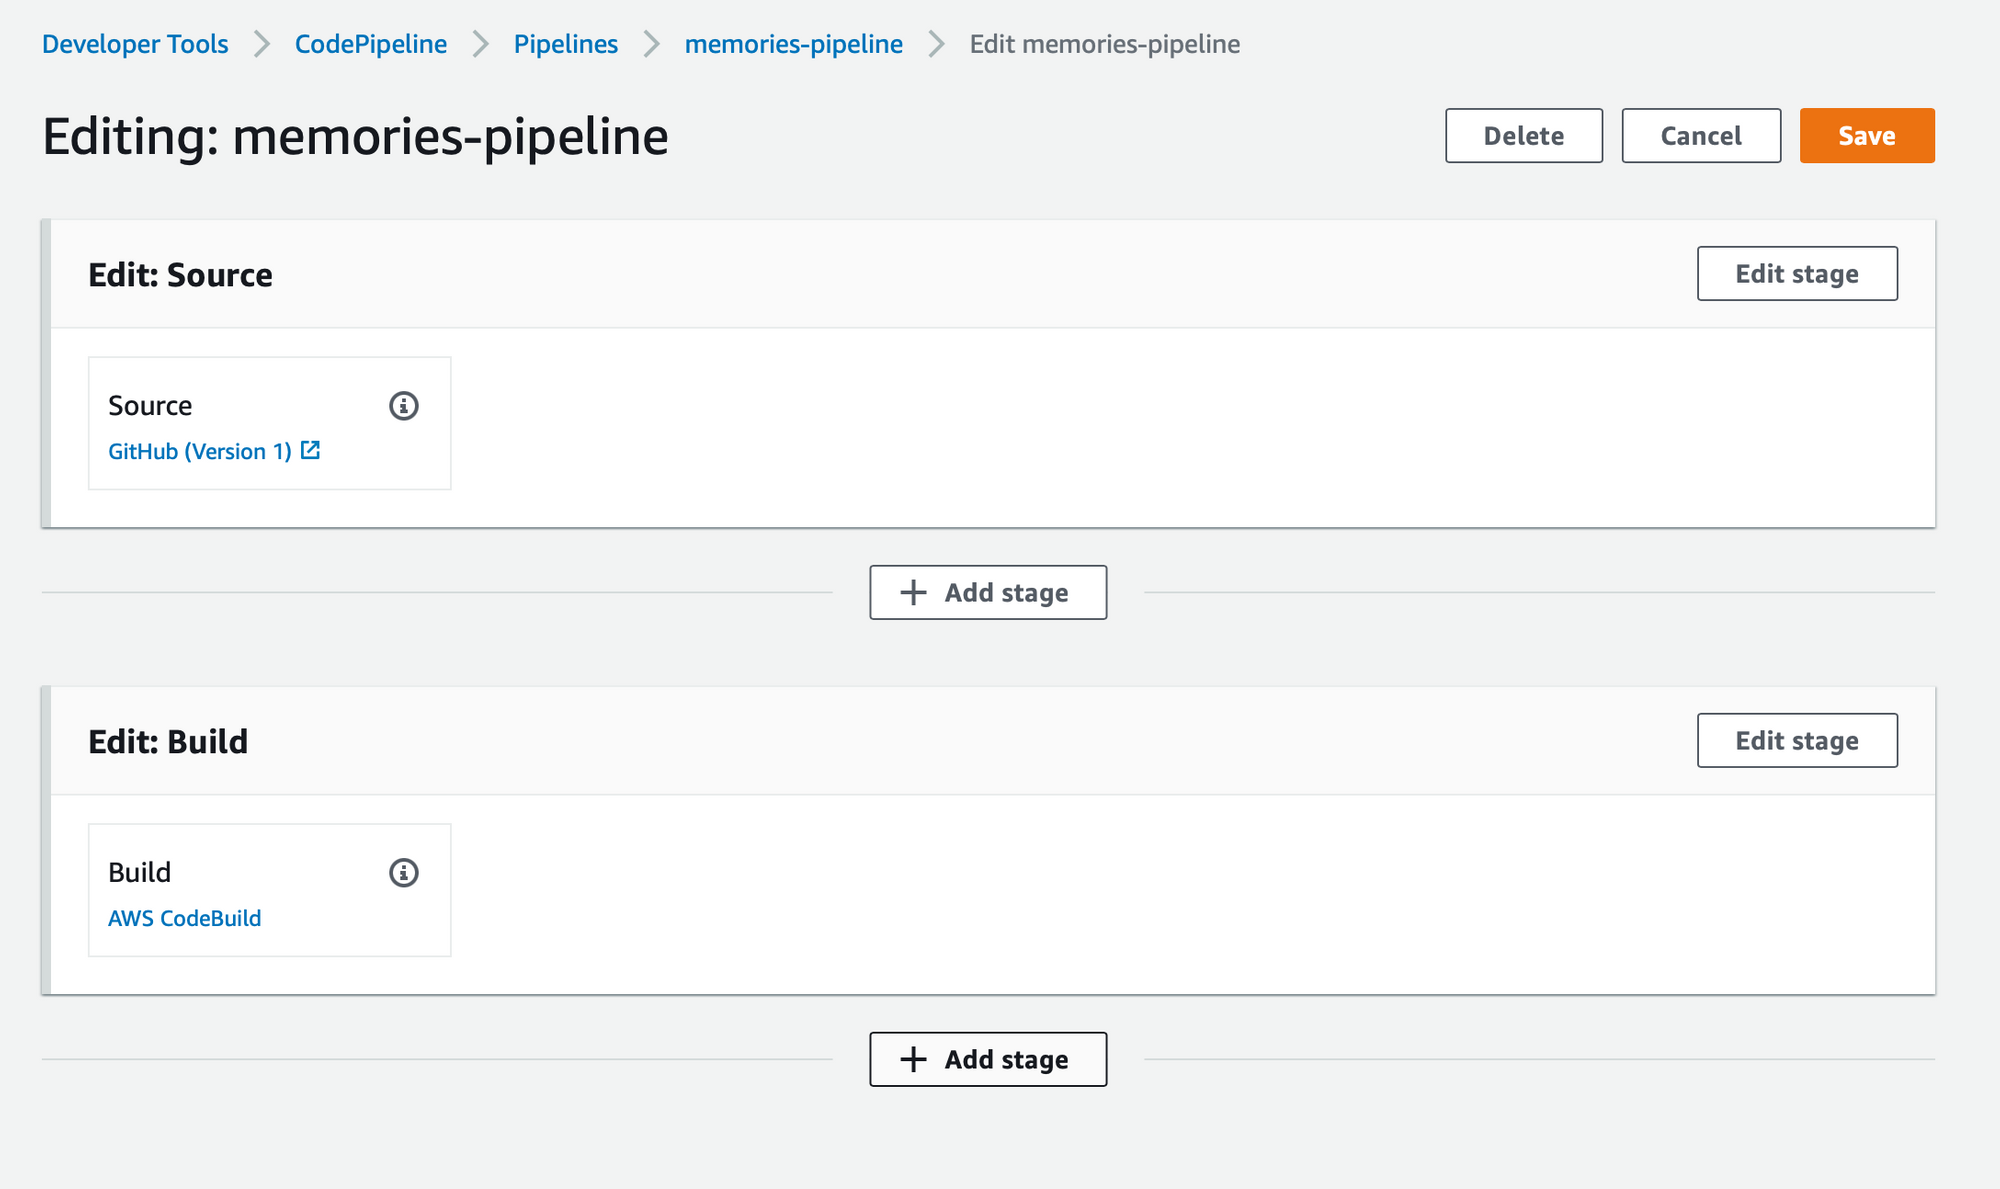
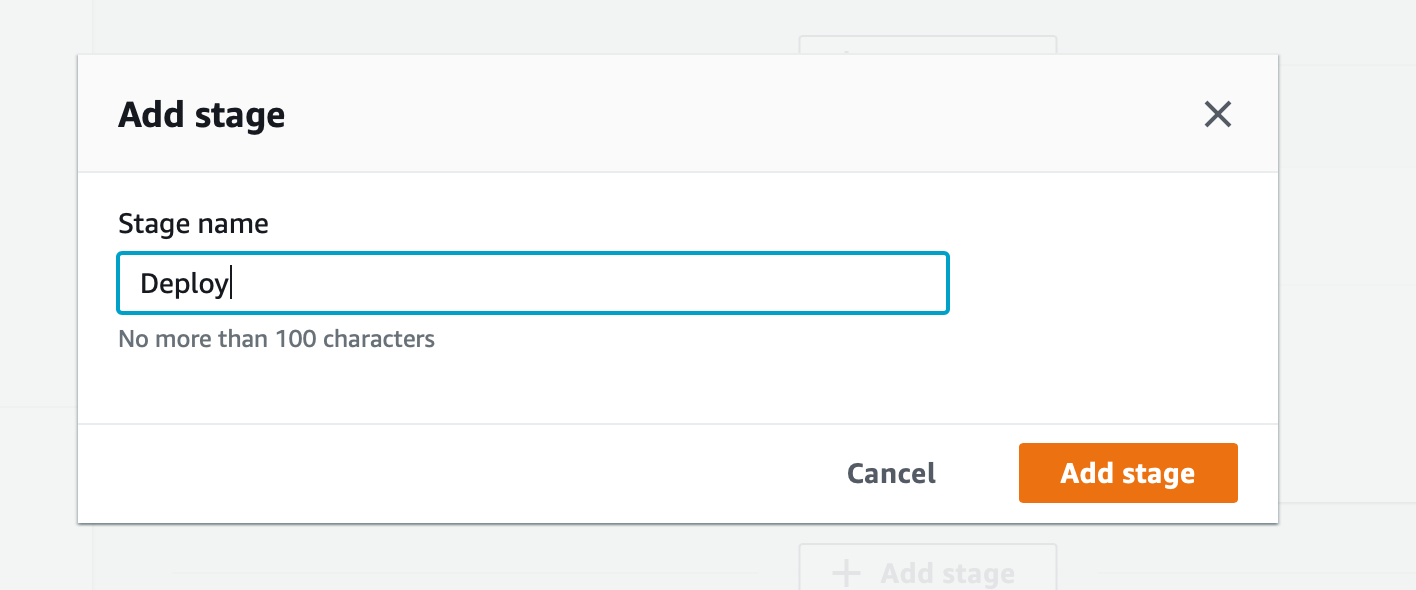
On the edit page, there is 'Add stage' button after each stage. Let's click one right after the 'Build stage'. Let's give the name of our new stage as 'Deploy'. Once we have our 'Deploy' stage, we need to add an action group.
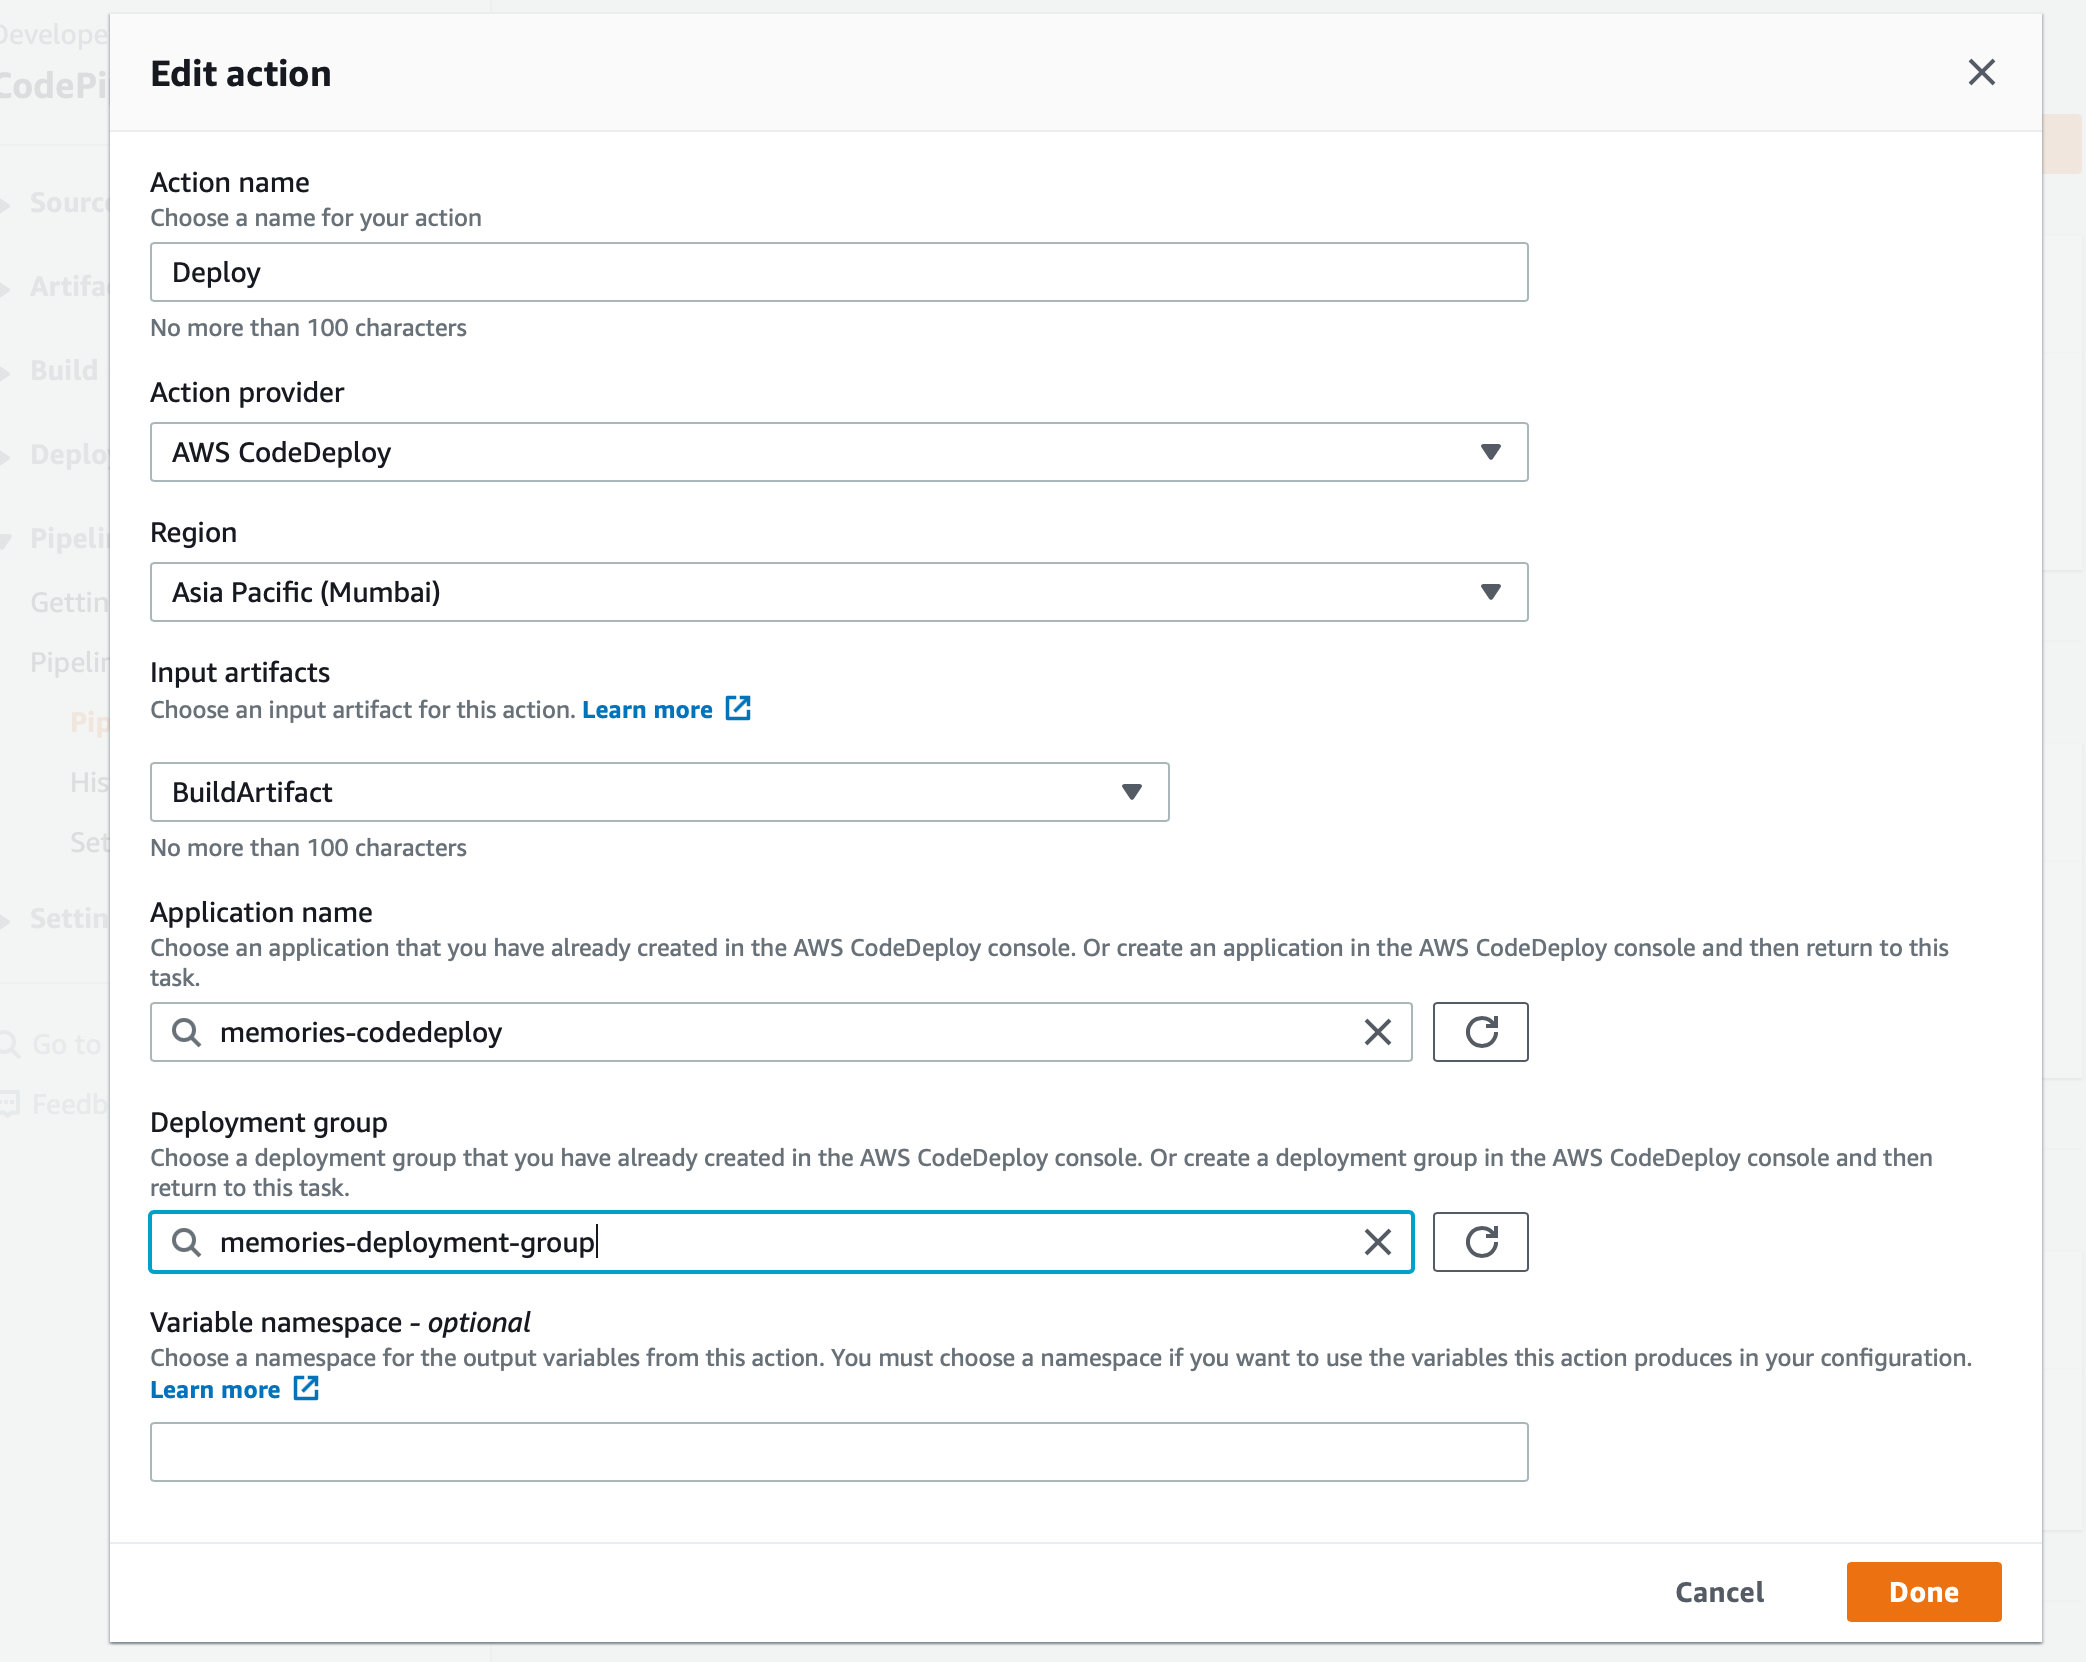
We call our action 'Deploy' and select 'AWS CodeDeploy' as our Action Provider. We need to select the CodeDeploy application and deployment group that we had created. Choose 'BuildArtifact' as our input artifacts. Click 'Save' button. And we have finally completed our setup.
Run database migration
Our Phoenix application is a basic CRUD application which talks with the database to store the notes as memories. We have one database migration in our application. To run the migration on our EC2 deployed application, create a file named `release.ex` in the lib/memories folder as
defmodule Memories.Release do
  @app :memories

  def migrate do
    for repo <- repos() do
      {:ok, _, _} = Ecto.Migrator.with_repo(repo, &Ecto.Migrator.run(&1, :up, all: true))
    end
  end

  def rollback(repo, version) do
    {:ok, _, _} = Ecto.Migrator.with_repo(repo, &Ecto.Migrator.run(&1, :down, to: version))
  end

  defp repos do
    Application.load(@app)
    Application.fetch_env!(@app, :ecto_repos)
  end
end
We are using the above as per https://hexdocs.pm/phoenix/releases.html
Now commit the code and push it to GitHub
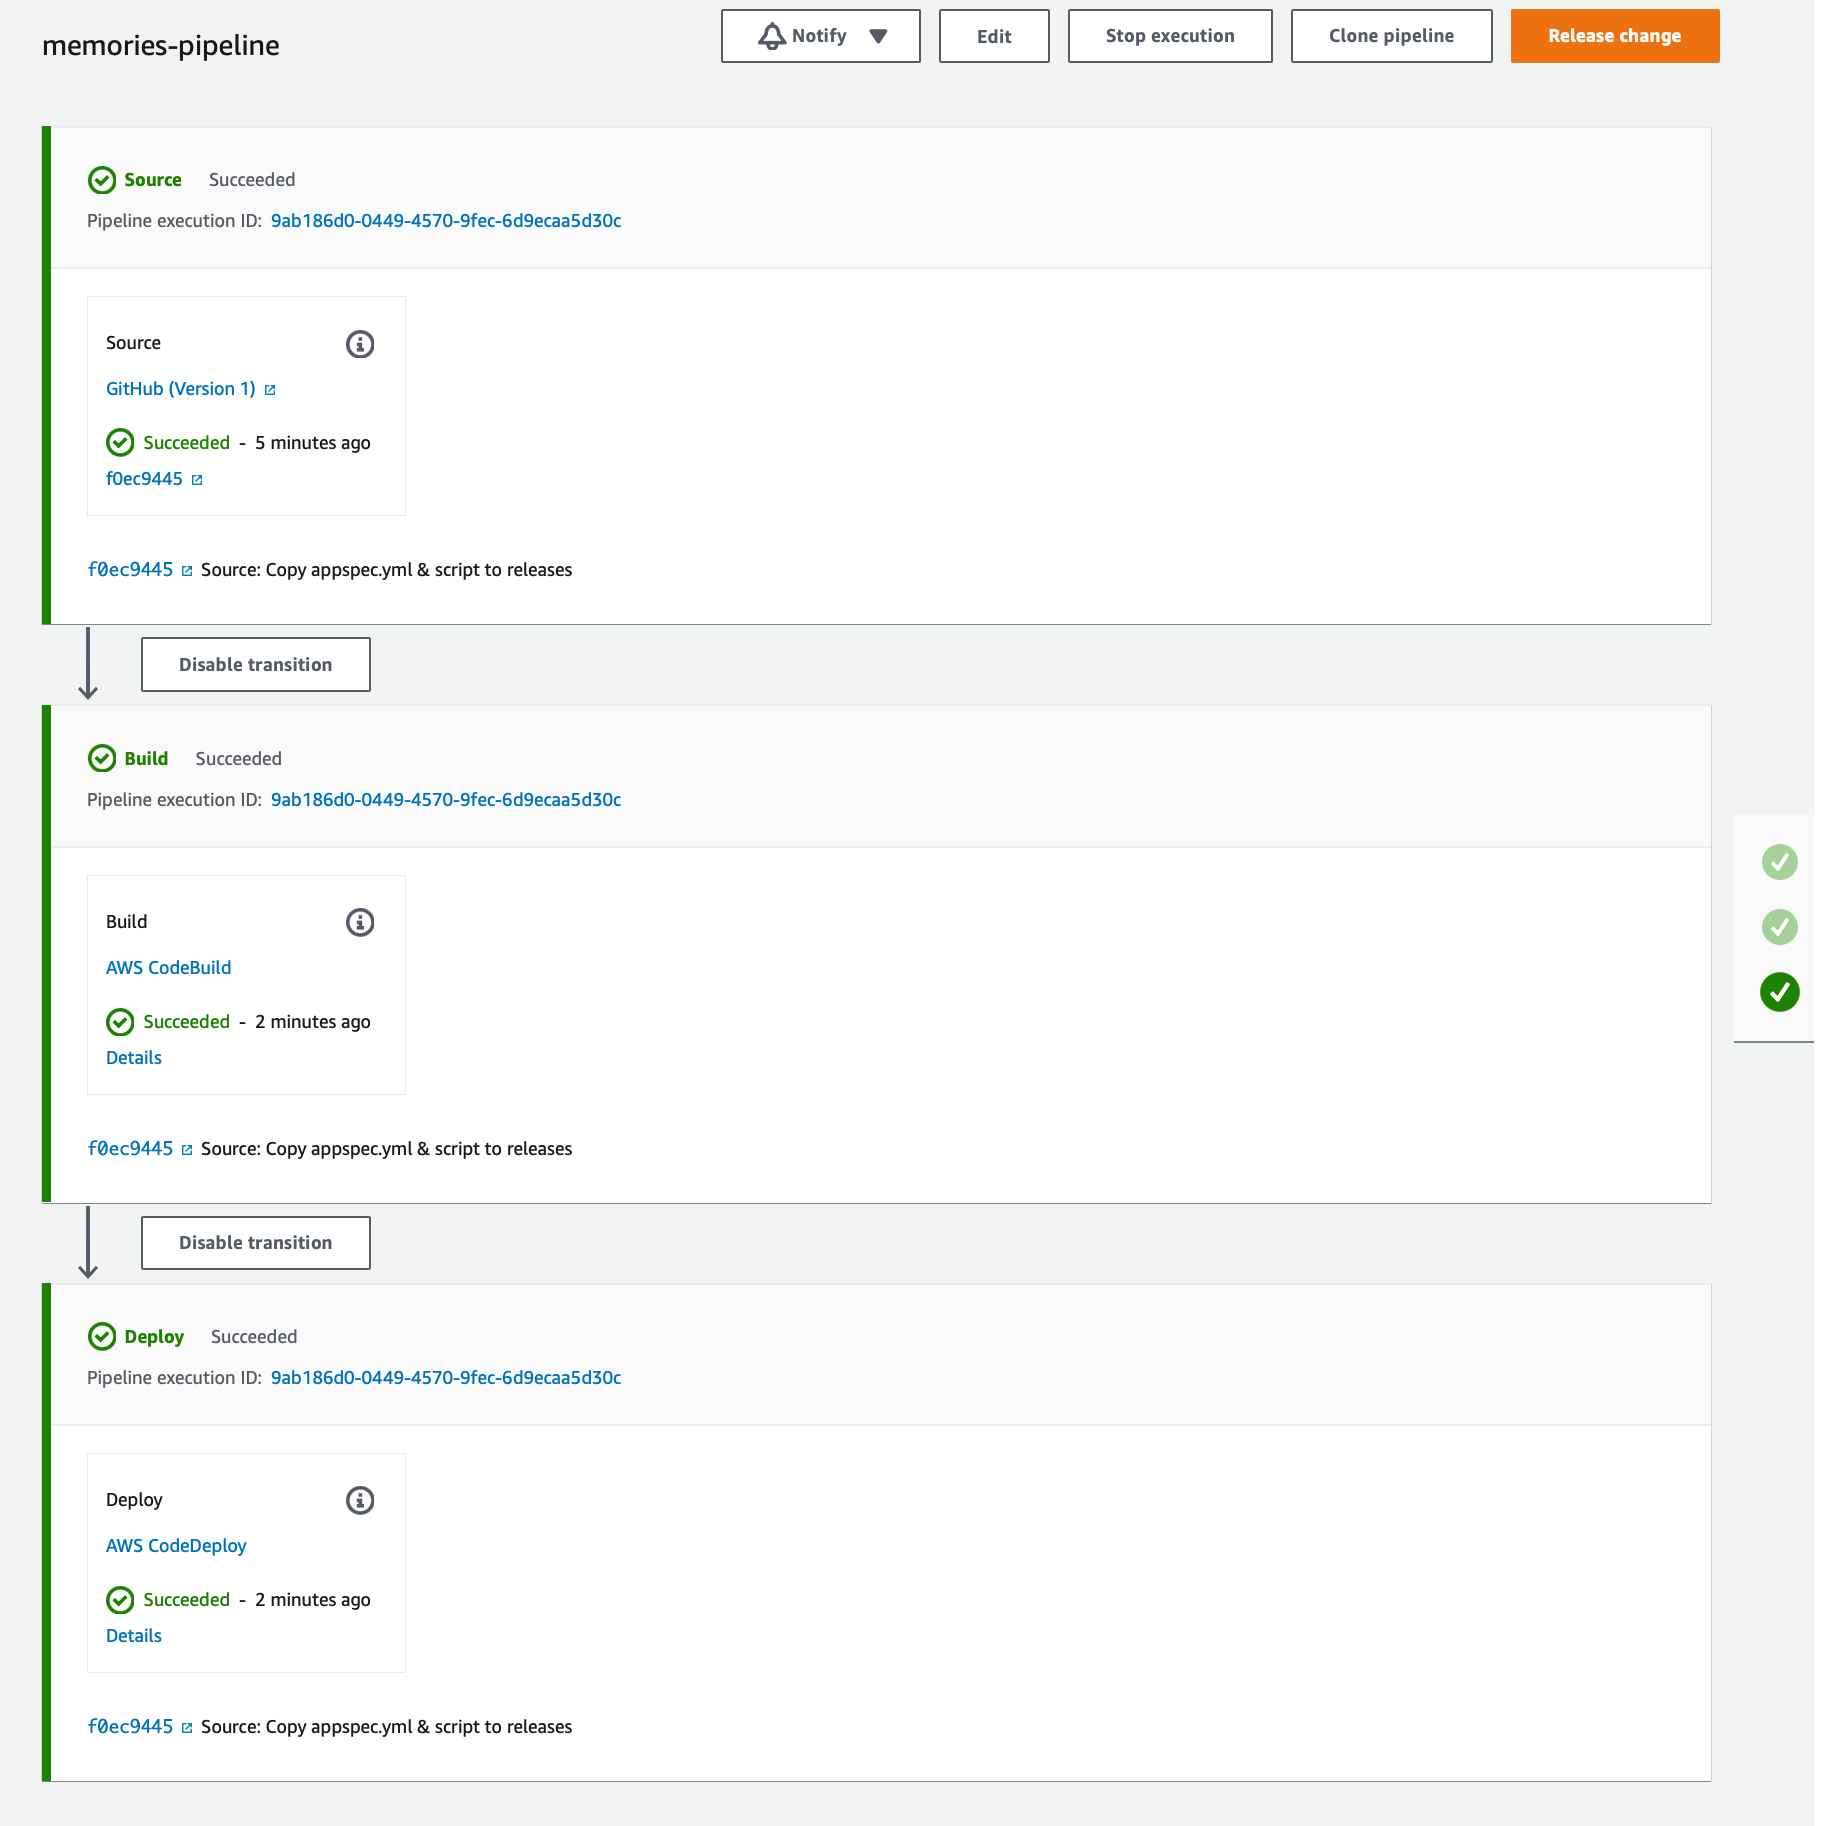
In the CodePipeline project, we should see something as following now.
Now ssh to the EC2 instance and run the following command from the bin folder of the release
sudo ./memories eval "Memories.Release.migrate"You should see something as below.

Now go and visit the our EC2 instasnce public IP URL
http://<ec2-instance-public-ip>:4000/notes
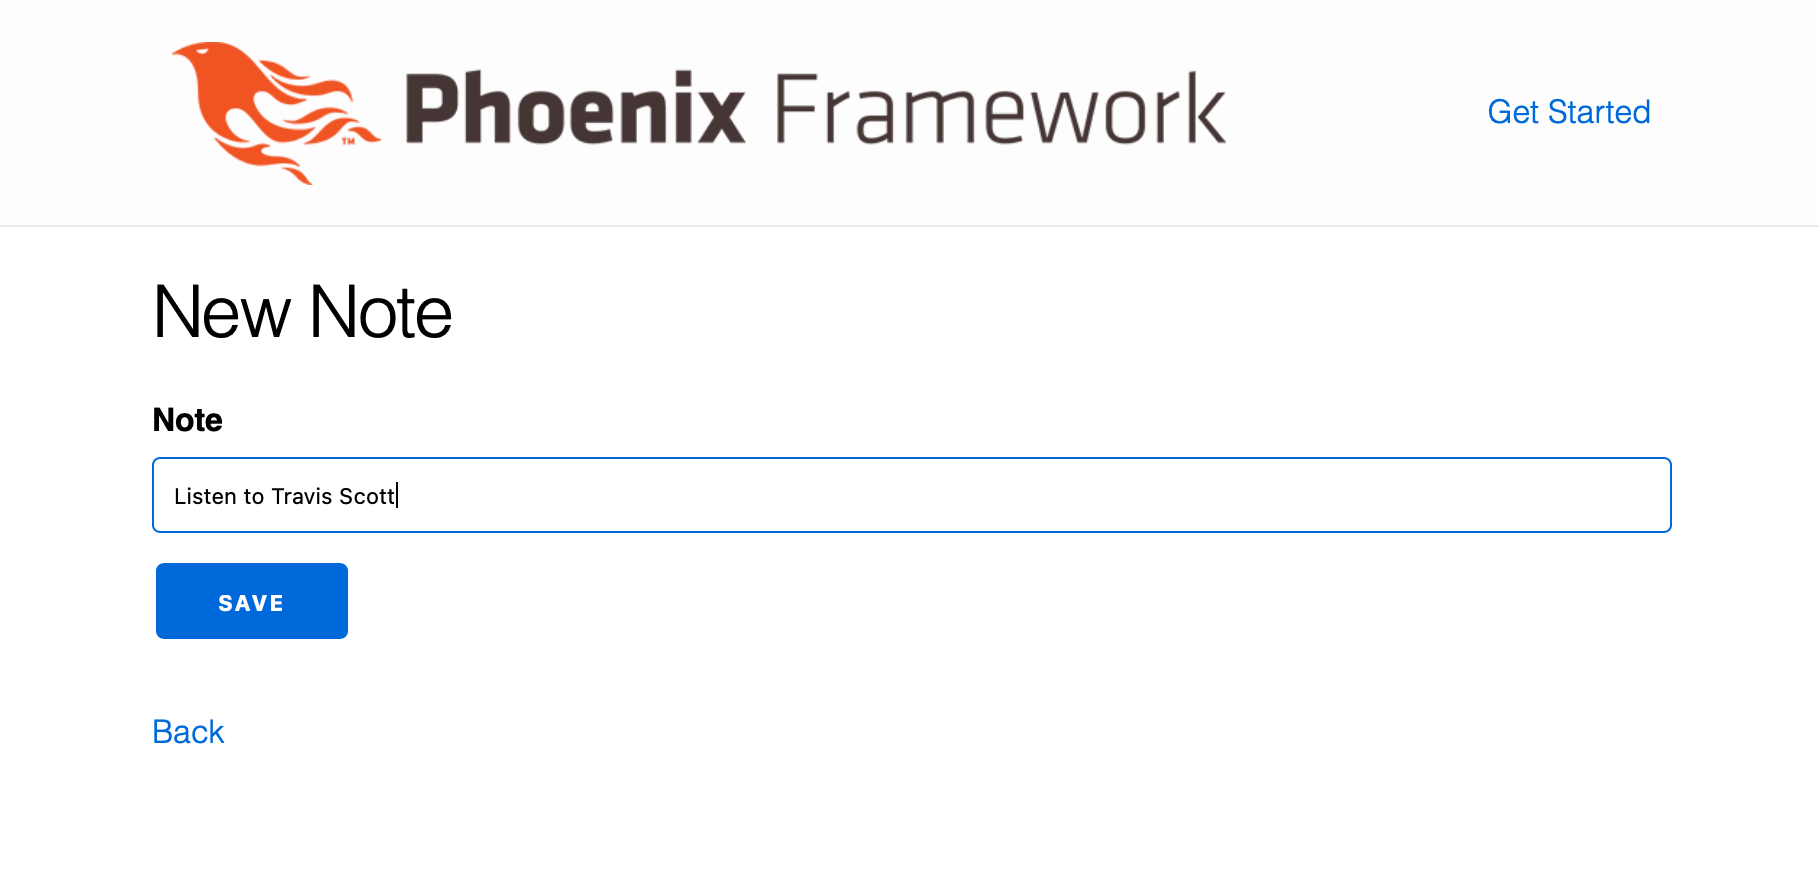
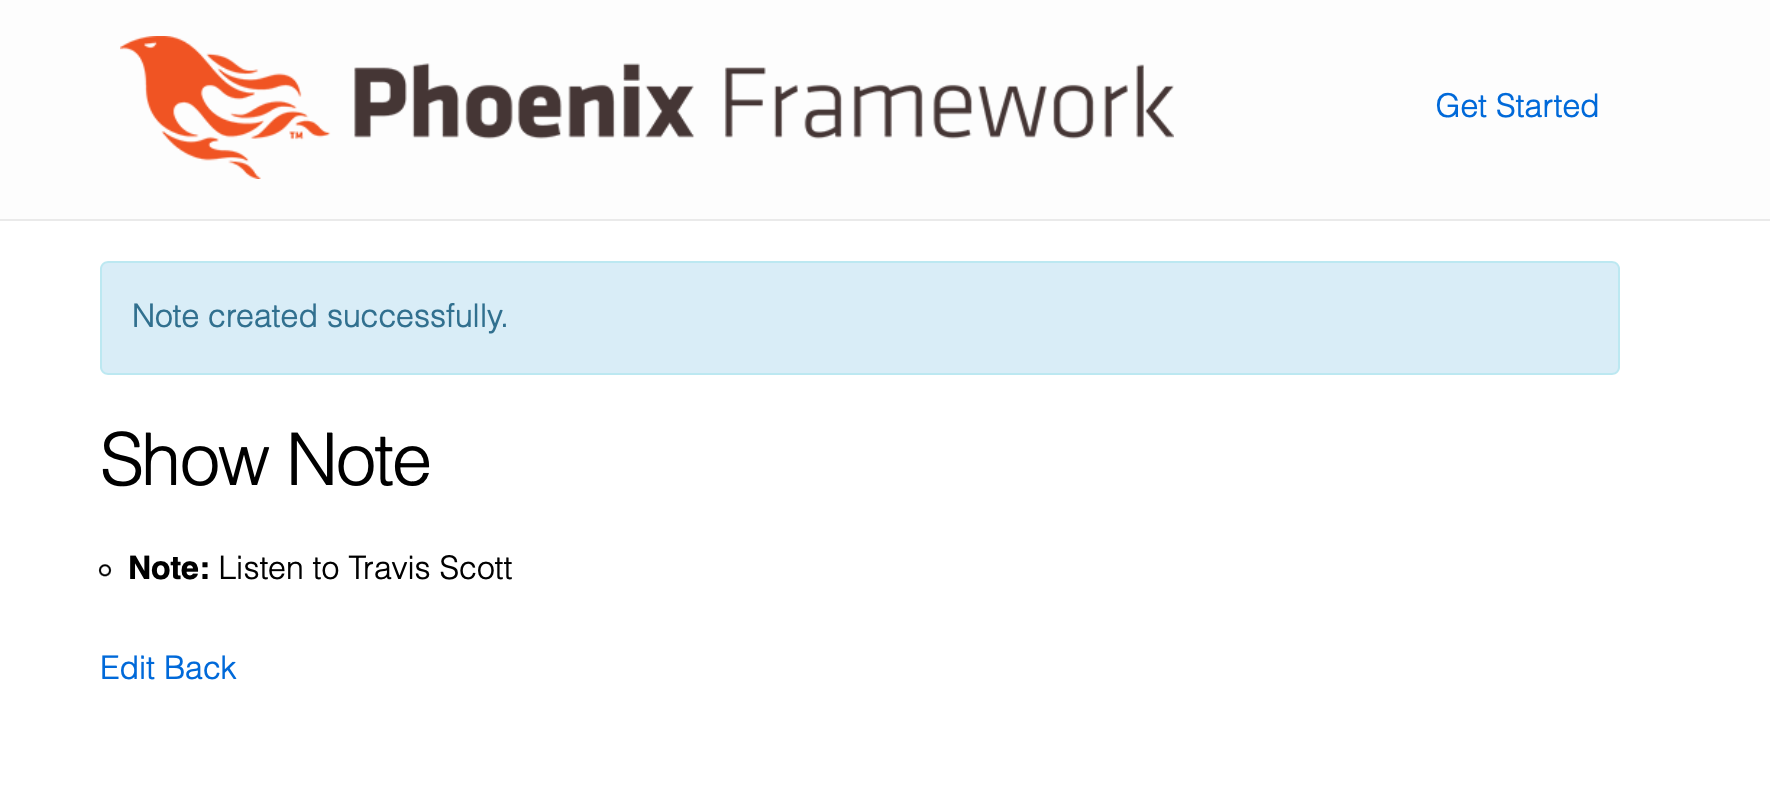
You should be able to create new notes.
Logs
Our application logs can be seen on the EC2 instance with the following command
tail /var/log/aws/codedeploy-agent/codedeploy-agent.log
This article is inspired by the original article - https://botsplash.com/blog/using-aws-code-suite-to-automate-build-and-deploy-a-simple-expressjs-project-86fb359c0358.html I have ported it for the Phoenix application.